Fixed Raised Bed
Step-by-step instructions for building a fixed raised bed for FarmBot Genesis or Genesis XL
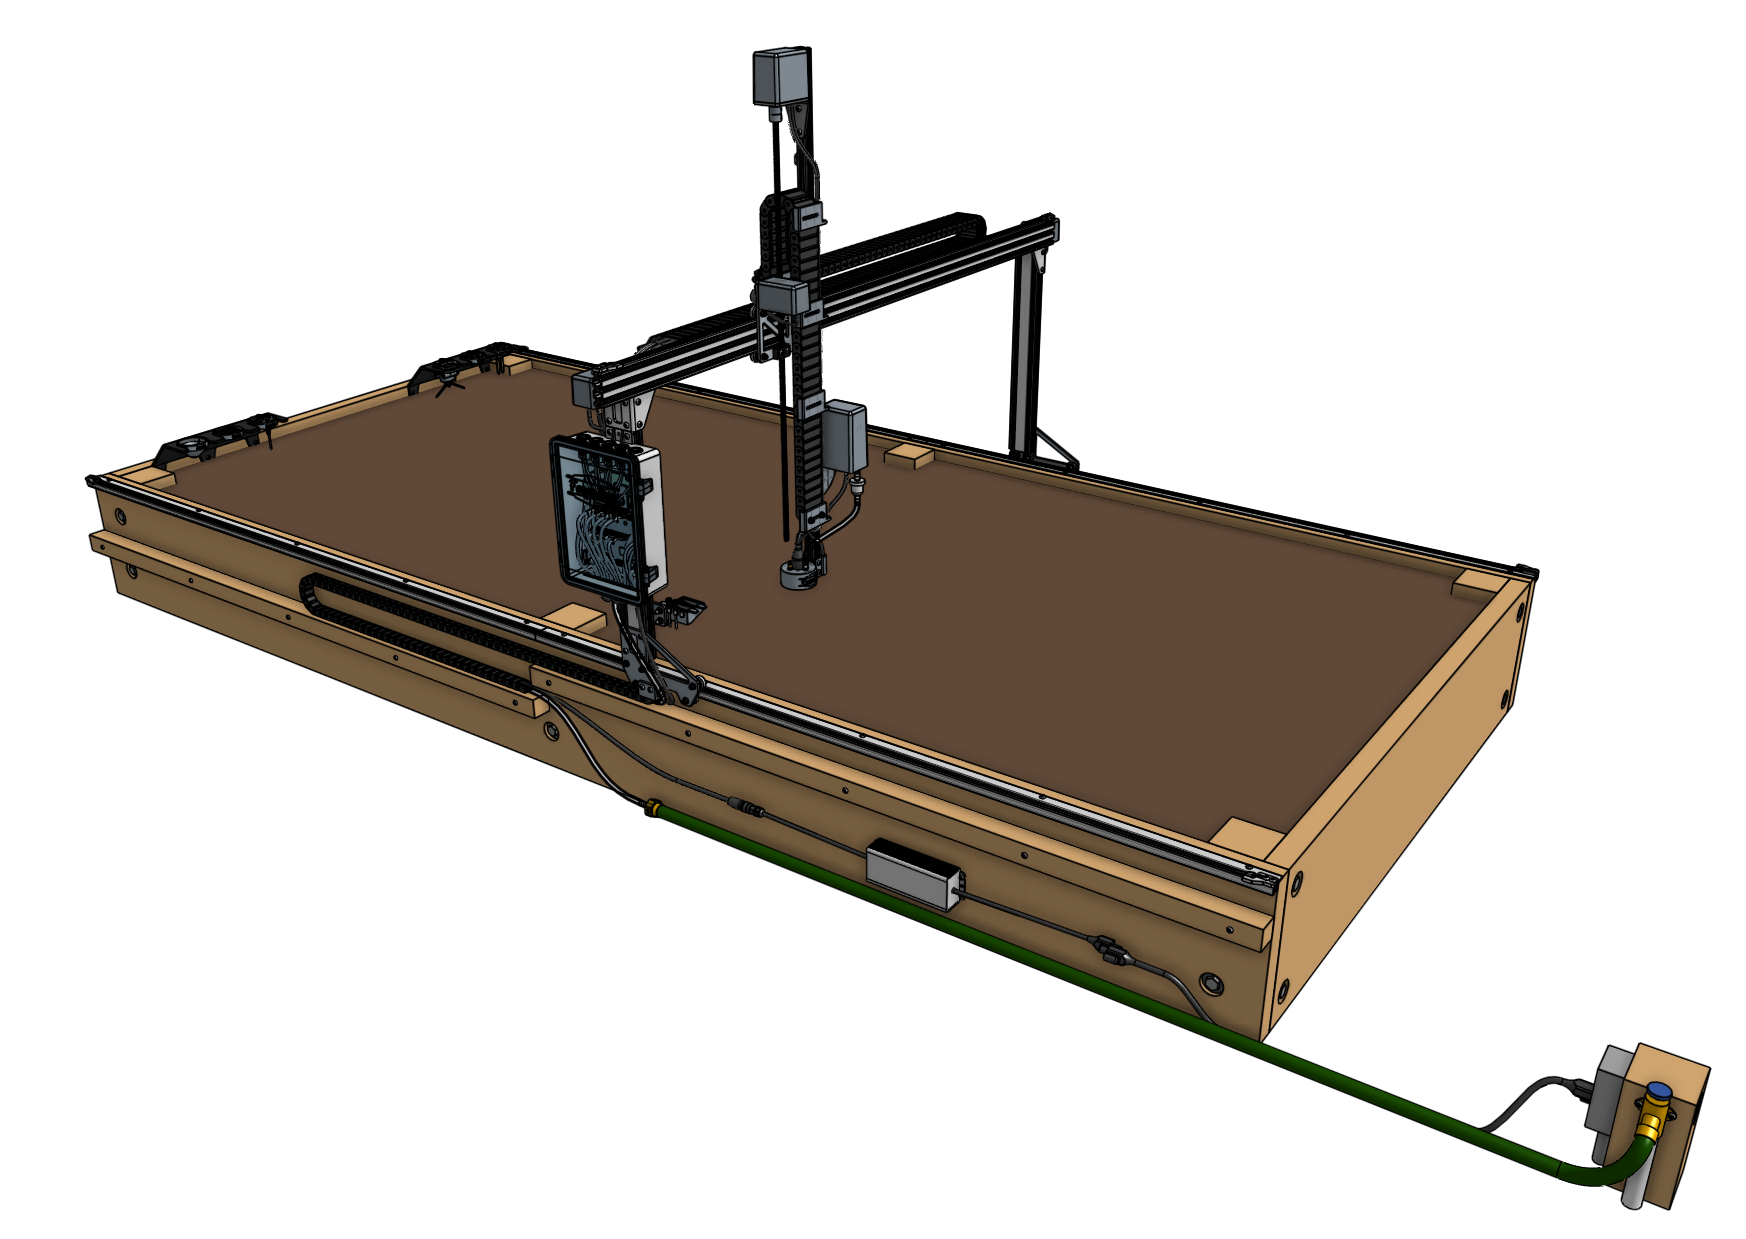
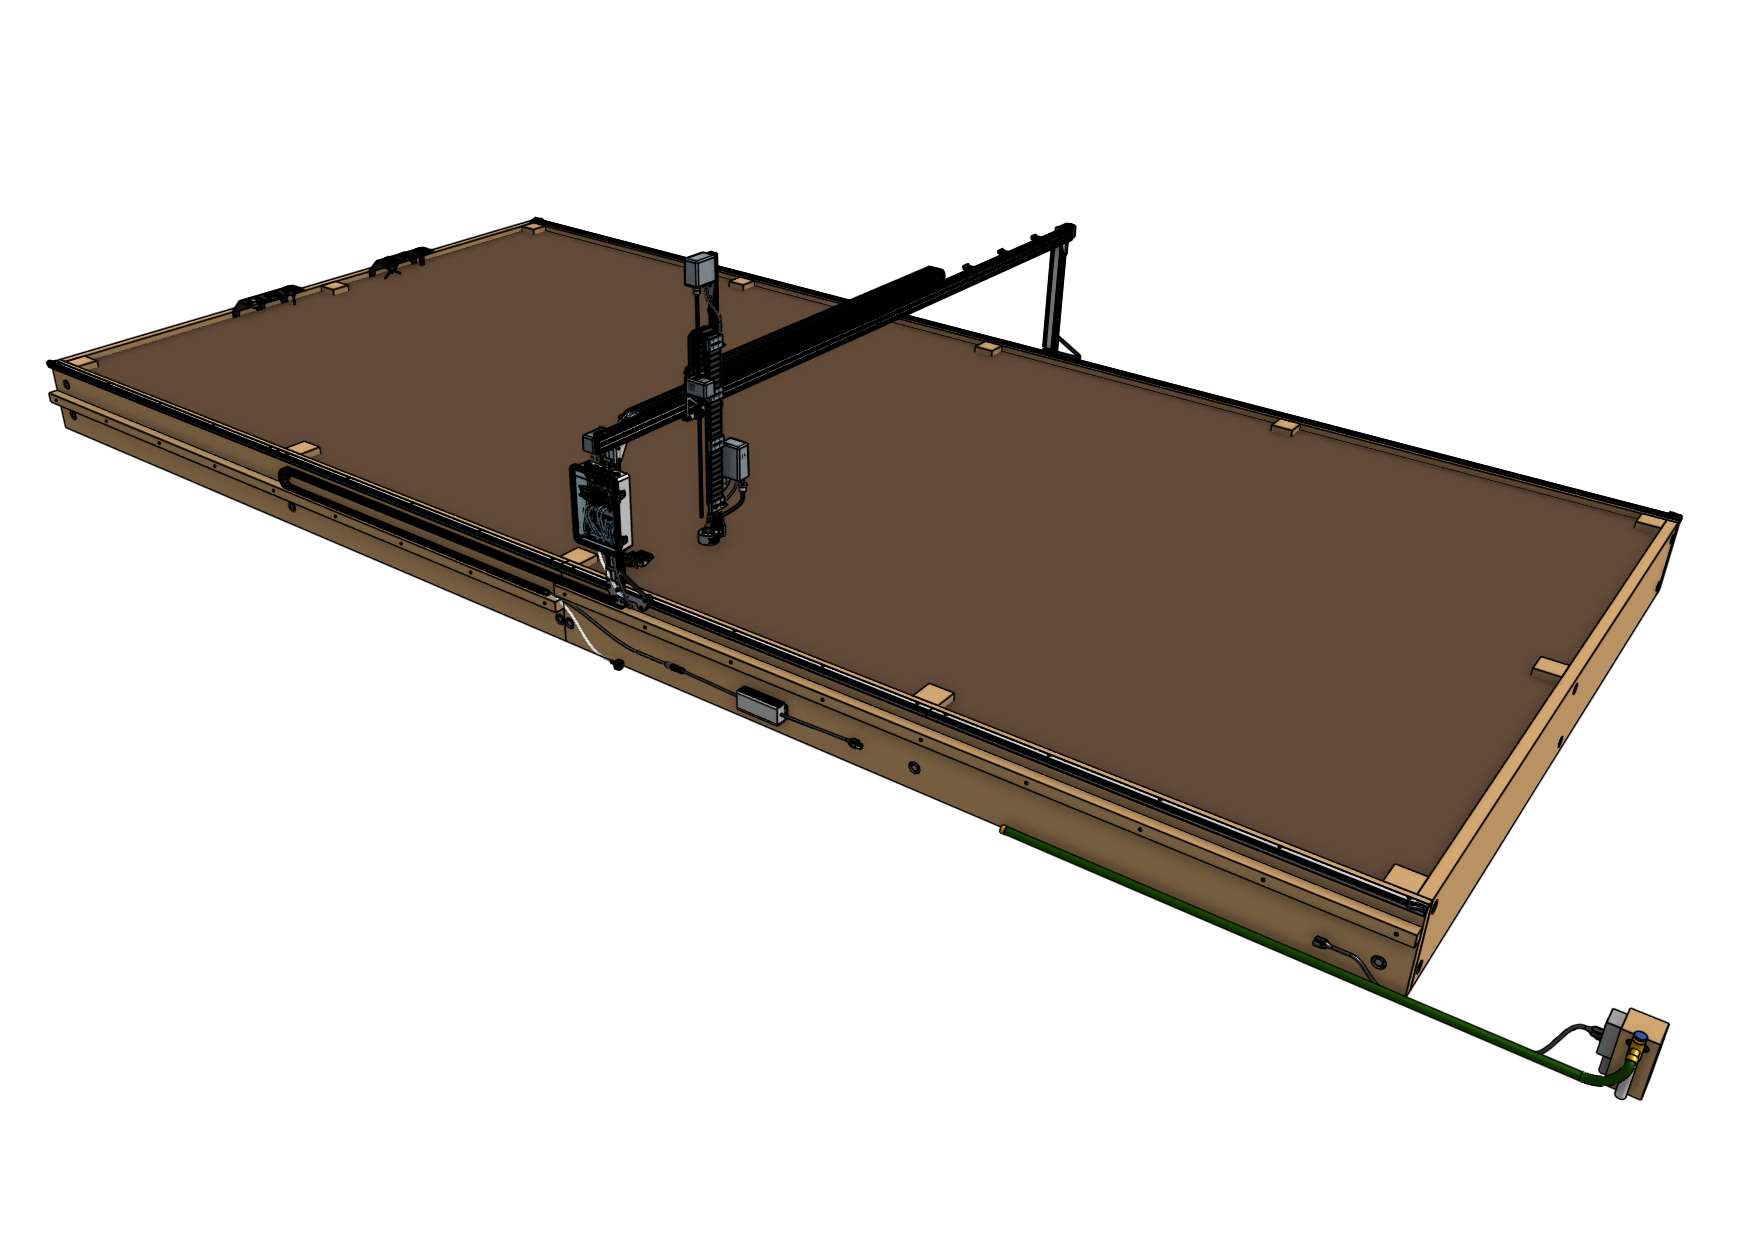
Building a fixed raised bed is the recommended method for installing FarmBot Genesis or Genesis XL outdoors. In these instructions we show you how to build a simple but sturdy bed that will fit into most yards, look great, and last a lifetime.

8-12 hours
This is the estimated time it will take to build a fixed raised bed.
Determining bed size
We recommend building your raised bed as large as possible to get the most value out of your FarmBot, while making sure you do not exceed the maximum size limit. This will ensure you get the most value out of your FarmBot without making the bed unnecessarily large, which can add cost.
The reference designs shown on this documentation page are for a maximally sized fixed raised bed for the stock Genesis and Genesis XL kits. The outer dimensions of the bed (where the tracks will be mounted) will be 1.36m wide by 3m in length for Genesis, and 2.86m wide by 6m in length for Genesis XL, with the cable carrier support adding an additional 0.04m to the total width.
If you are designing a bed for a smaller installation, you will need to modify the dimensions of the lumber and post hole layouts.
View the CAD model
The CAD model of this supporting infrastructure is open-source . You are free to view, copy, and modify the design as needed.
Step 1: Acquire materials
Genesis bed (1.36m x 3m)
| Qty | Component | $/Unit | Subtotal |
|---|---|---|---|
| 6 | Posts (90mm x 90mm x 600mm) | $3.00 | $18 |
| 2 | Long walls (40mm x 300mm x 3000mm) | $15.00 | $30 |
| 2 | Short walls (40mm x 300mm x 1280mm) | $7.50 | $15 |
| 2 | Cable carrier supports (40mm x 40mm x 1500mm) | $3.00 | $6 |
| 20 | M10 x 100mm lag screws | $0.75 | $15 |
| 20 | M10 washers | $0.25 | $5 |
| 10 | T25 x 75mm wood screws | $0.20 | $2 |
| 1 | Sealer, stain, or polyurethane | $20.00 | $20 |
| TOTAL | $111 |
Genesis XL bed (2.86m x 6m)
| Qty | Component | $/Unit | Subtotal |
|---|---|---|---|
| 12 | Posts (90mm x 90mm x 600mm) | $3.00 | $36 |
| 4 | Long walls (40mm x 300mm x 3000mm) | $15.00 | $60 |
| 2 | Short walls (40mm x 300mm x 2780mm) | $15.00 | $30 |
| 2 | Cable carrier supports (40mm x 40mm x 3000mm) | $6.00 | $12 |
| 36 | M10 x 100mm lag screws | $0.75 | $27 |
| 36 | M10 washers | $0.25 | $9 |
| 20 | T25 x 75mm wood screws | $0.20 | $4 |
| 1 | Sealer, stain, or polyurethane | $20.00 | $20 |
| TOTAL | $198 |
Step 2: Dig post holes
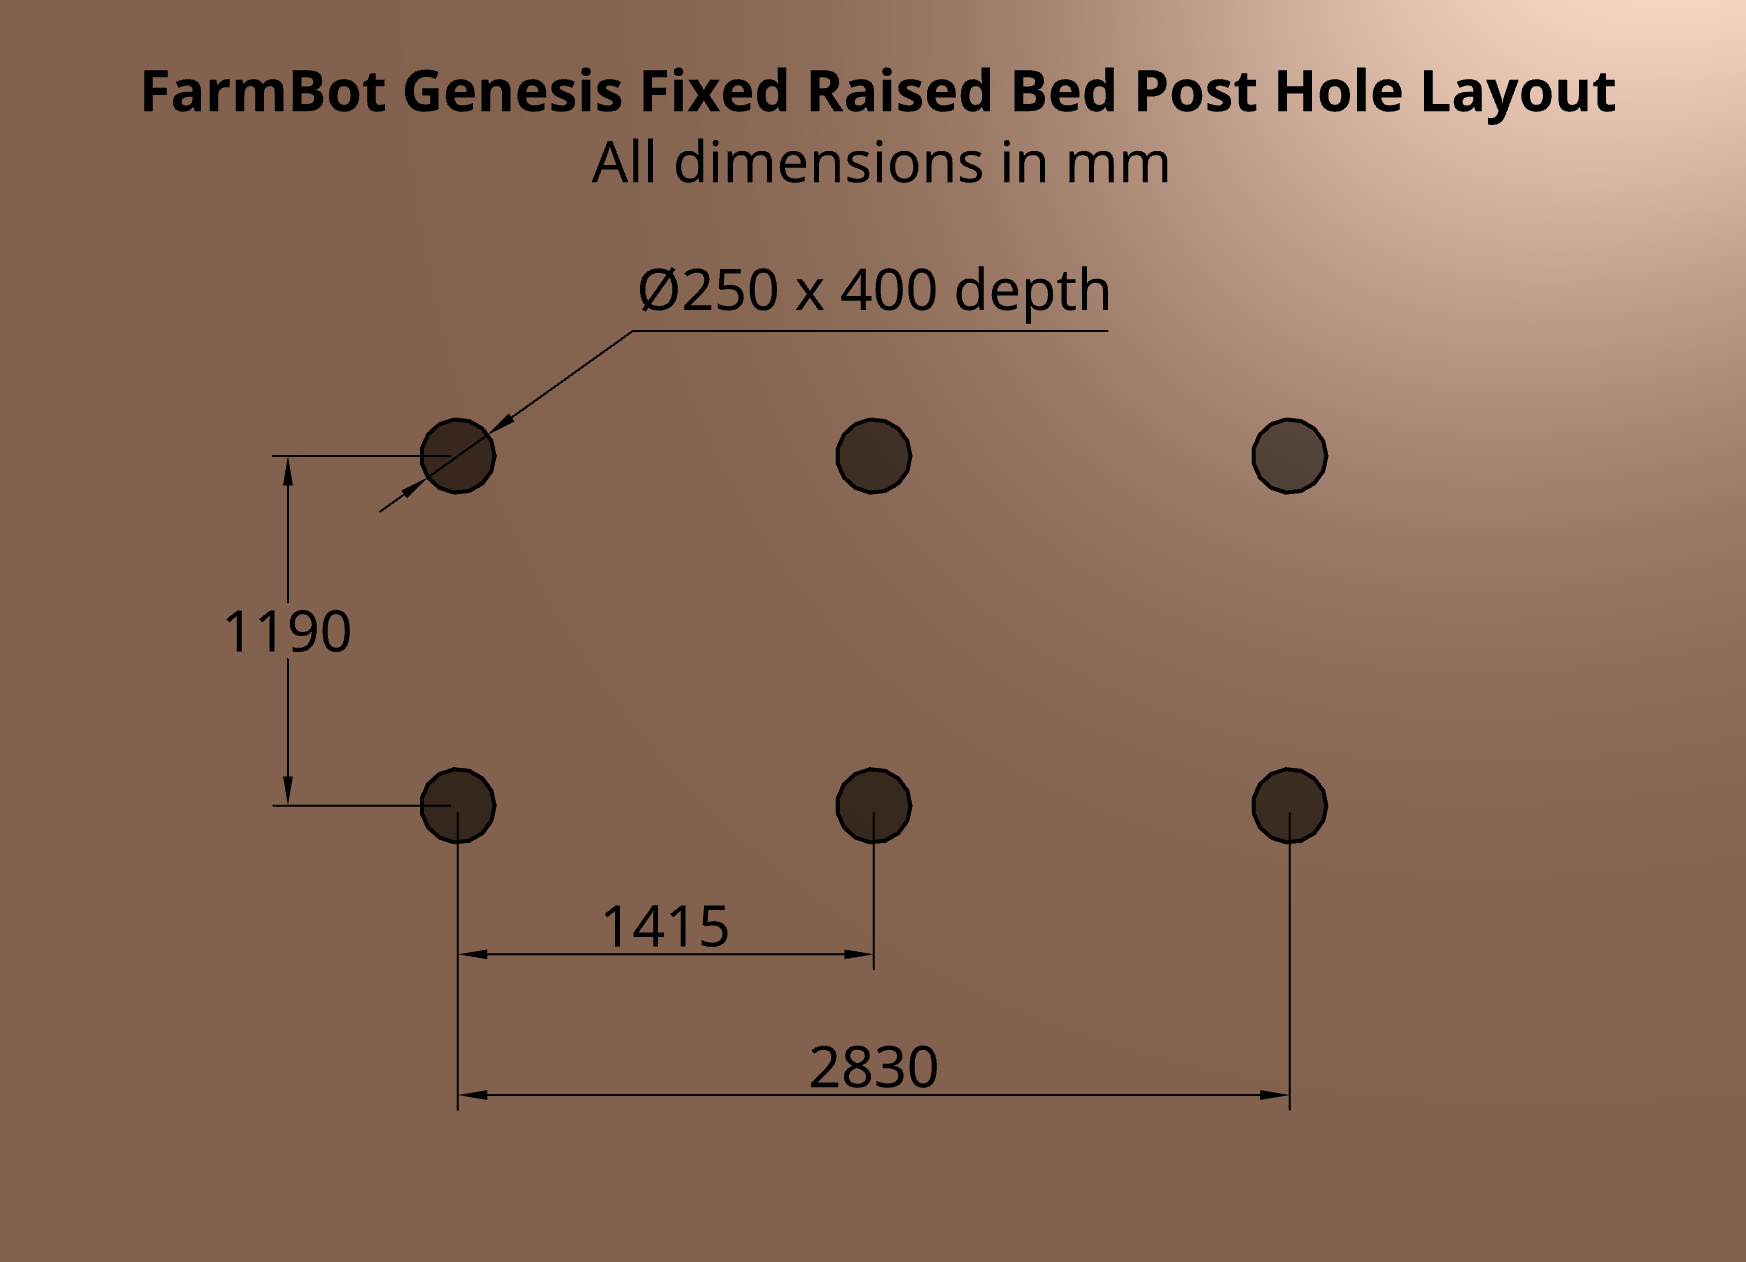
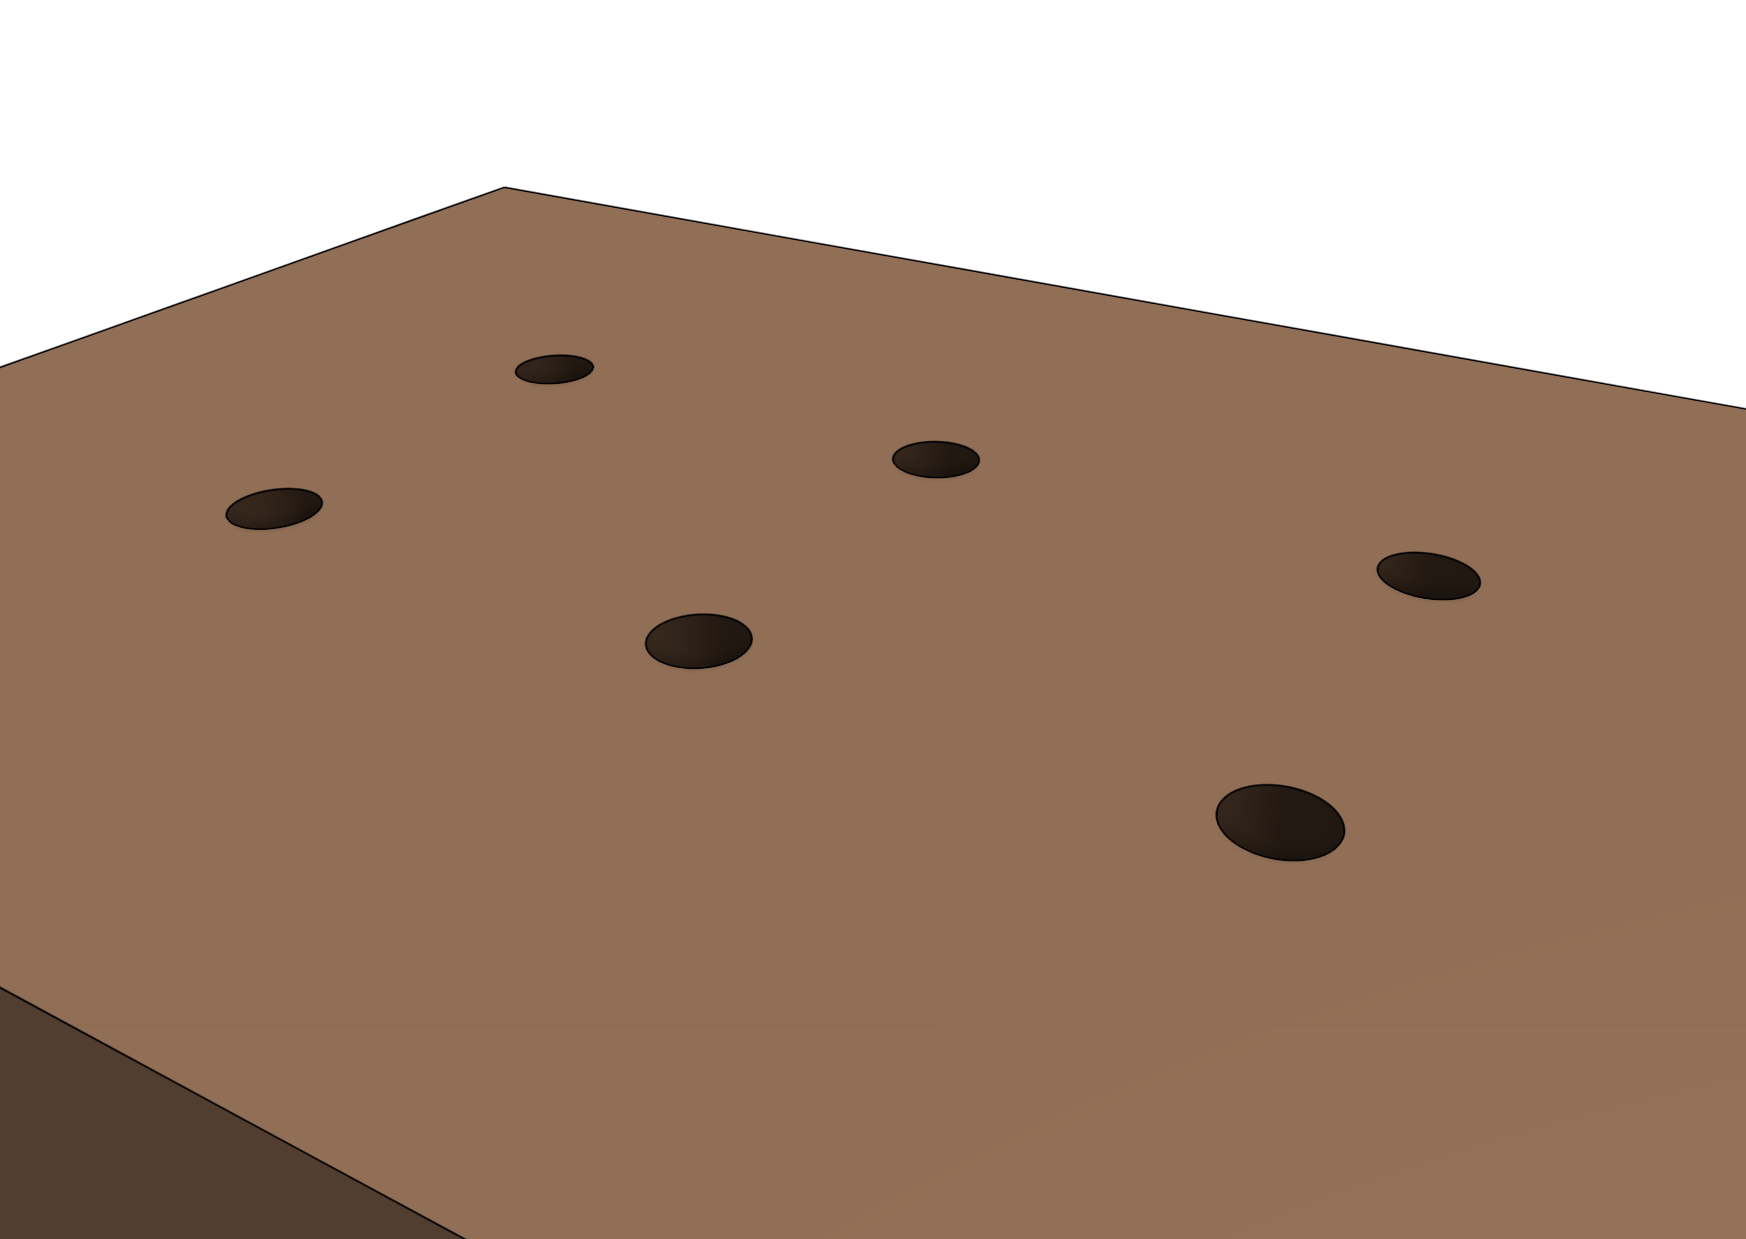
Dig post holes according to the diagrams below. A post hole digger and pick axe can help with tougher soils.
Maintain access
Position the raised bed such that you will be able to access all sides of your FarmBot and garden.

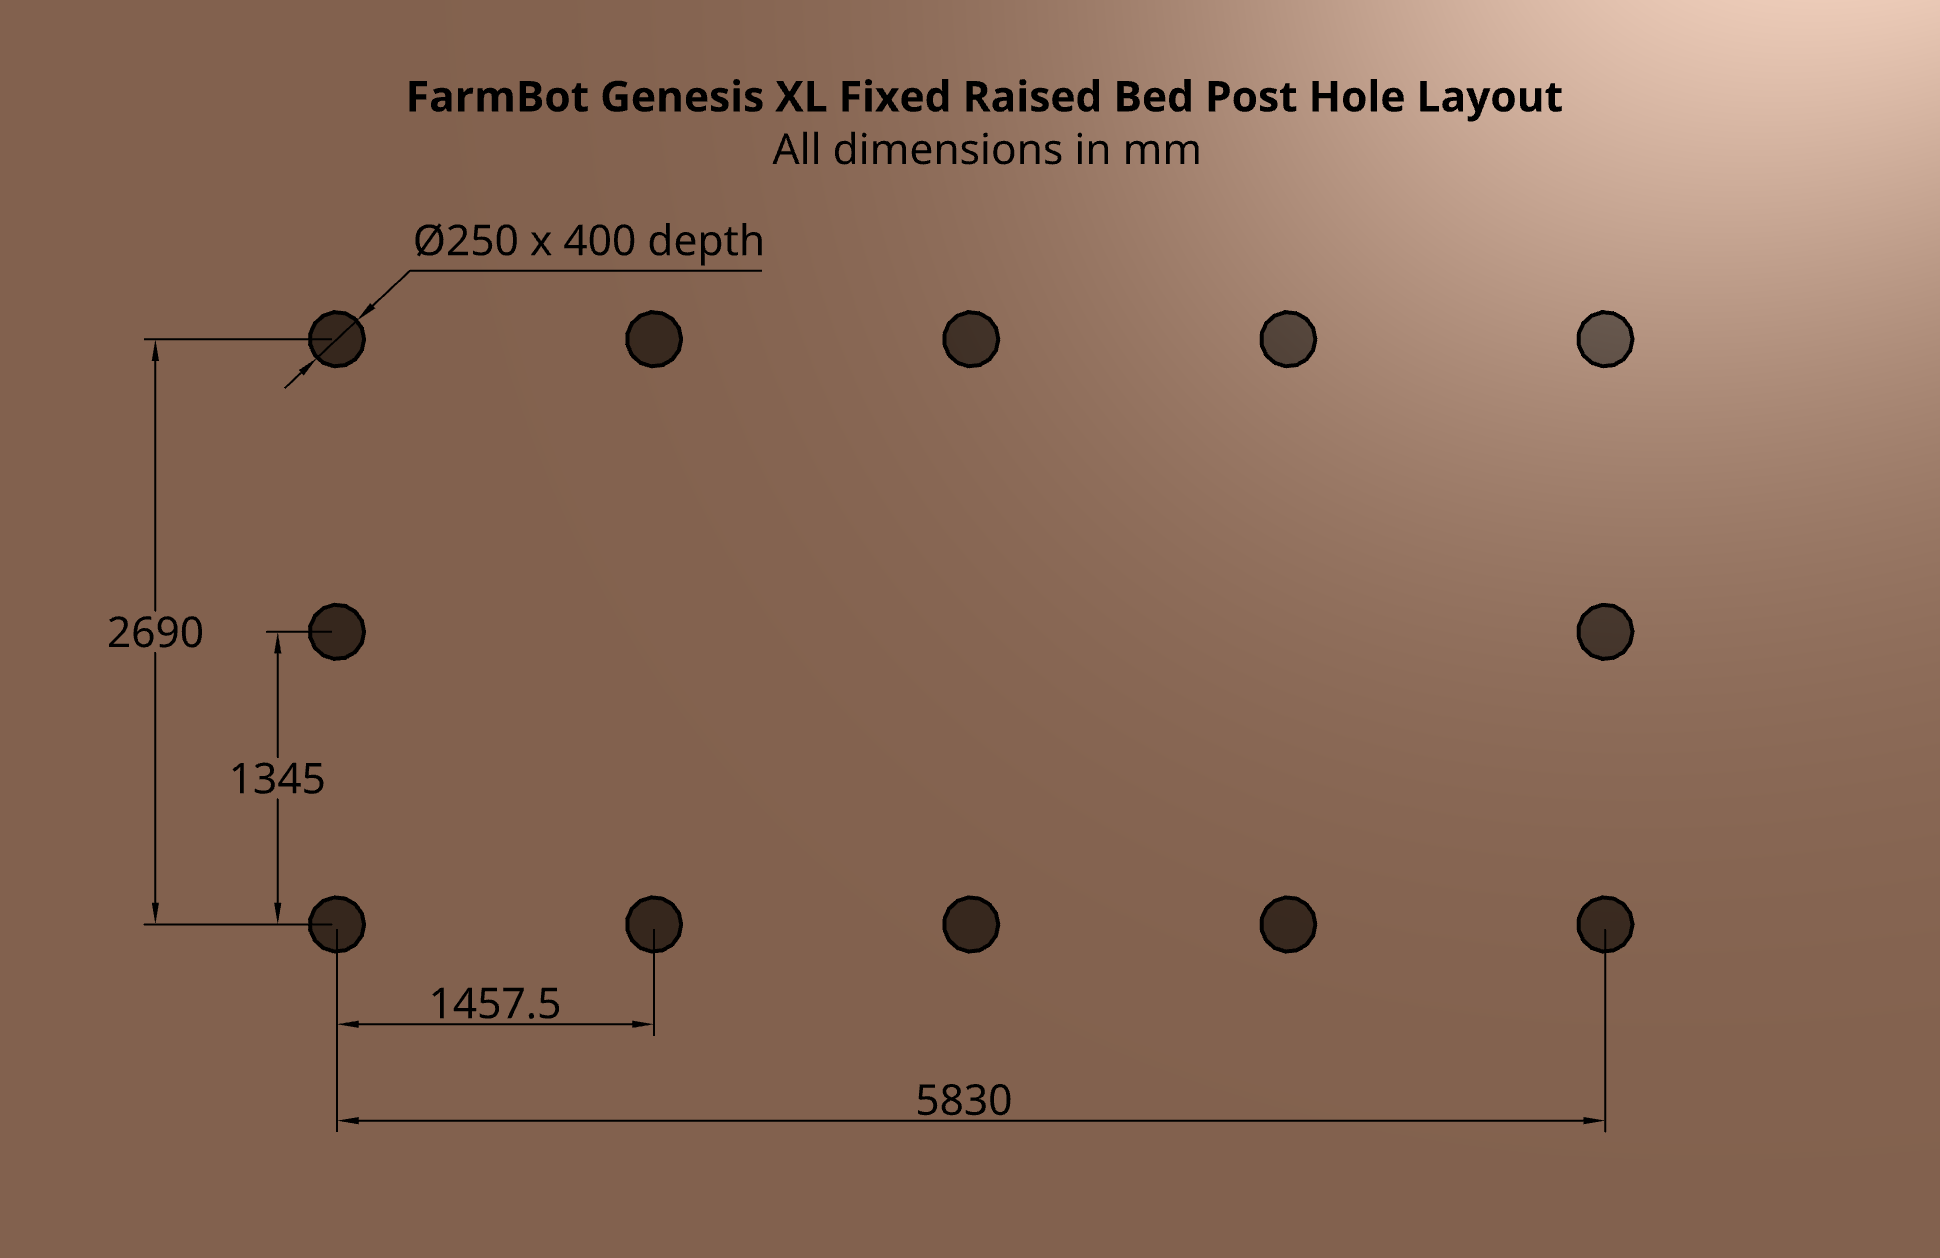
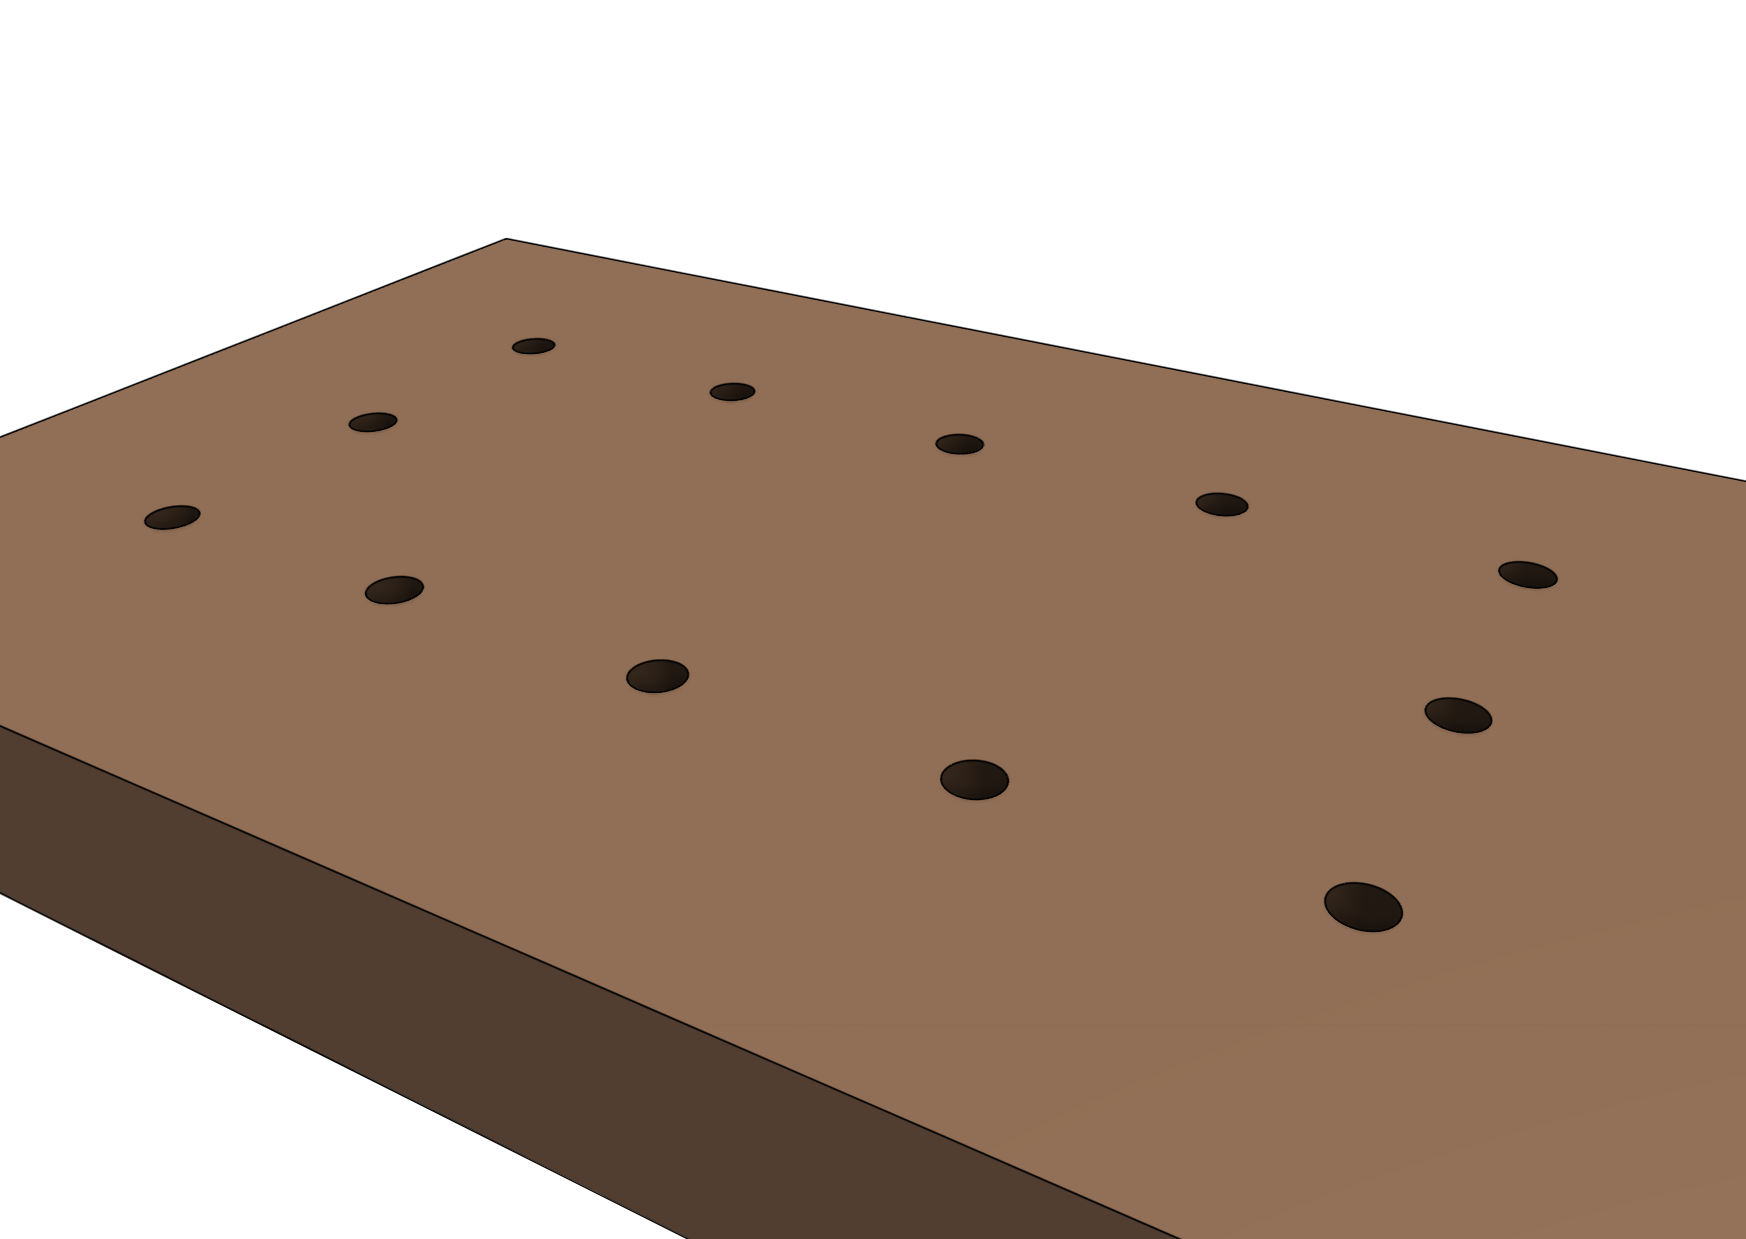
Step 3: Prepare the materials
Cut all of your lumber to the lengths shown in the table in step 1. Sand all of the wood surfaces to remove any markings and splinters. If desired, stain the wood or apply a protective coating of your choice.
Step 4: Position the posts
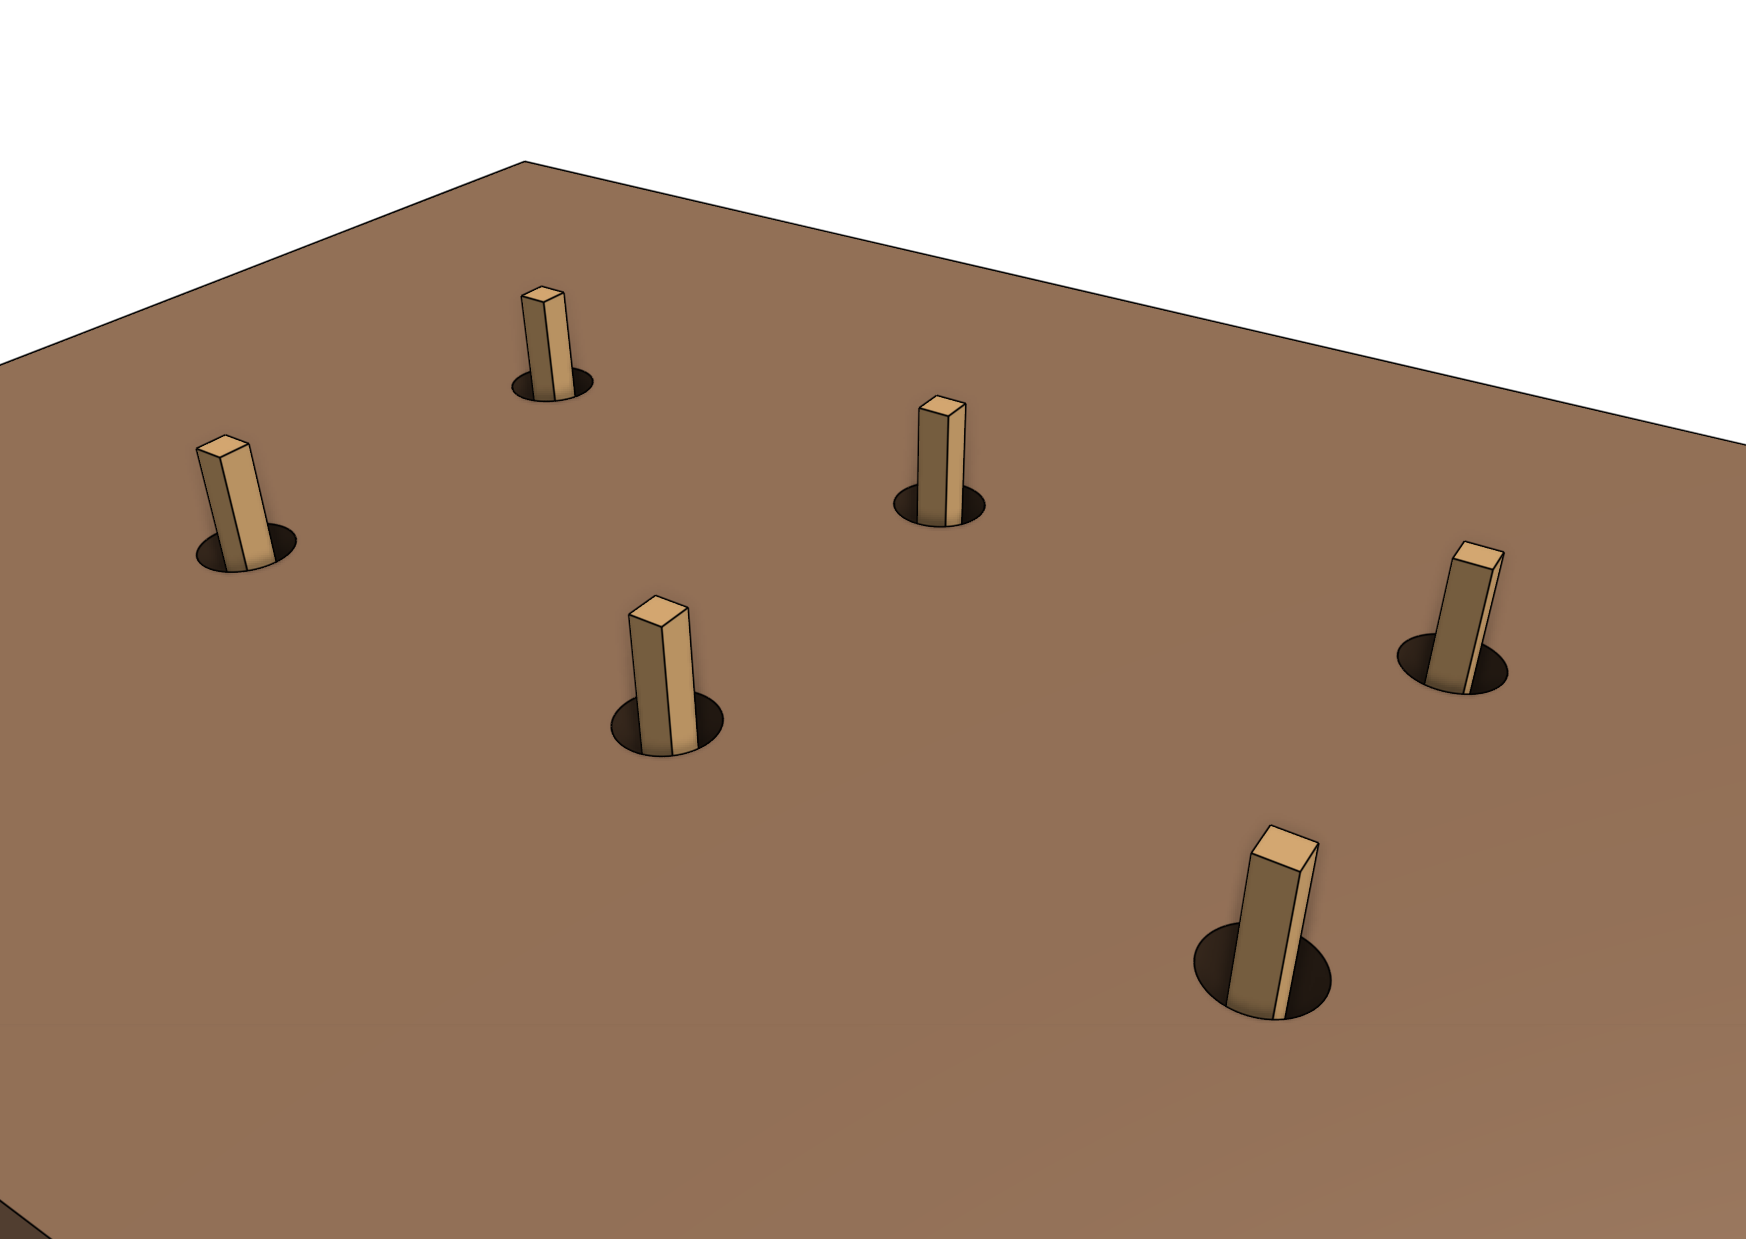
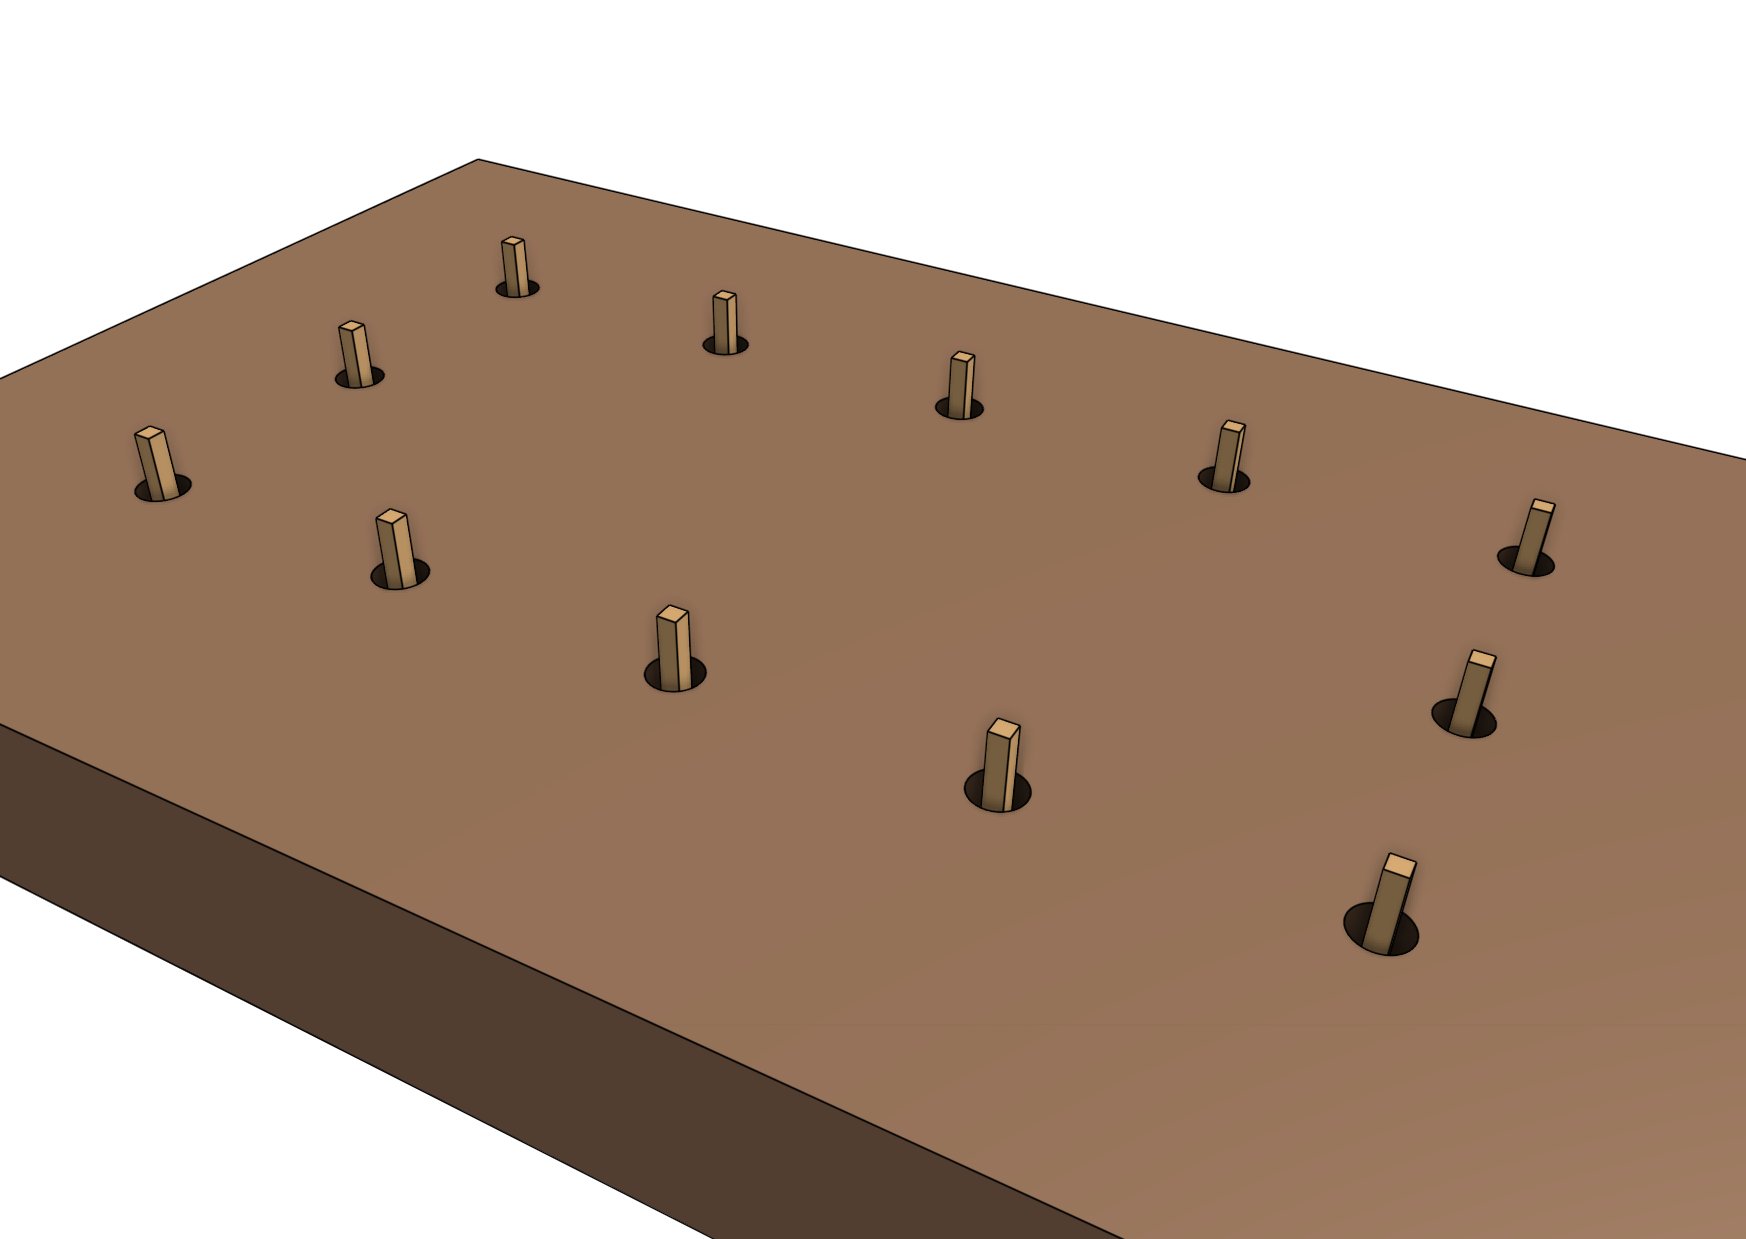
Place all of the posts in the holes. The top of the posts should be positioned 300mm above the ground.
All of the post tops must be level with each other. Dig out or back fill each hole as necessary to ensure the tops of all posts are level and the correct height off the ground.

Step 5: Attach the short walls
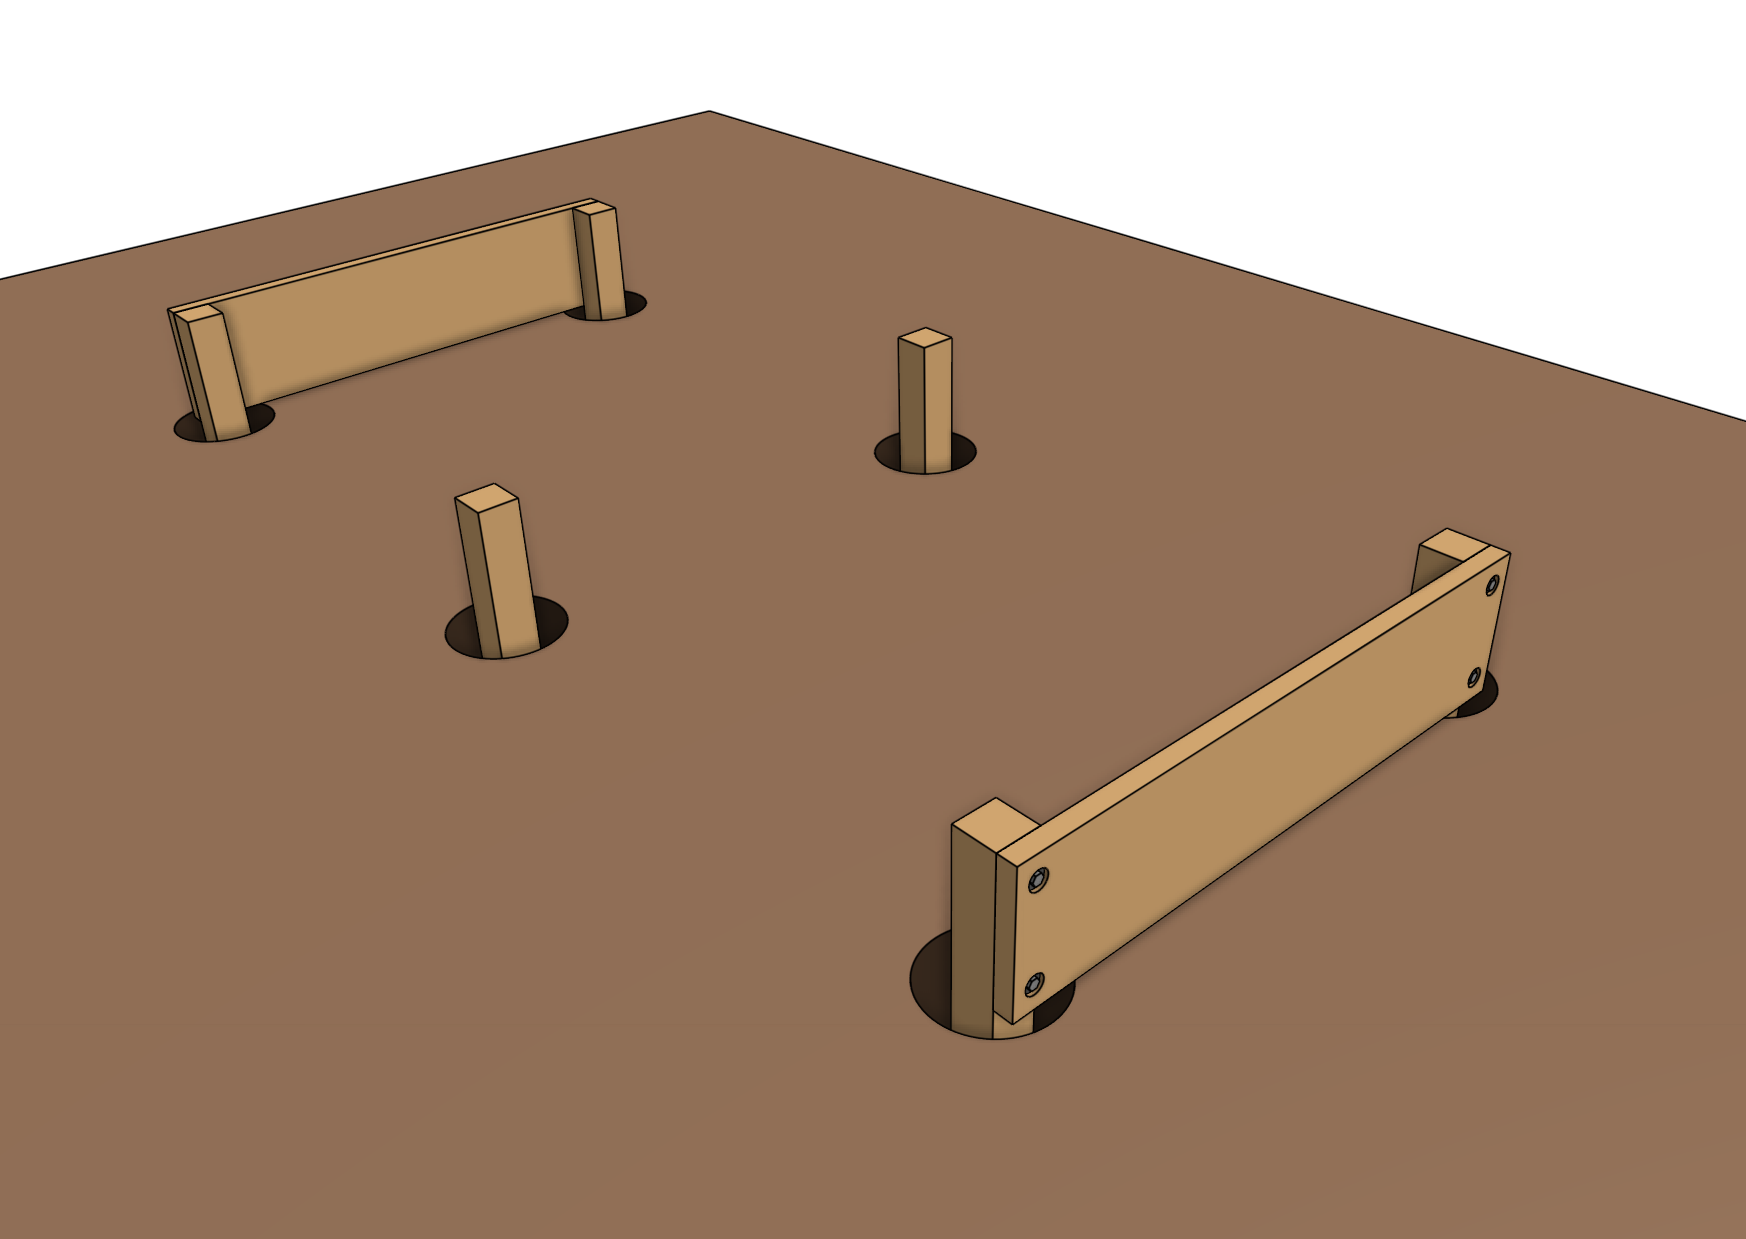
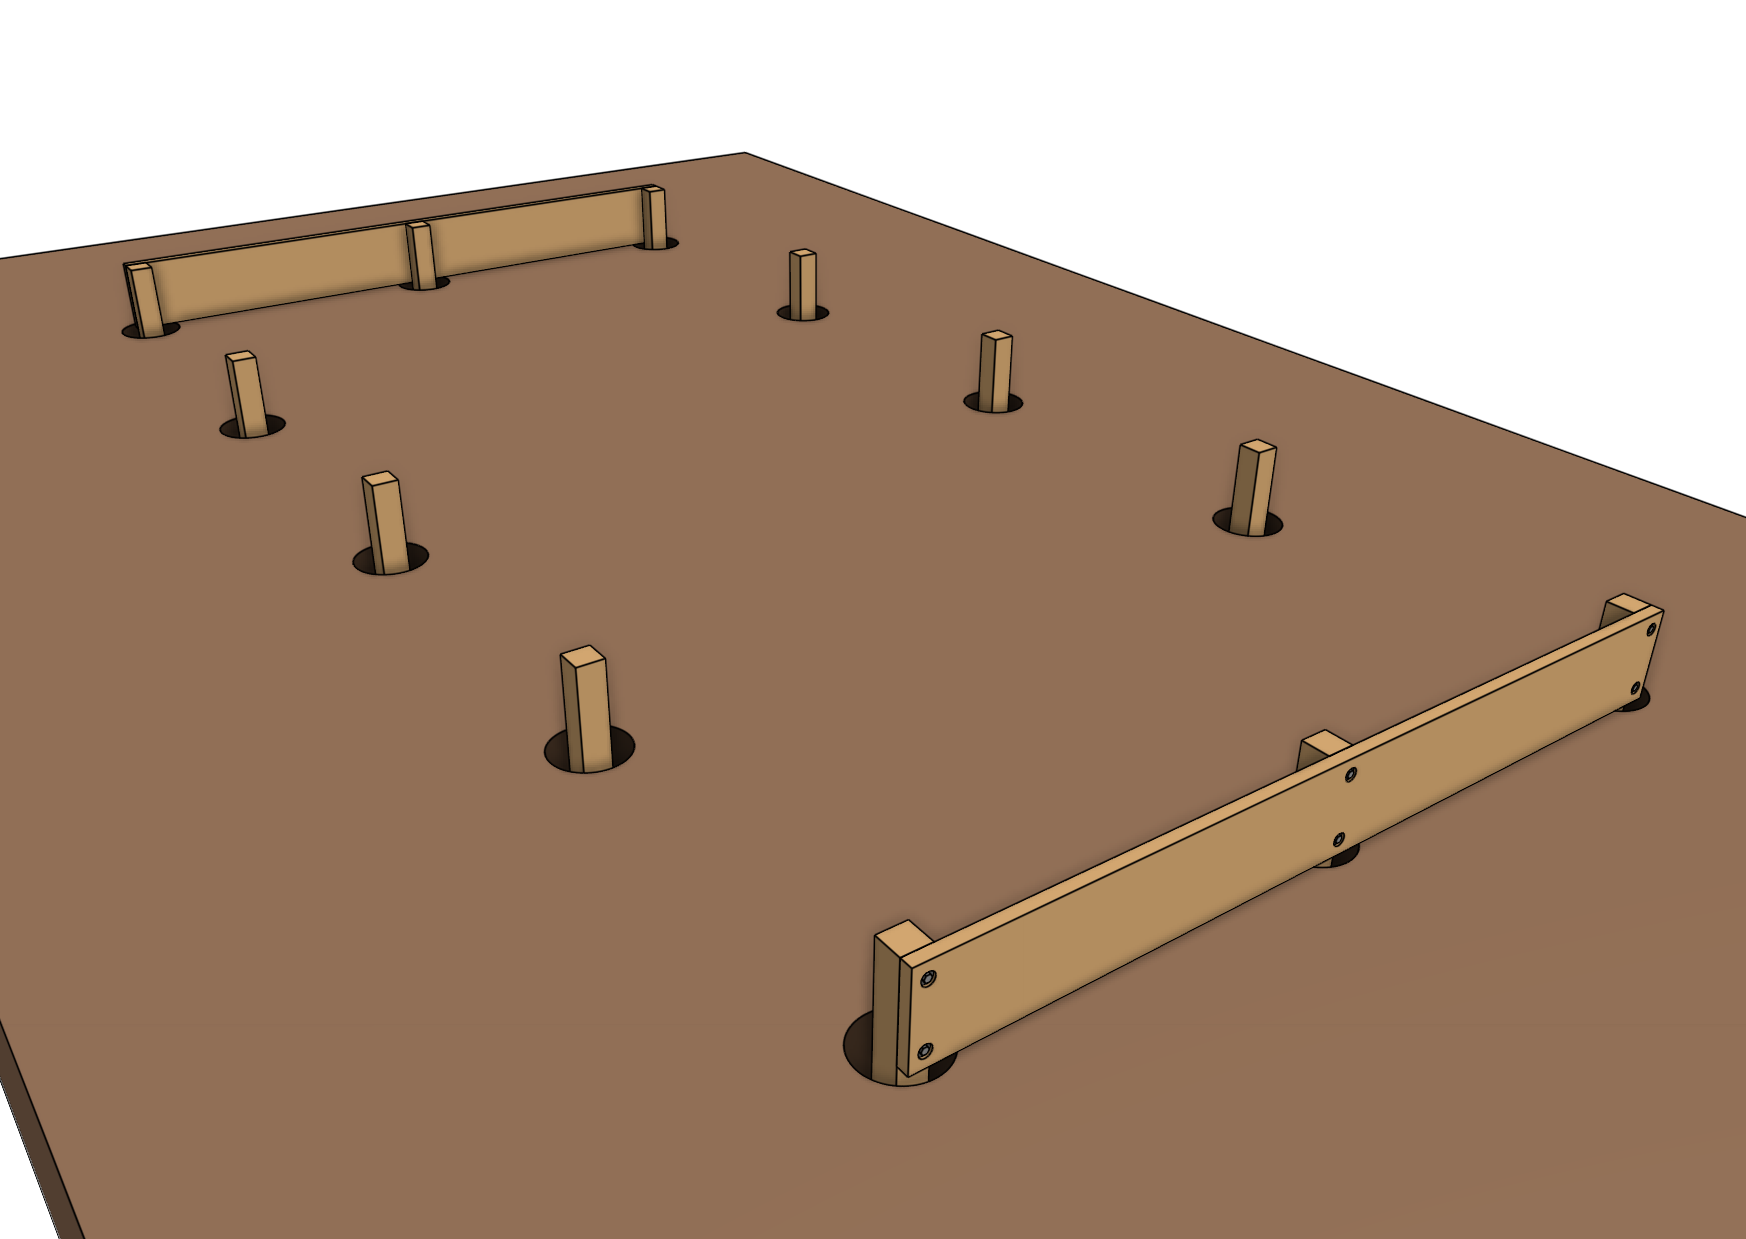
Clamp a short wall to the posts on one of the short sides of the bed. The posts should be flush with the top edge and ends of the short wall. If you are building an XL bed, also clamp the middle post to the short wall.
Drill appropriately sized holes and counterbores for the lag screws or bolts and washers you will be using. There should be two holes per post. The upper holes should be positioned 50mm from the top edge of the short wall. The lower holes should be positioned 50mm from the bottom edge of the short wall. All holes should be center-aligned on the posts.
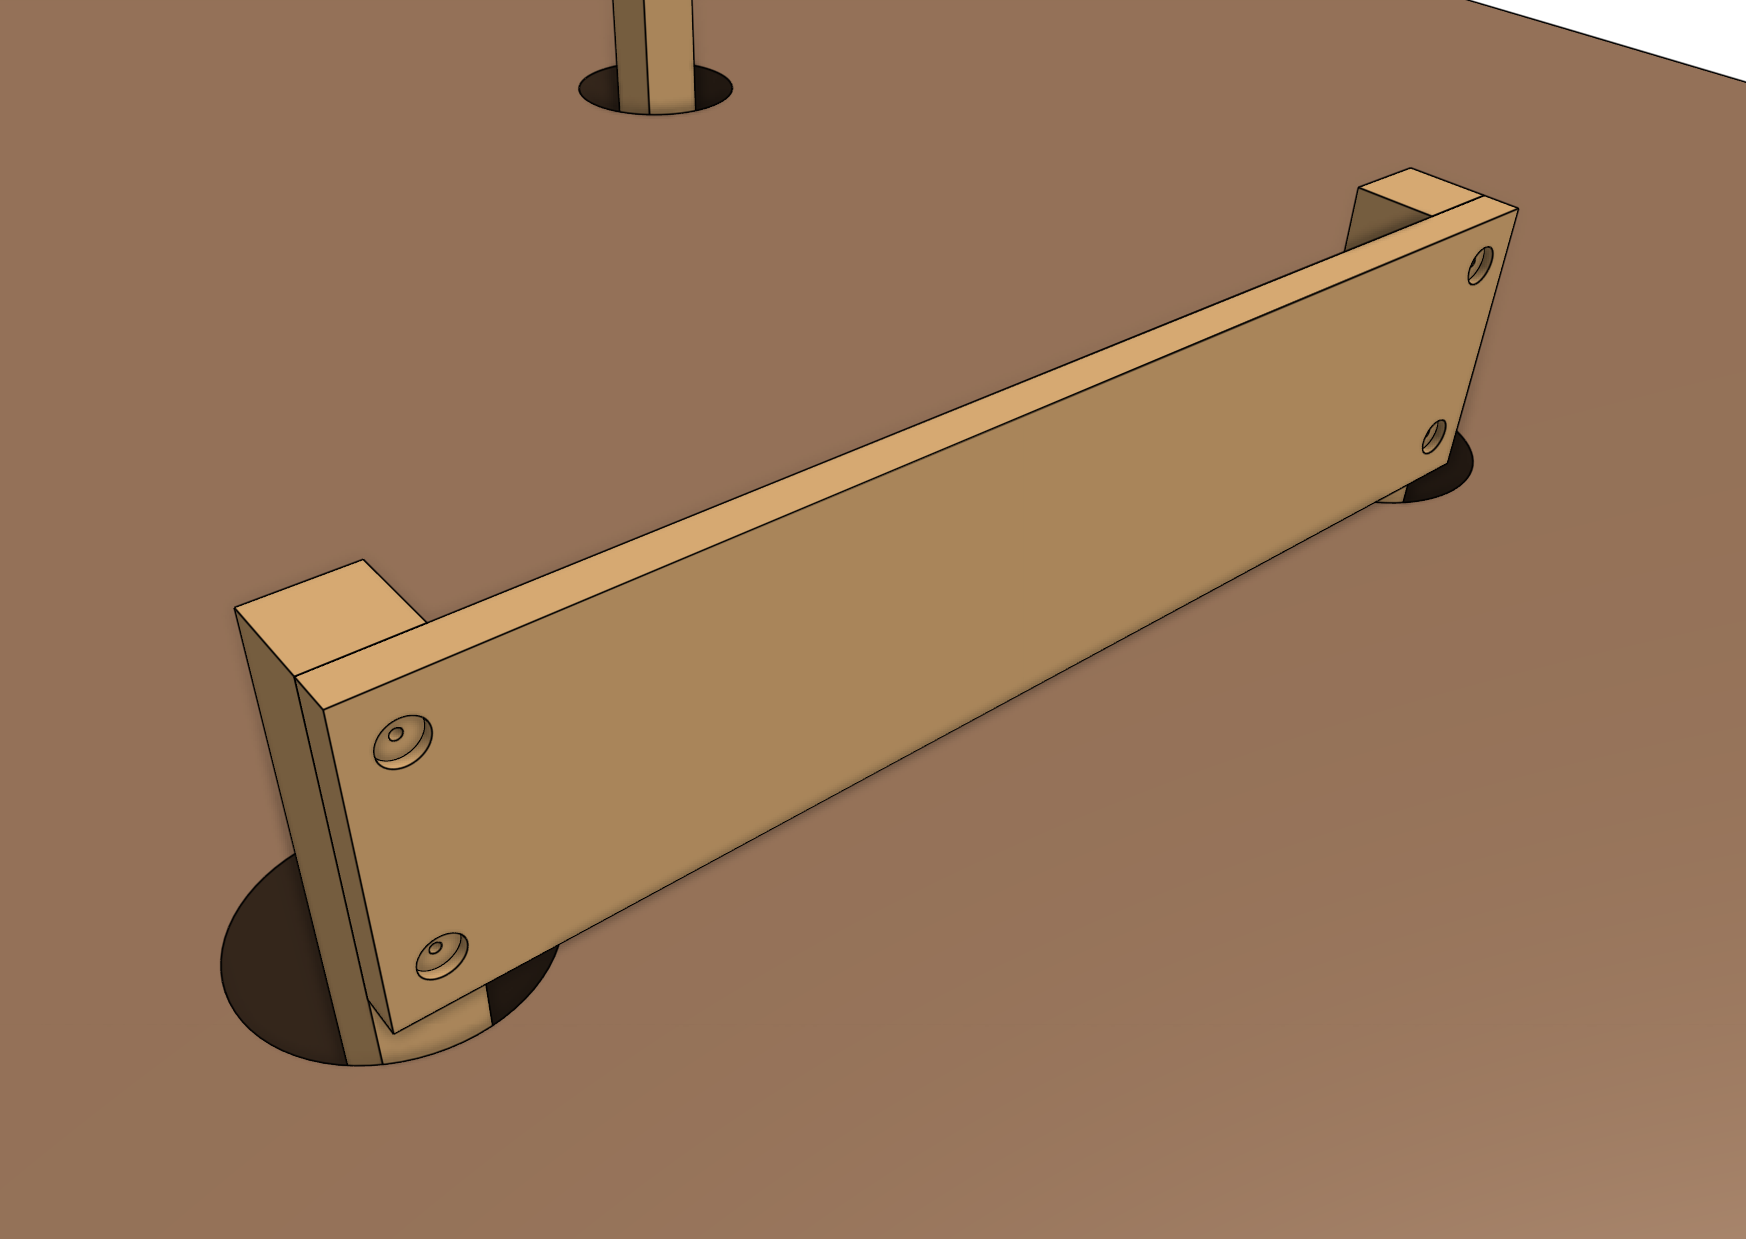

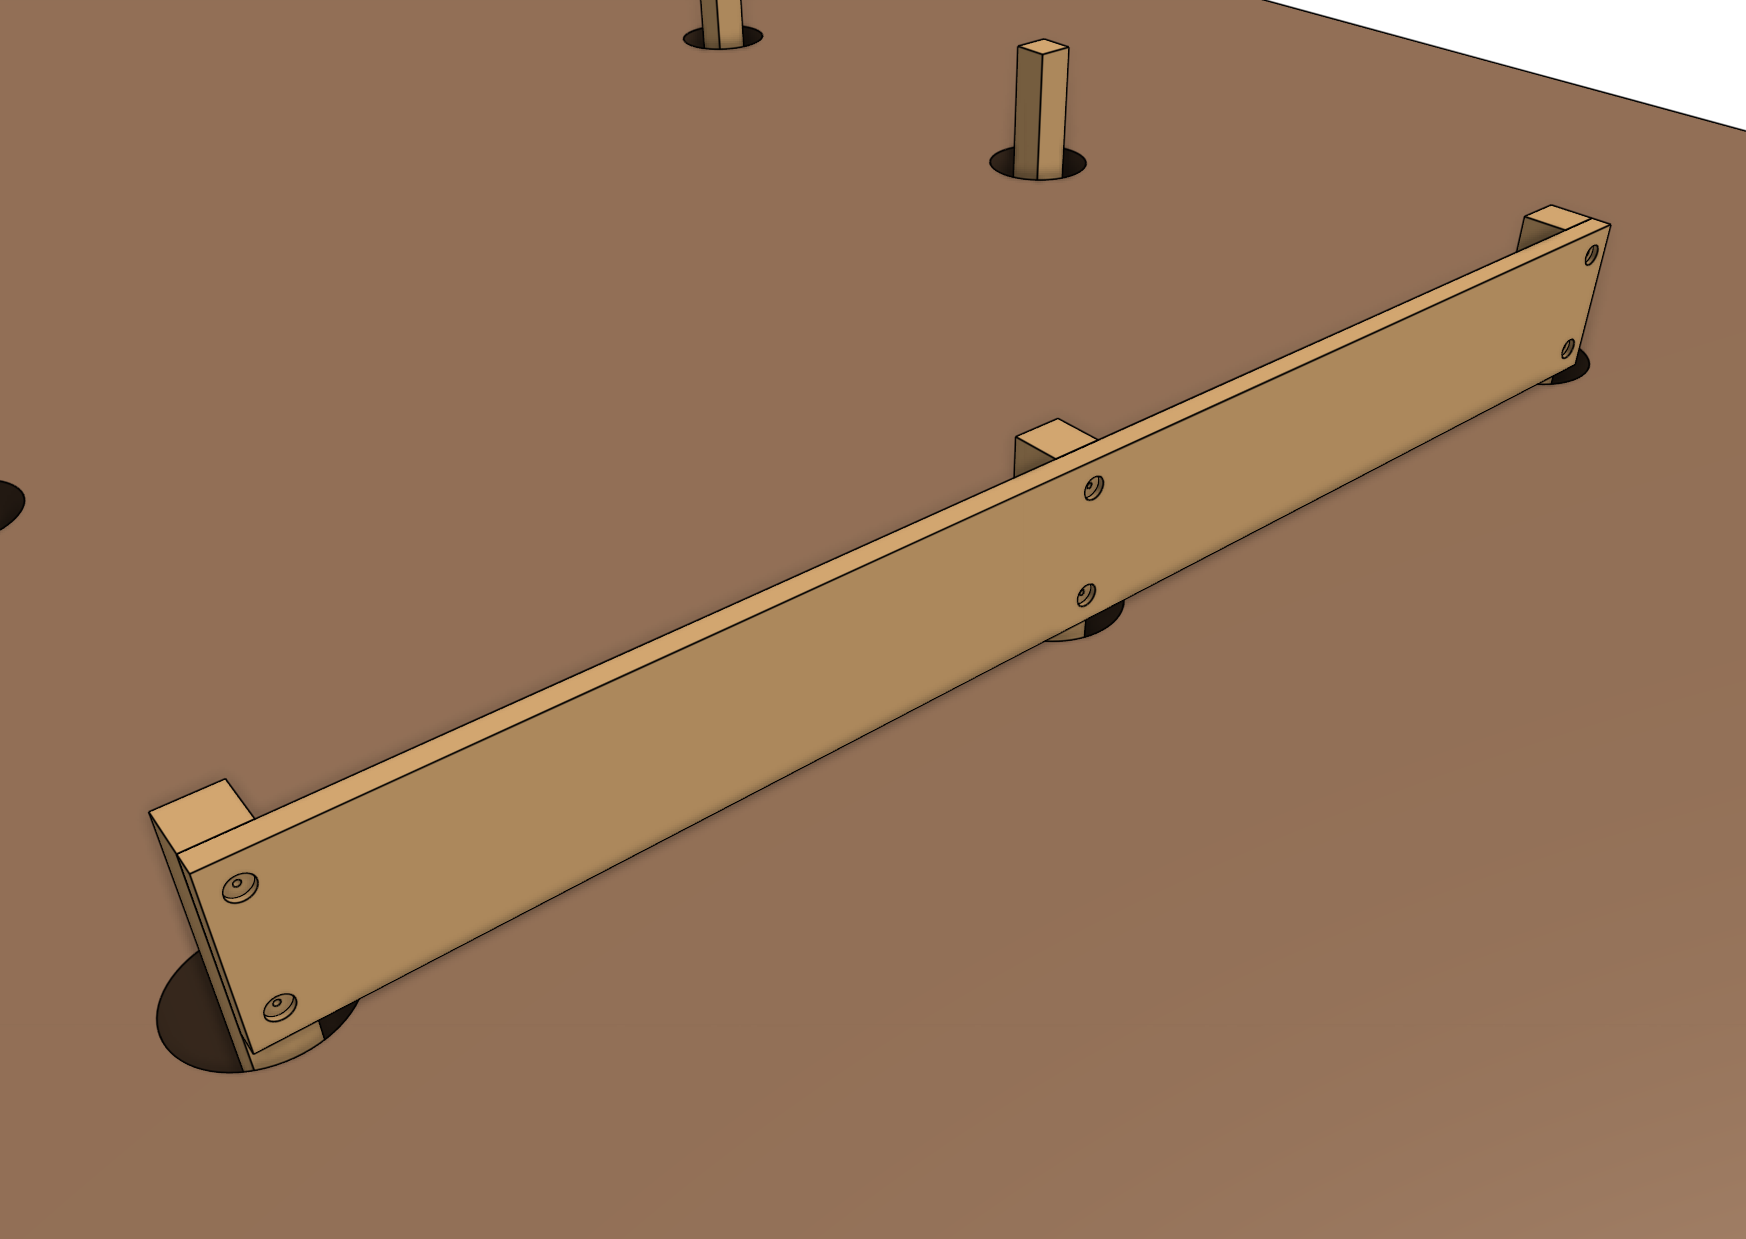
Attach the short wall to the posts using M10 x 100mm lag screws and M10 washers or equivalent. Once the wall is fastened to all of the posts, you may remove the clamps.
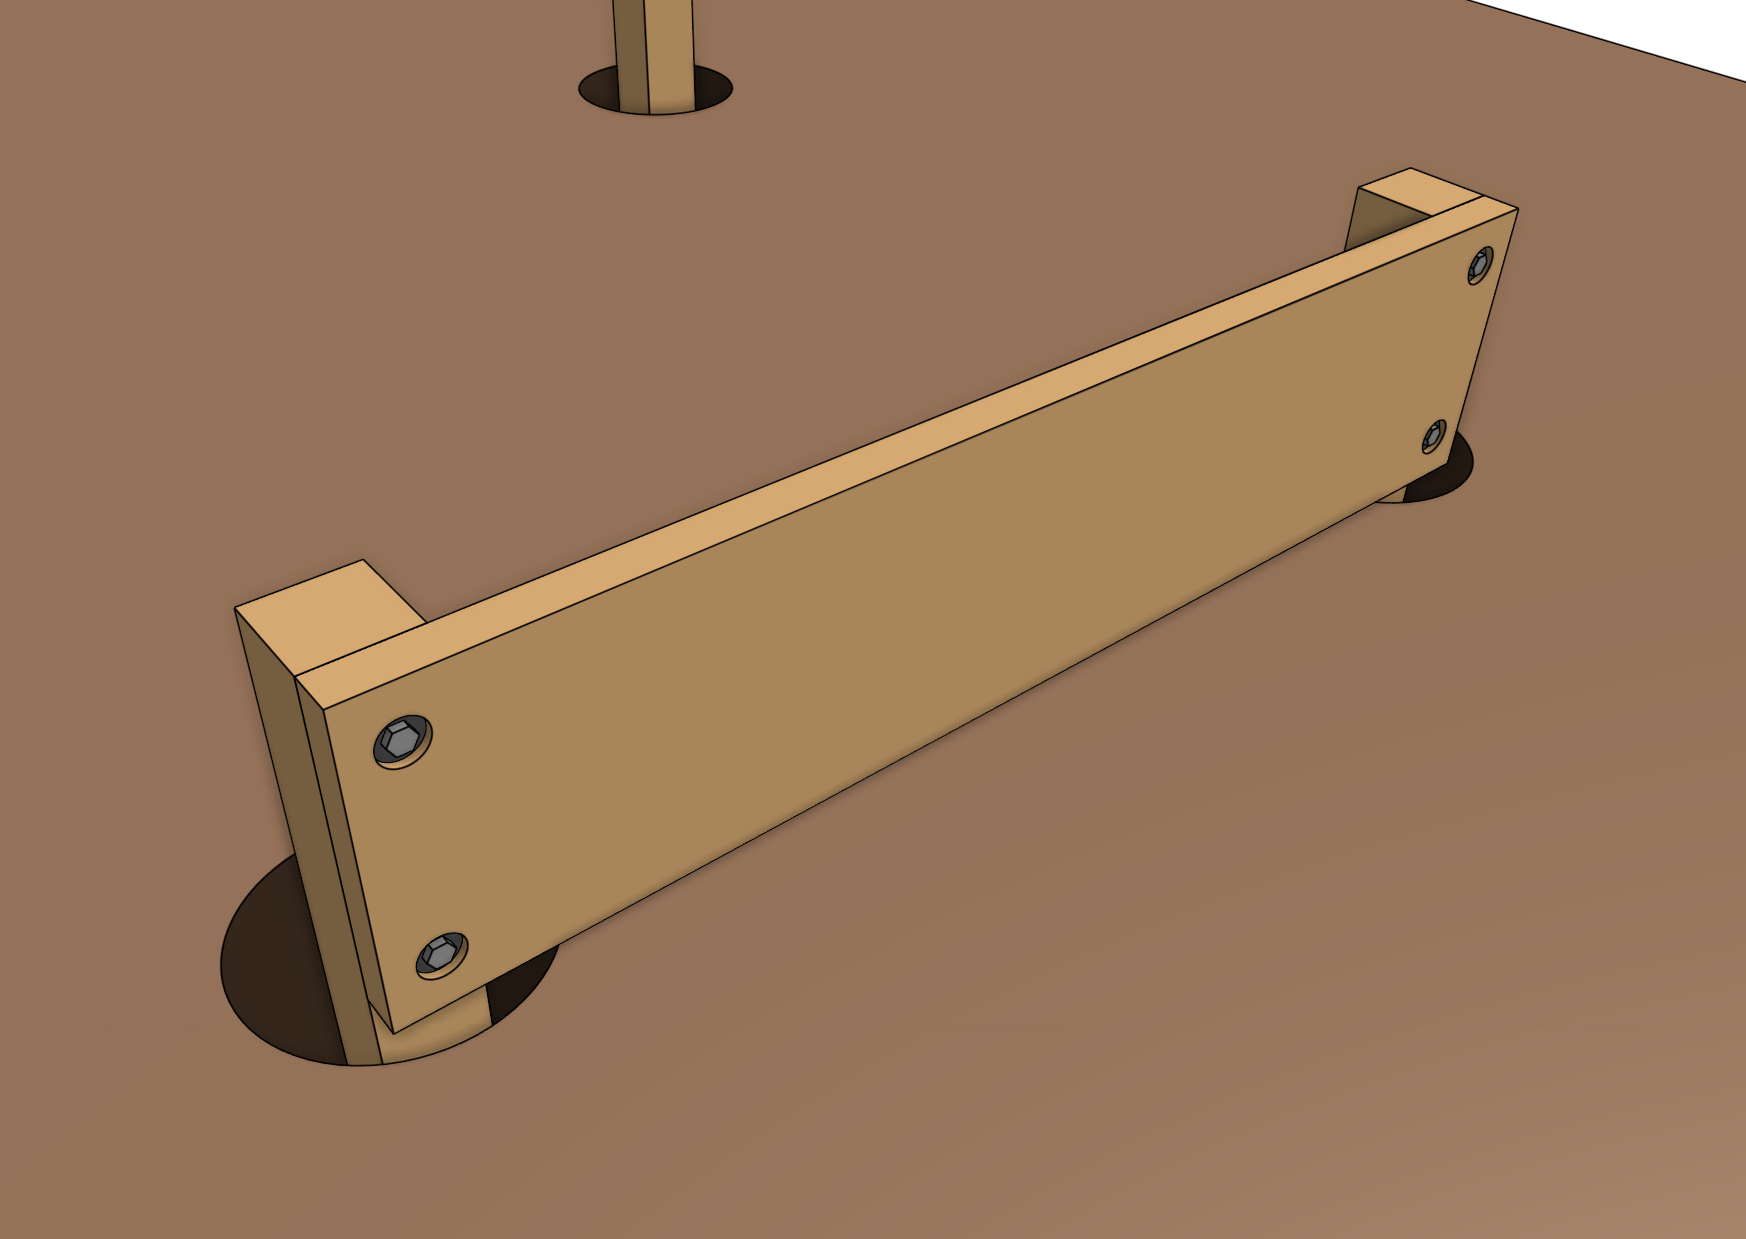

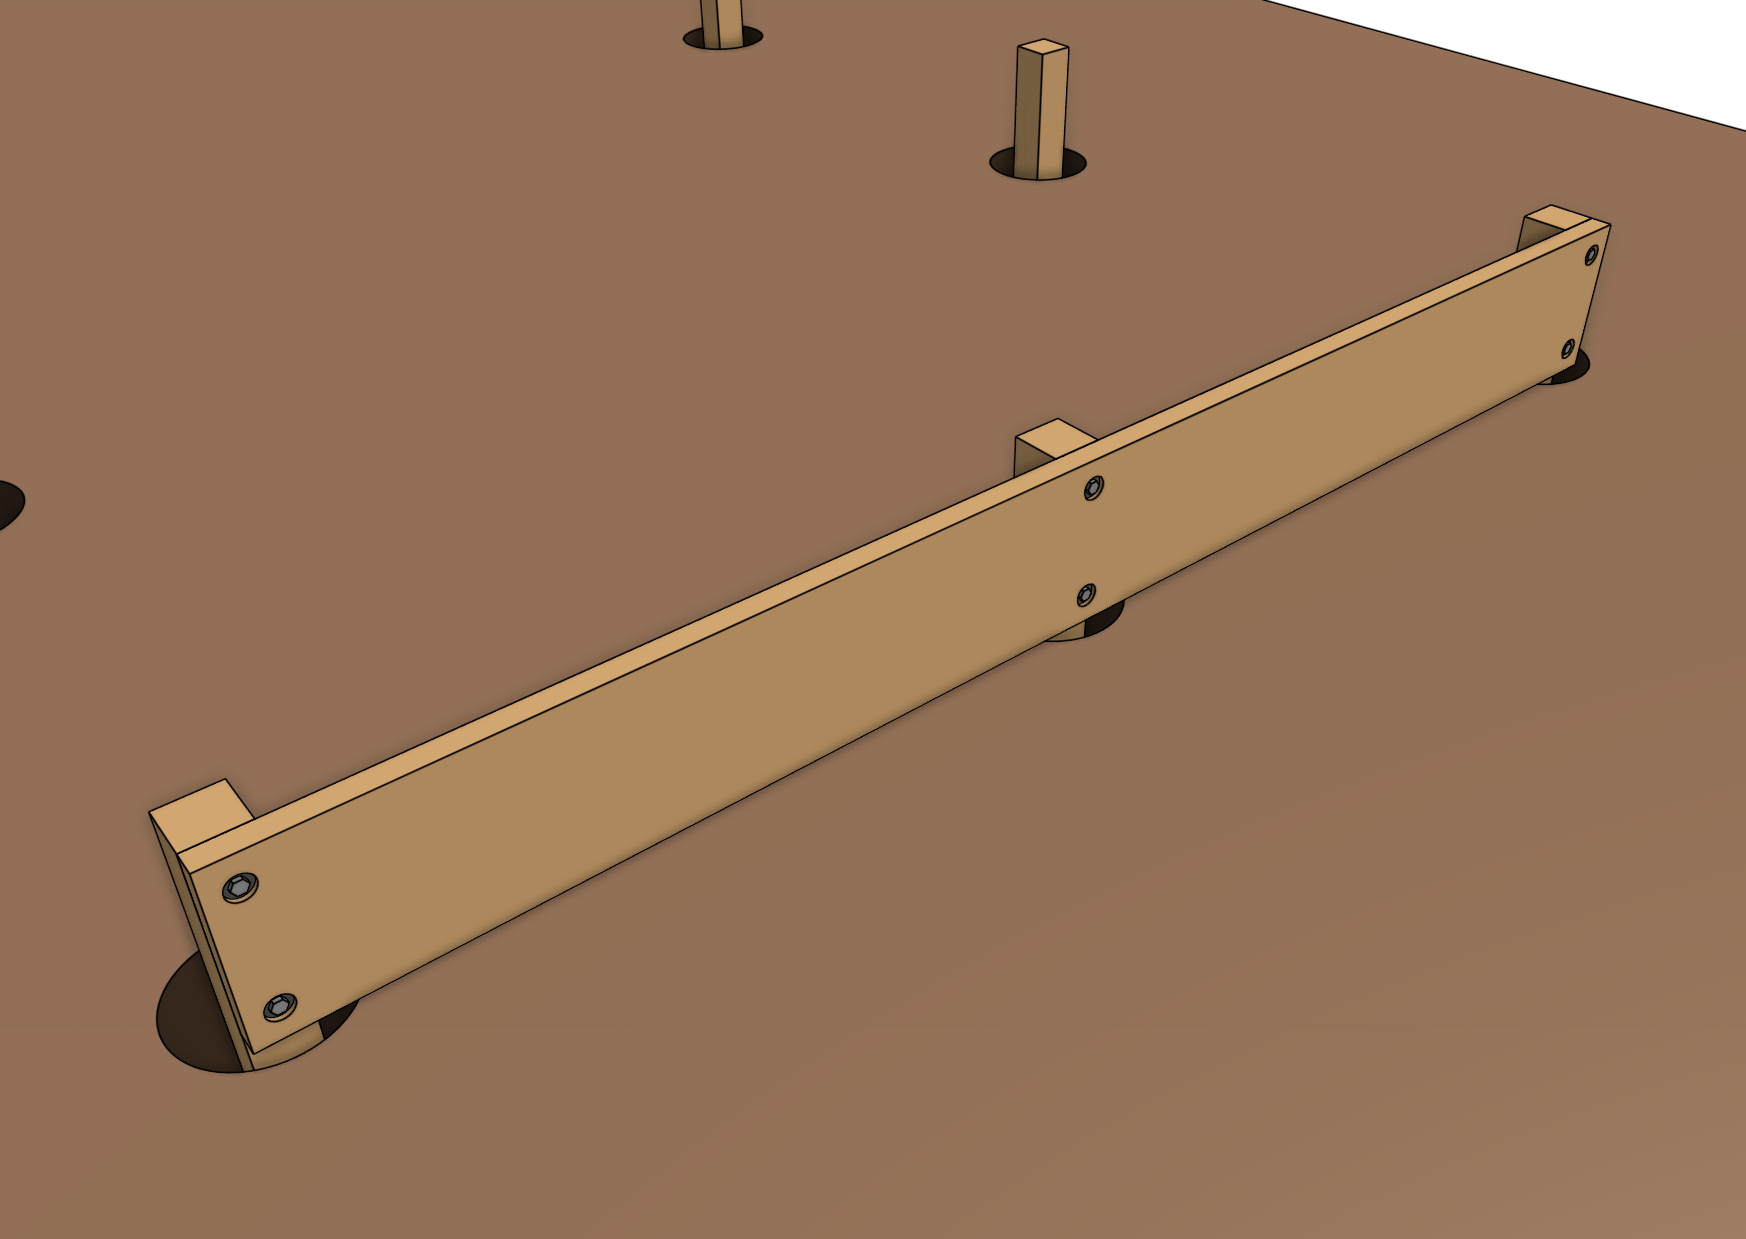
Repeat for the second short wall on the opposite side of the bed.

Step 6: Attach the long walls
Clamp the long wall(s) to the posts along a long side of the bed. The ends of the long wall(s) should be flush with the outer face of the short walls. If you are building an XL bed, the two long walls must meet at the middle of the middle post.
Drill and counterbore two holes per wall-post attachment point. The upper holes should be positioned 80mm from the top edge of the long wall(s). The lower holes should be positioned 80mm from the bottom edge of the long wall(s).
All holes should be center-aligned on the posts except for where the two long walls meet: these holes should be positioned 17.5mm from the ends of the long walls to best share the common post.
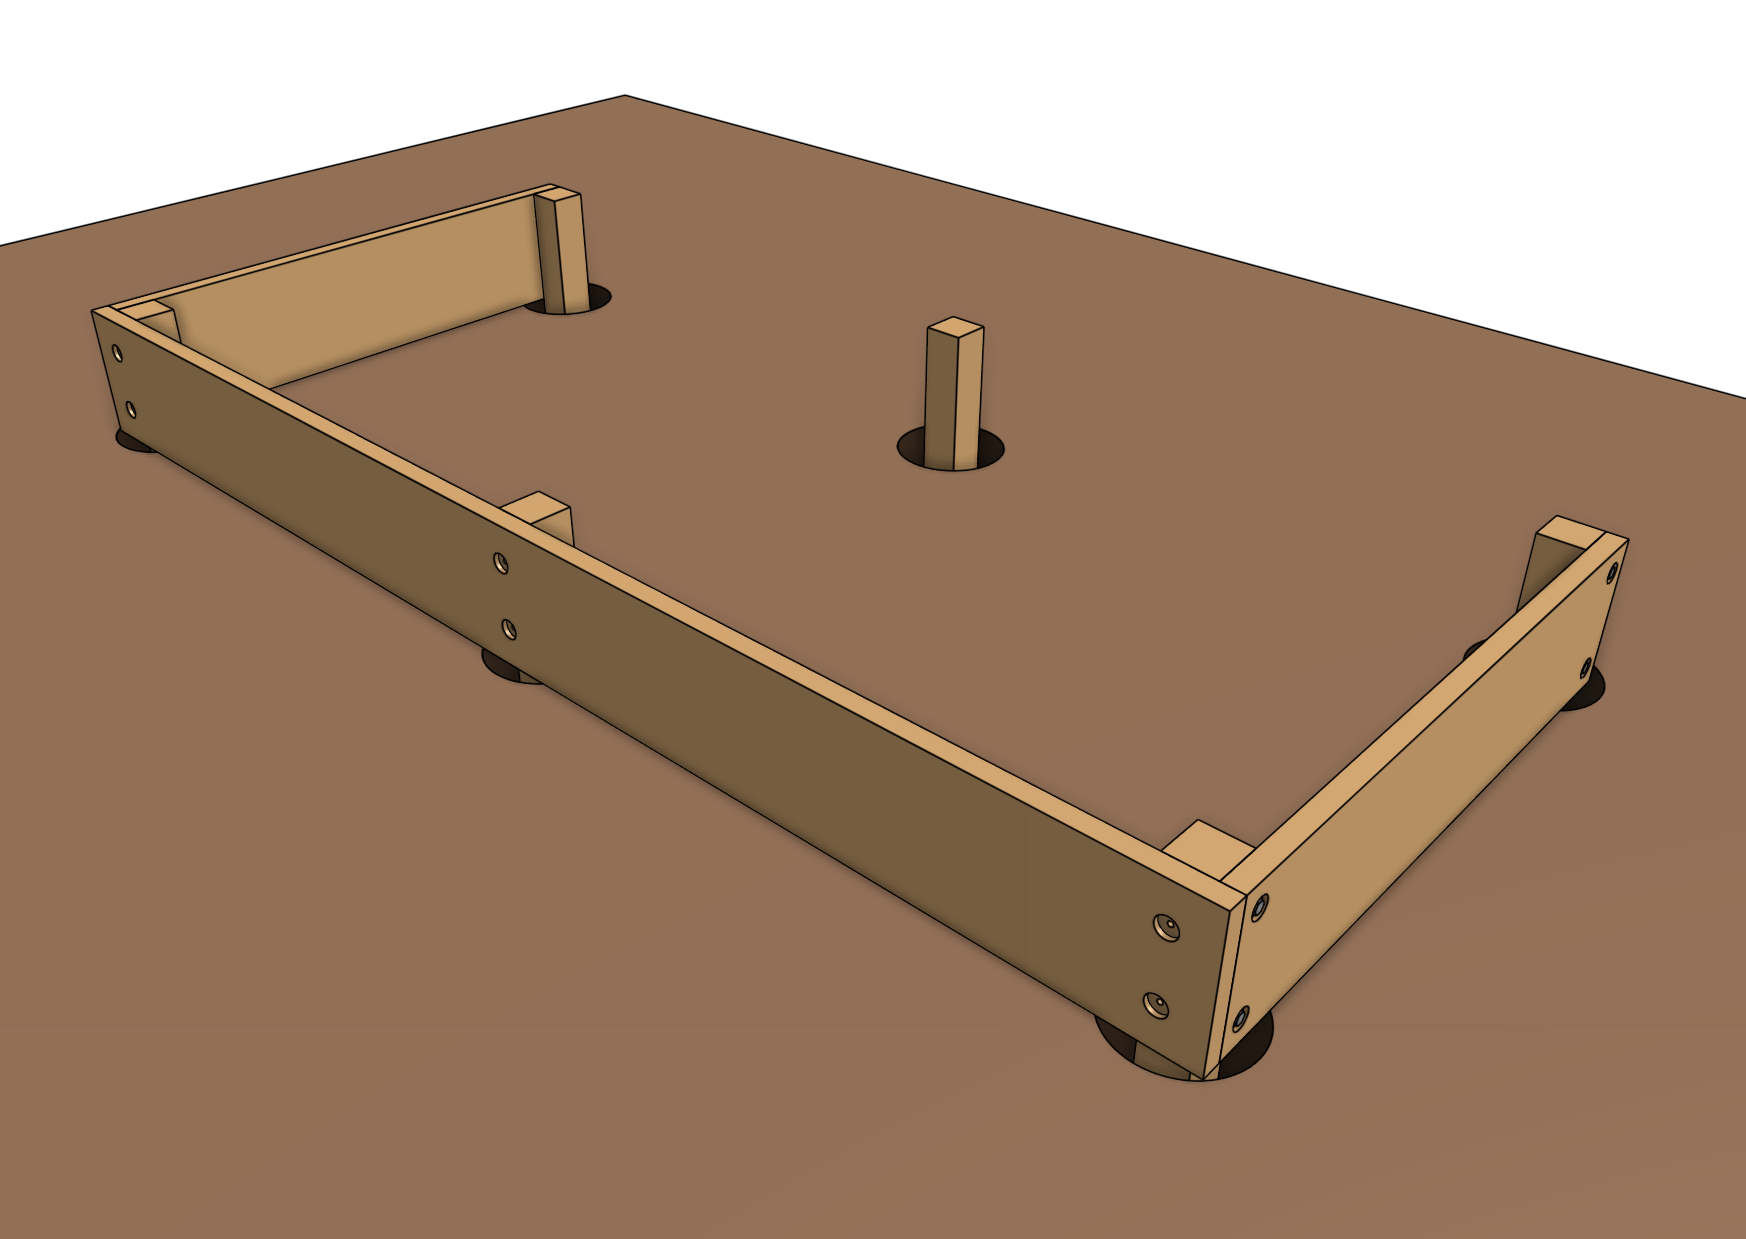

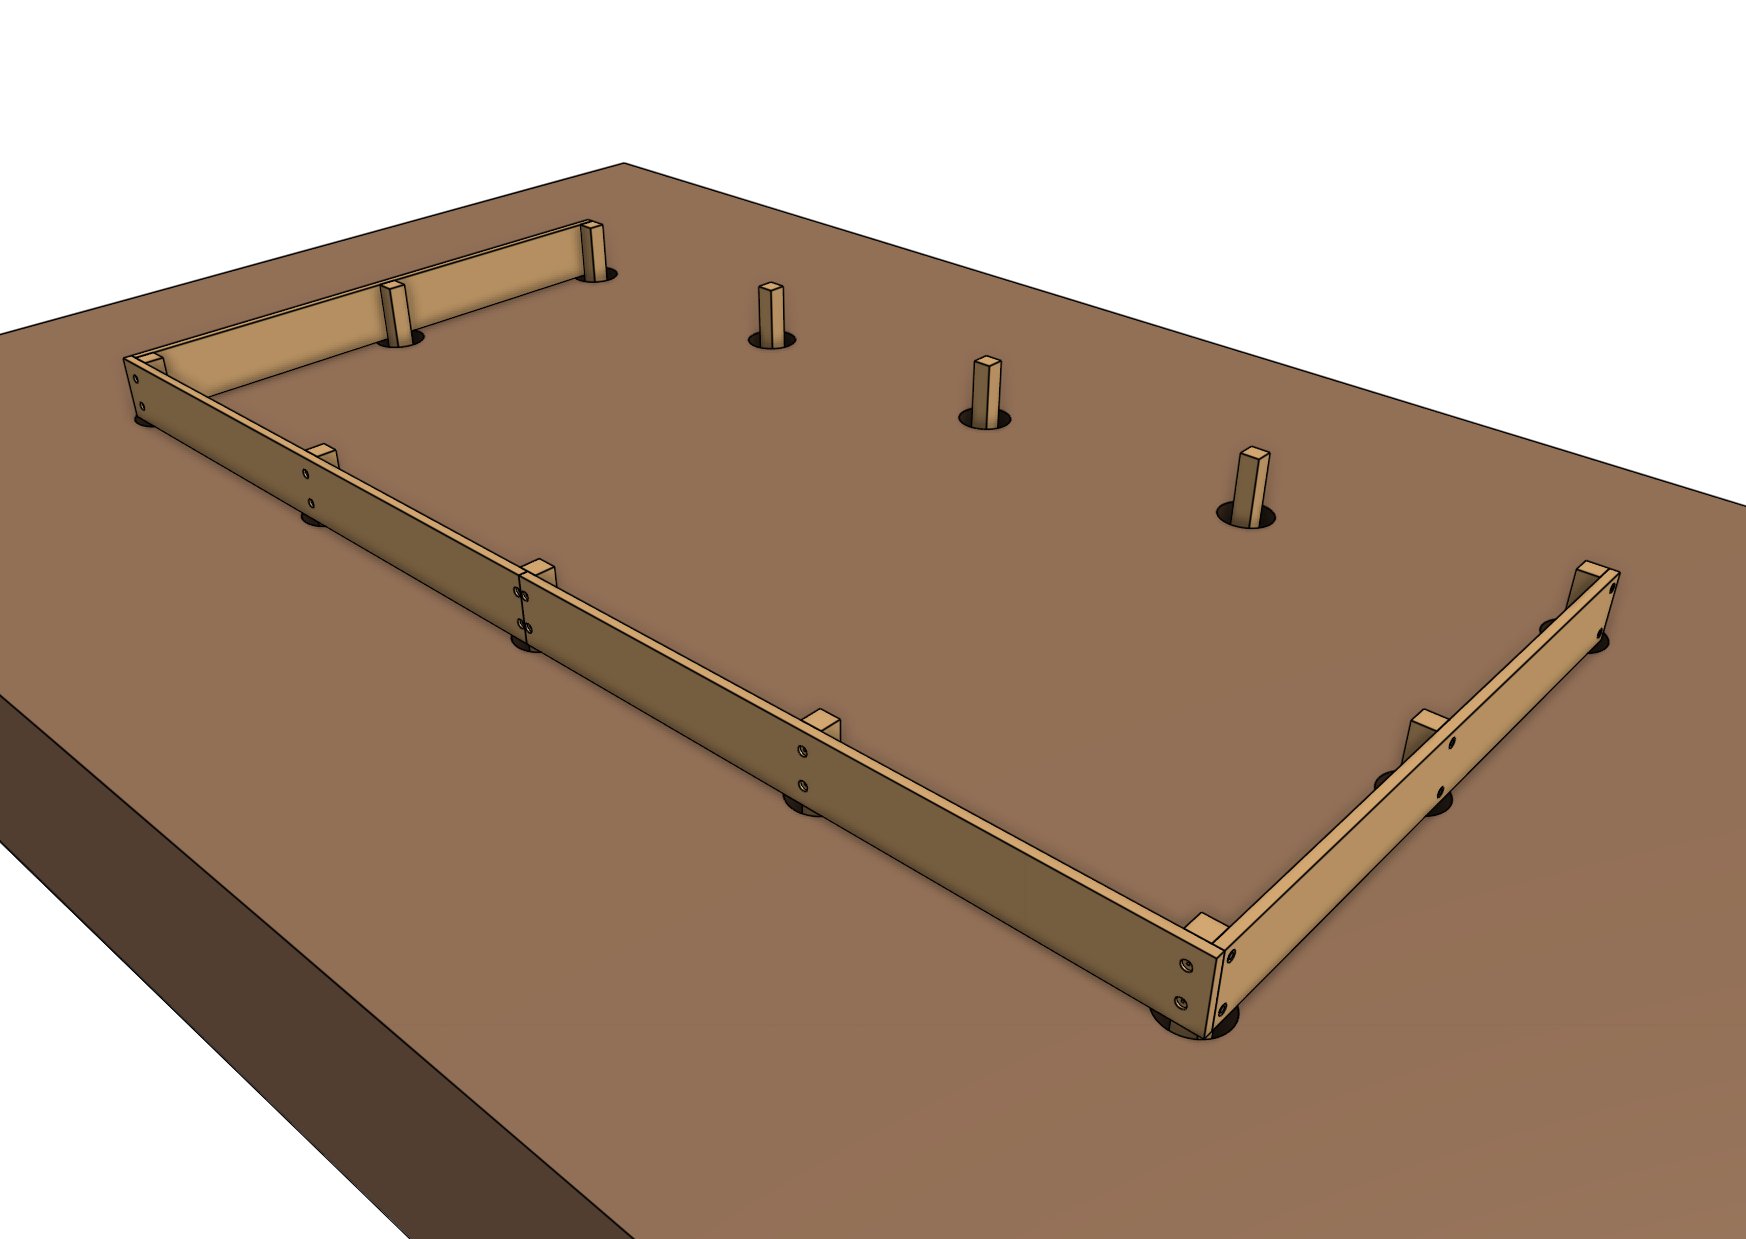
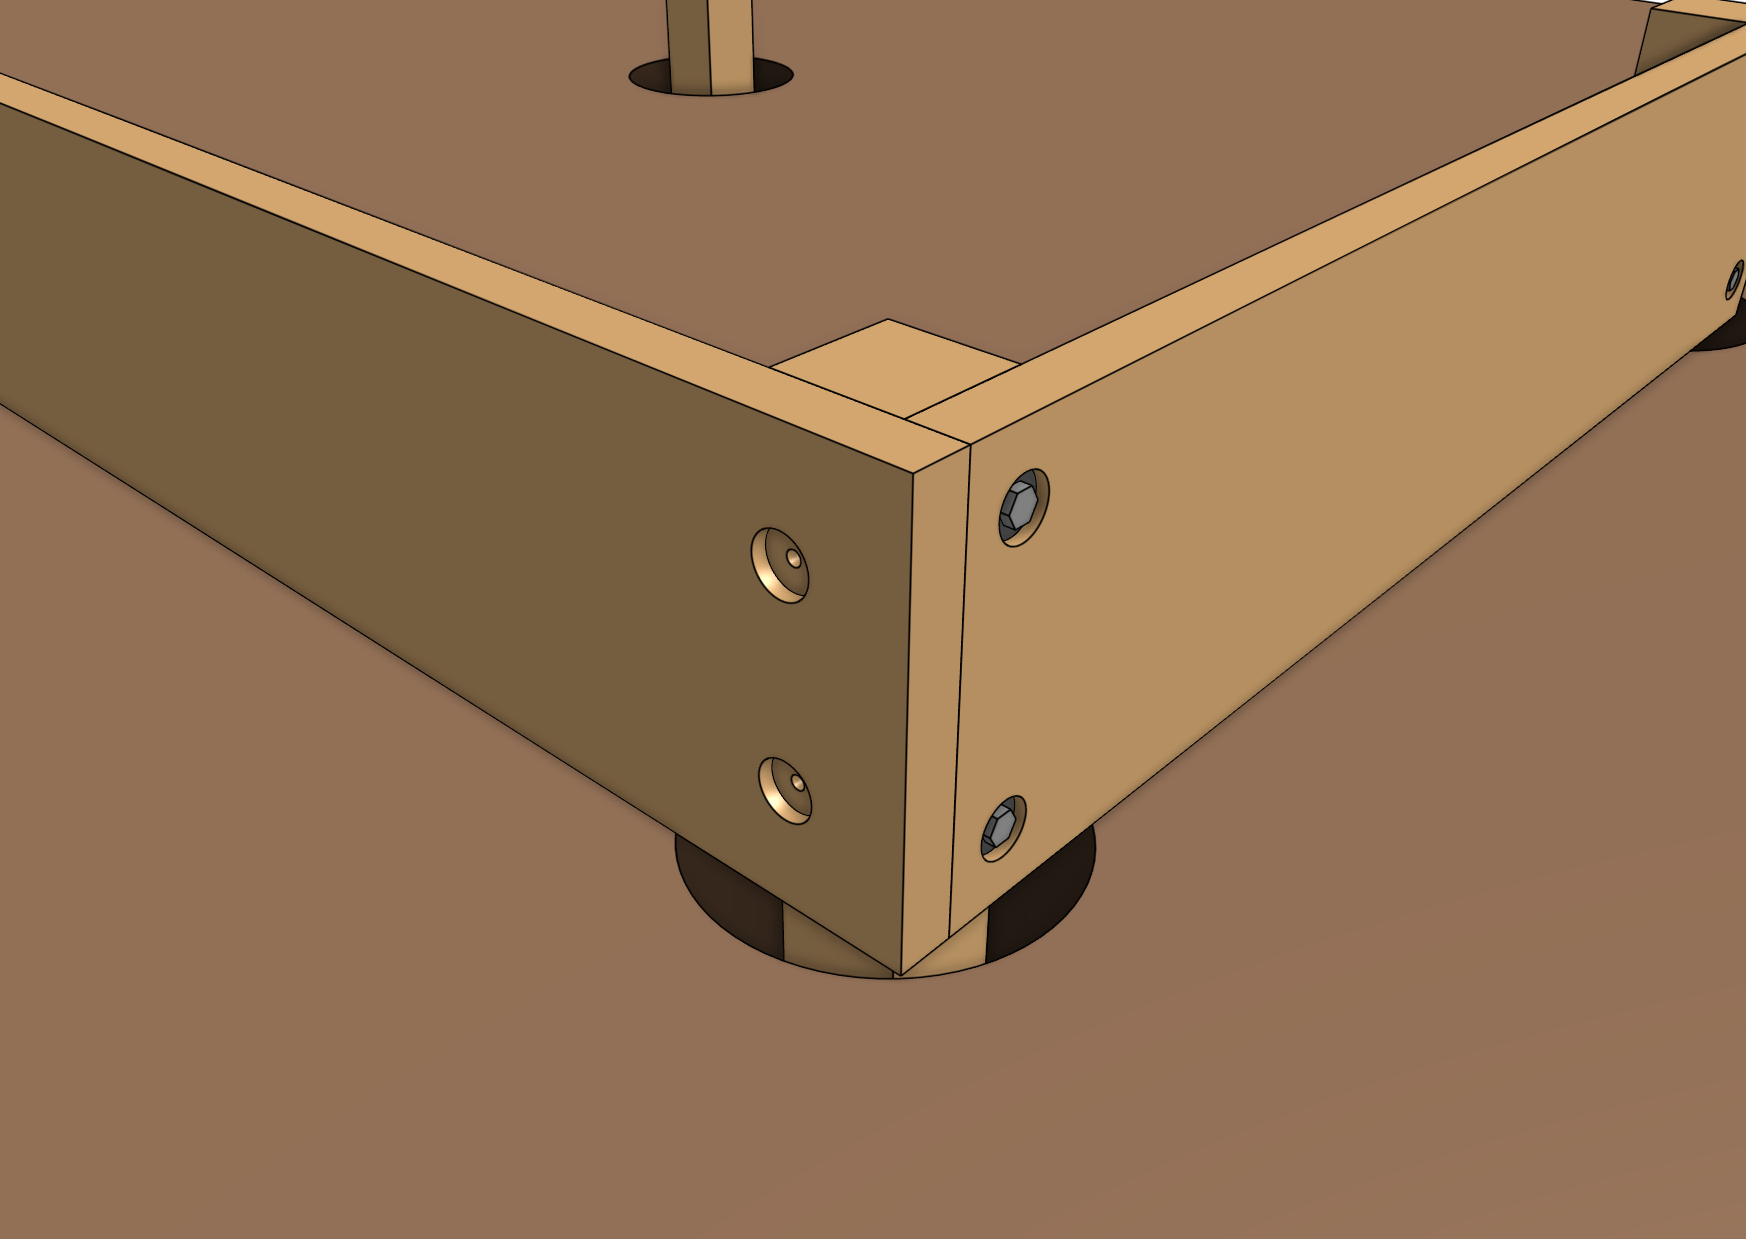
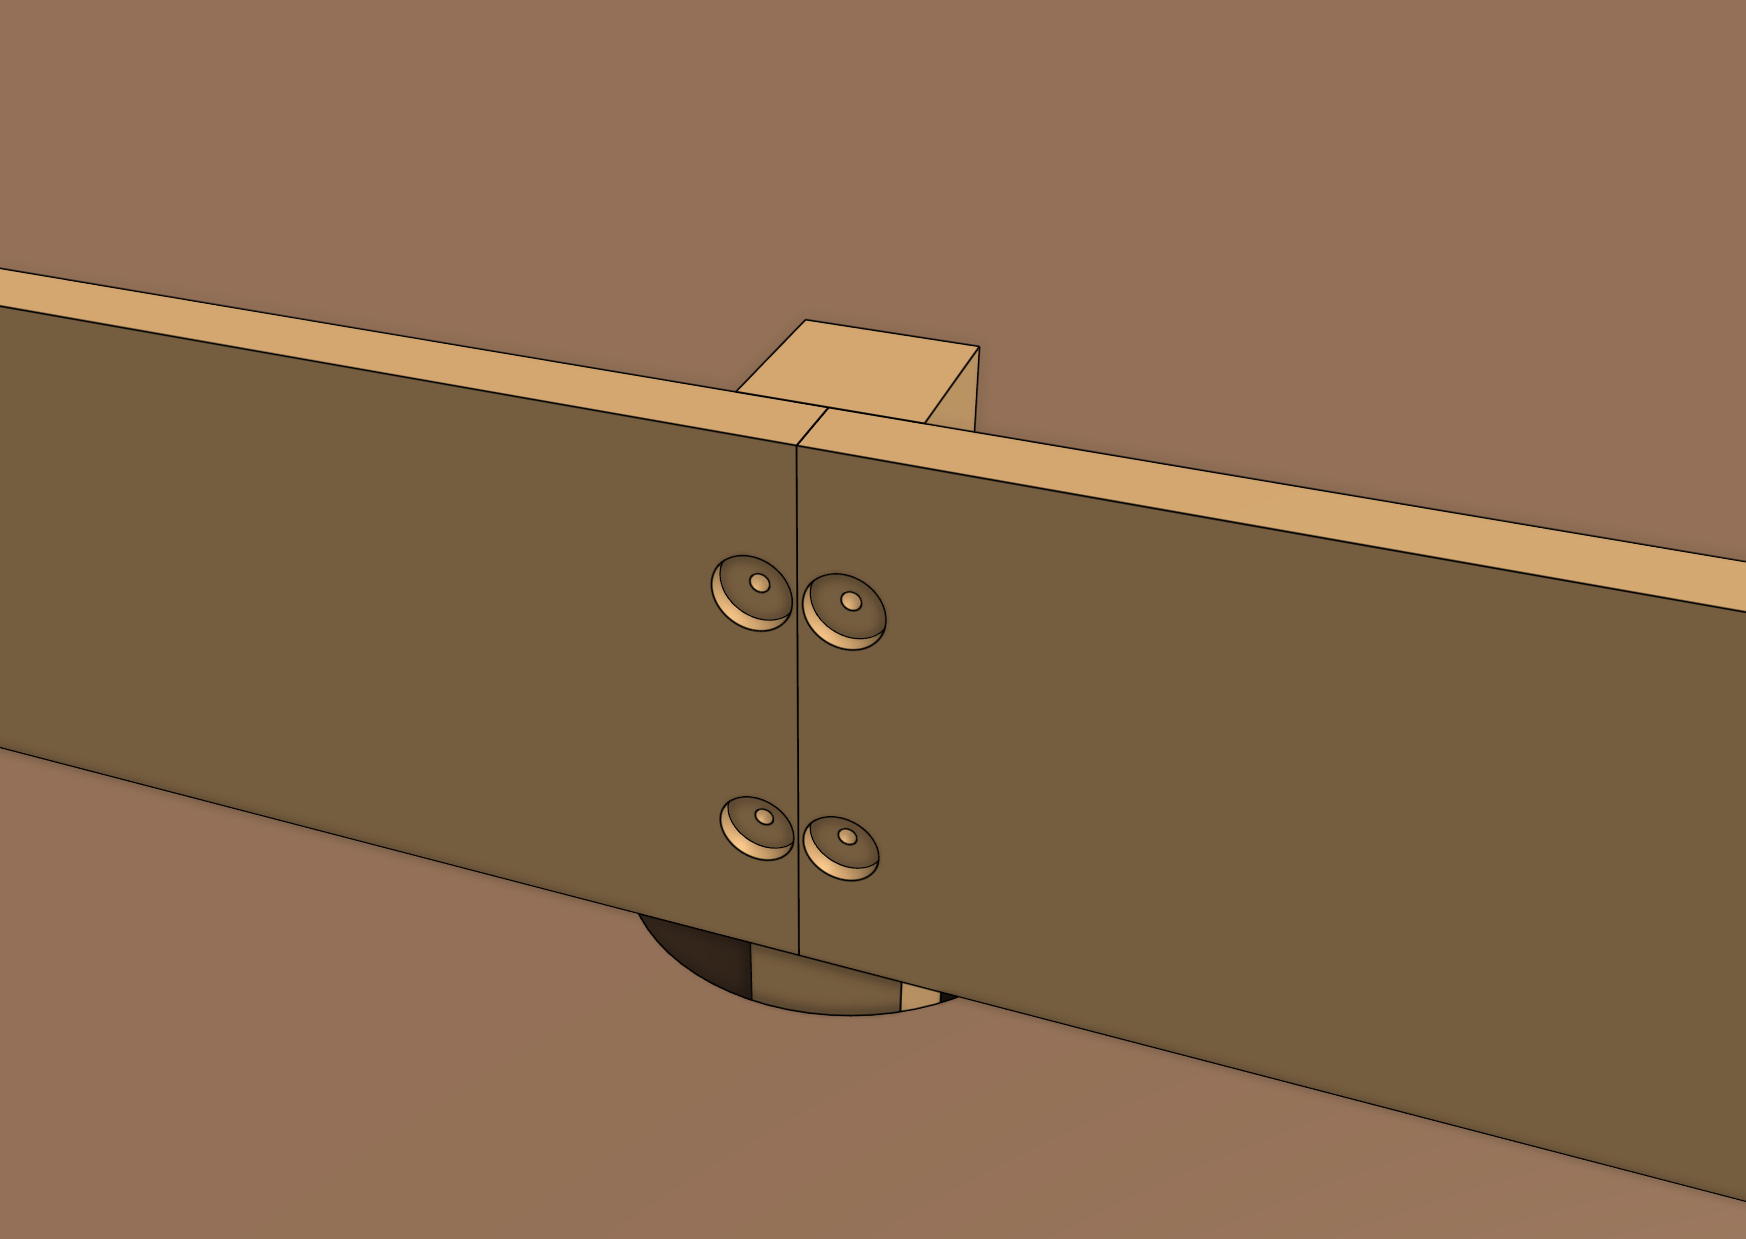
Attach the long wall(s) to the posts using M10 x 100mm lag screws and M10 washers or equivalent. Once fastened to all of the posts, you may remove the clamps.
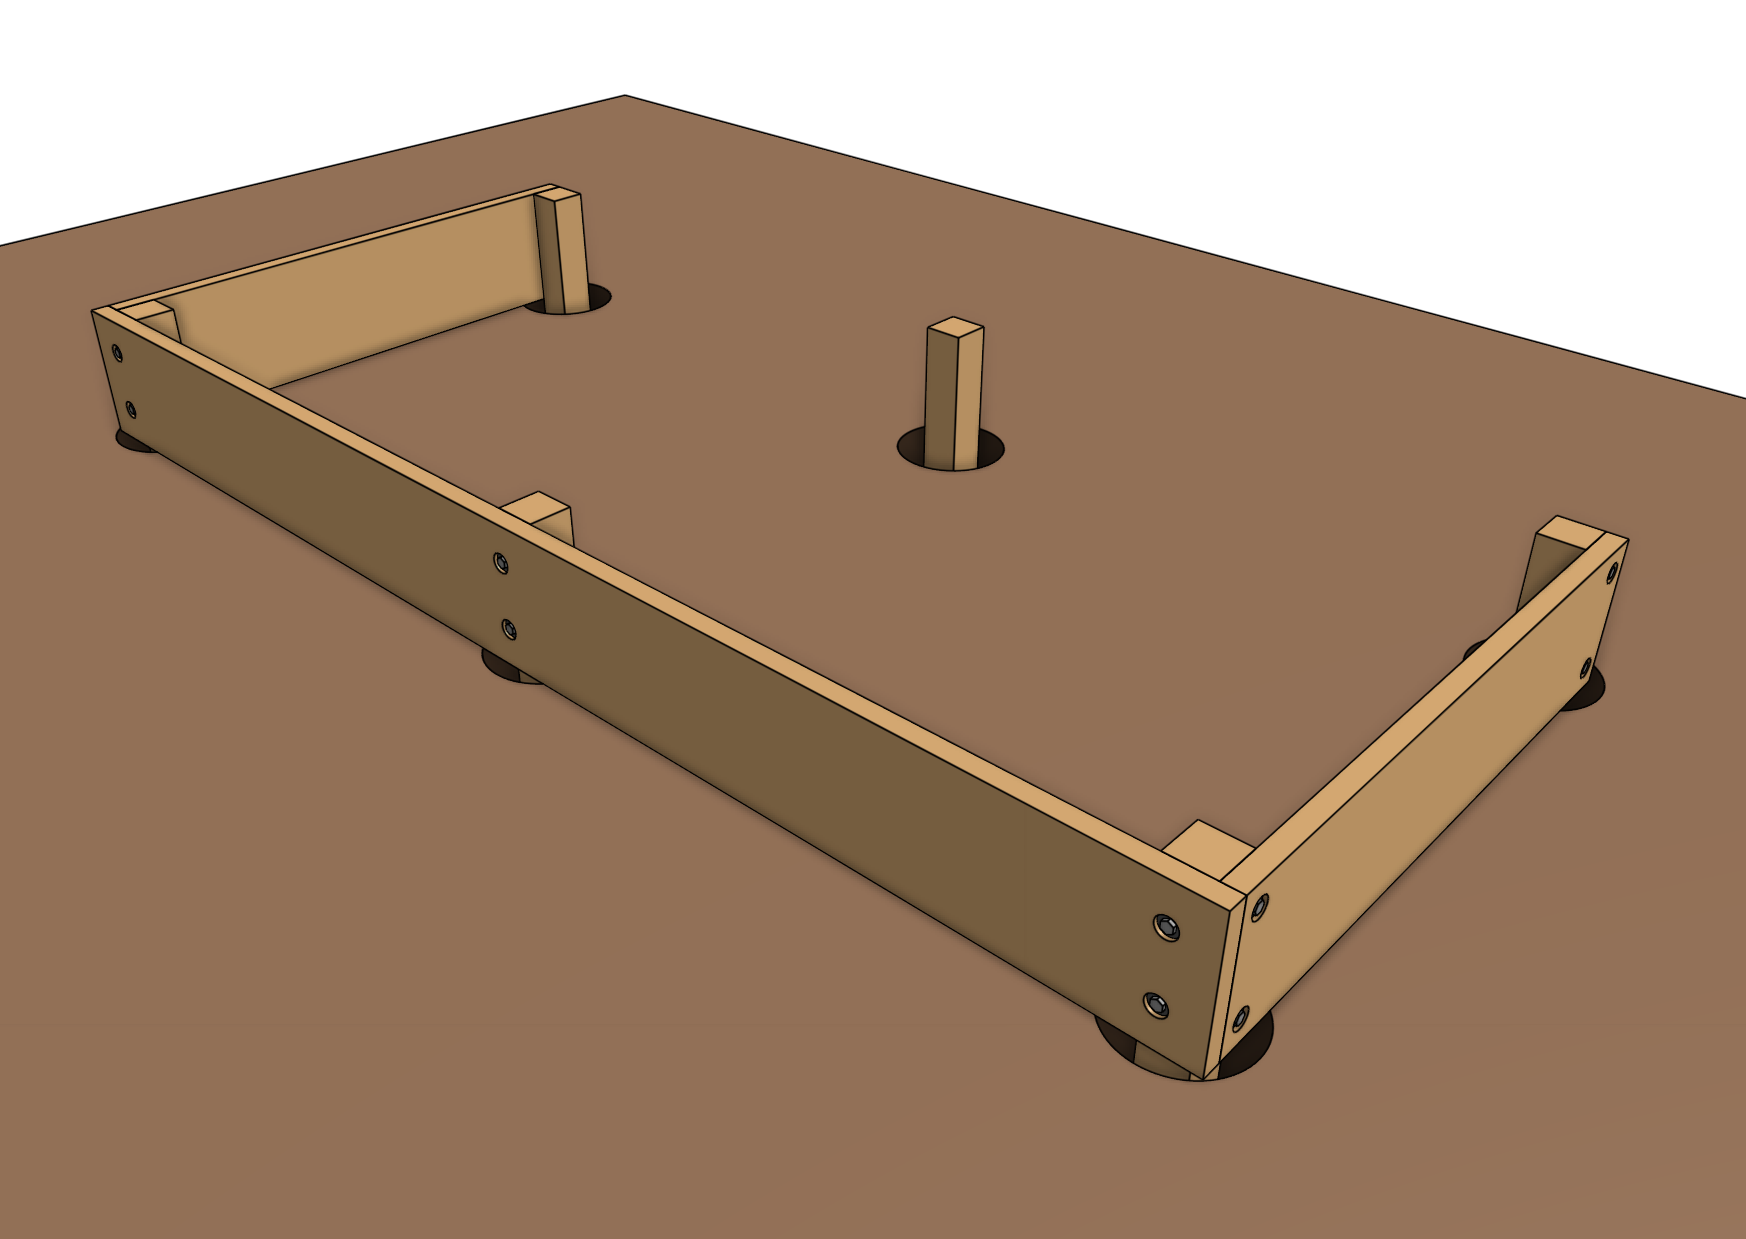

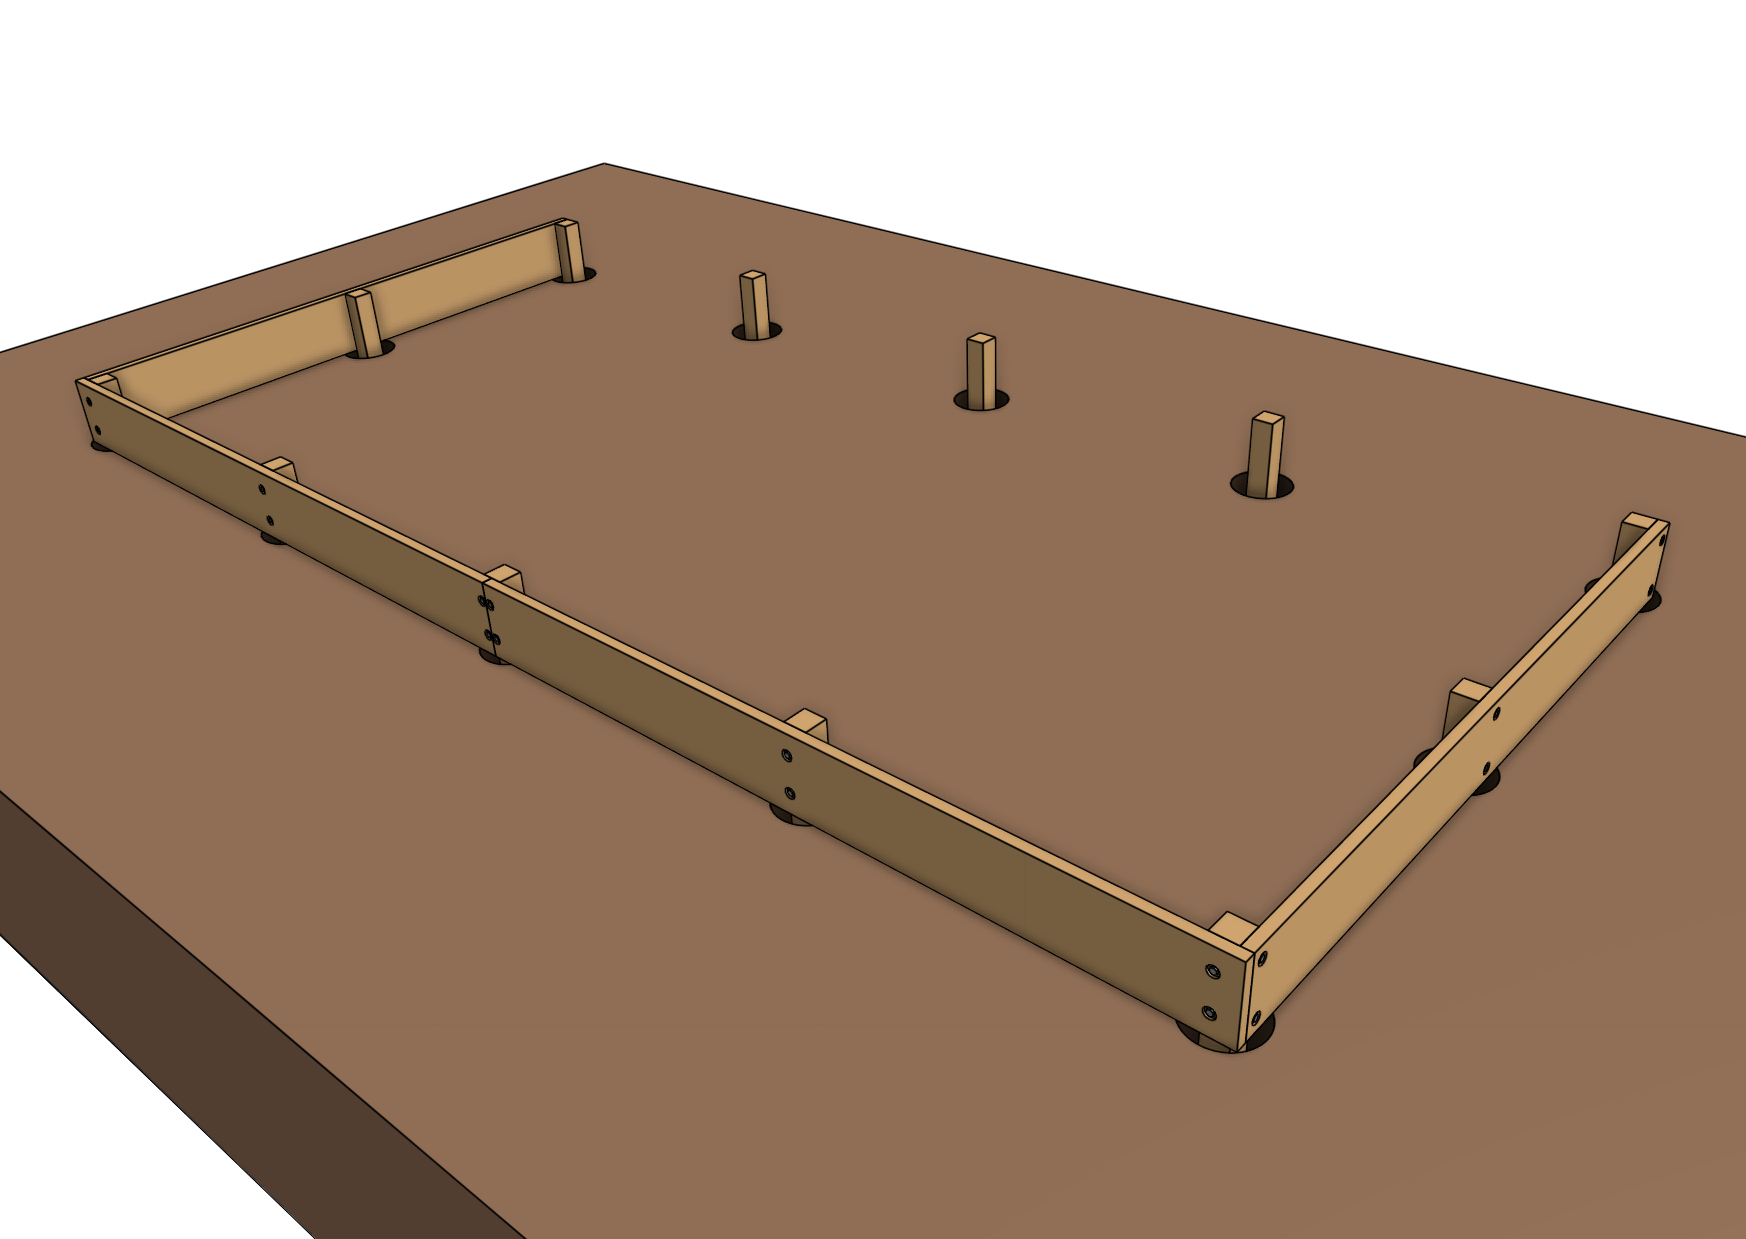
Repeat for the remaining long wall(s) on the opposite side of the bed.
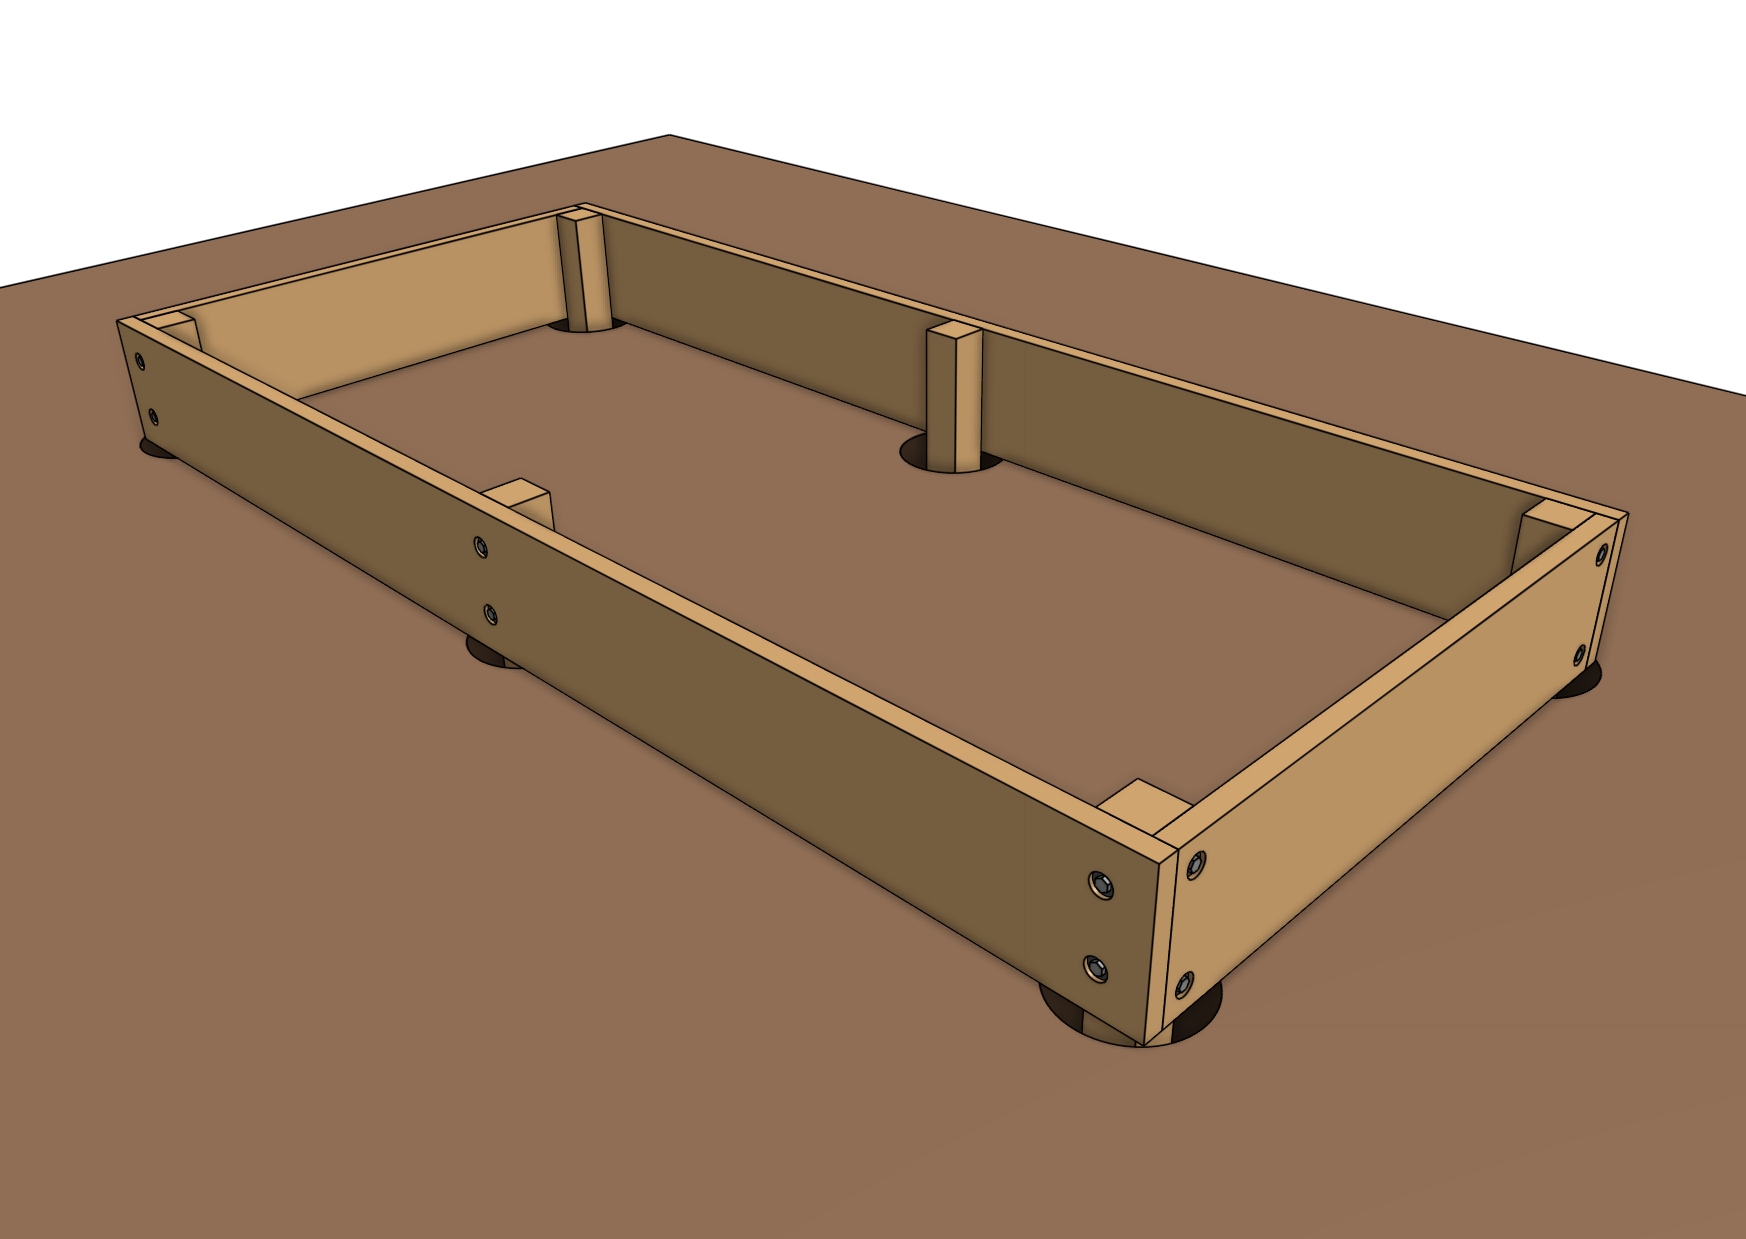

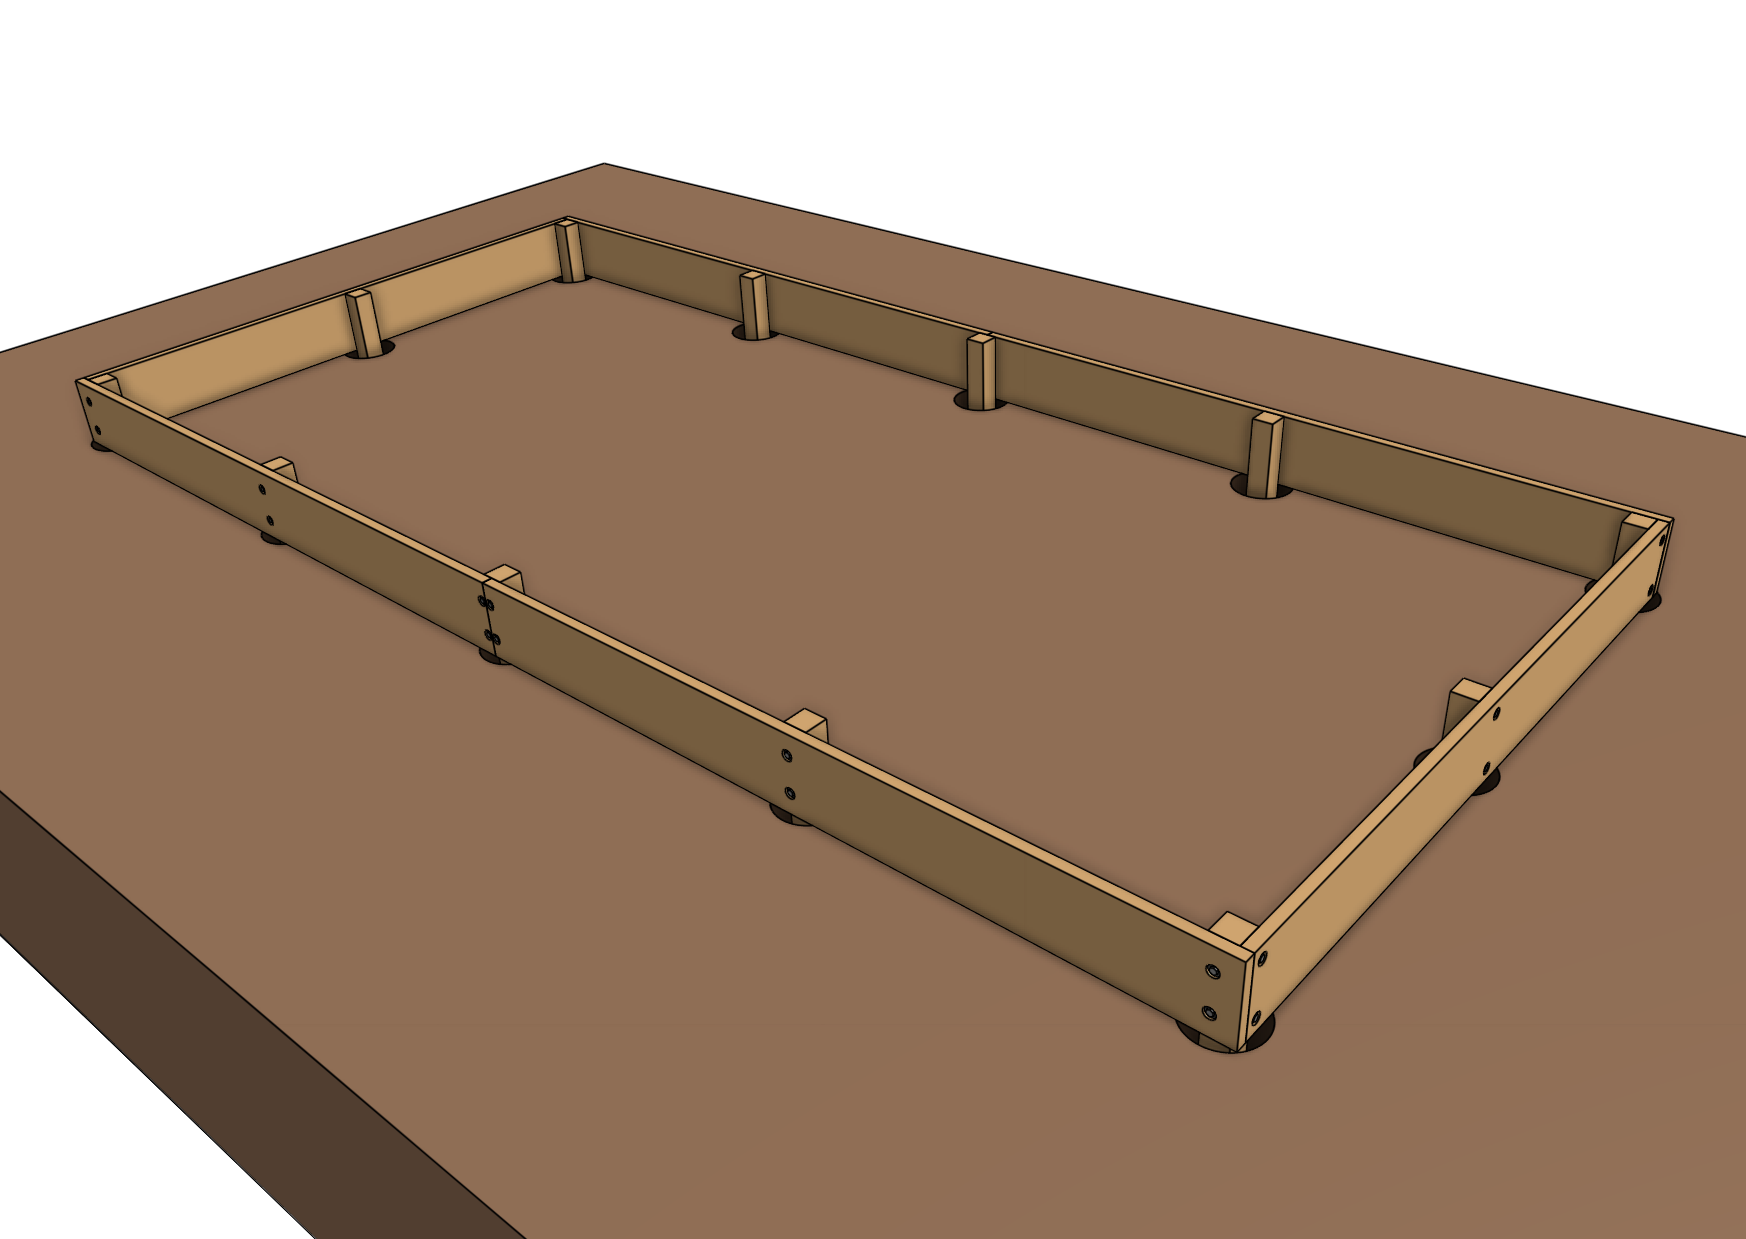
Step 7: Attach the cable carrier supports
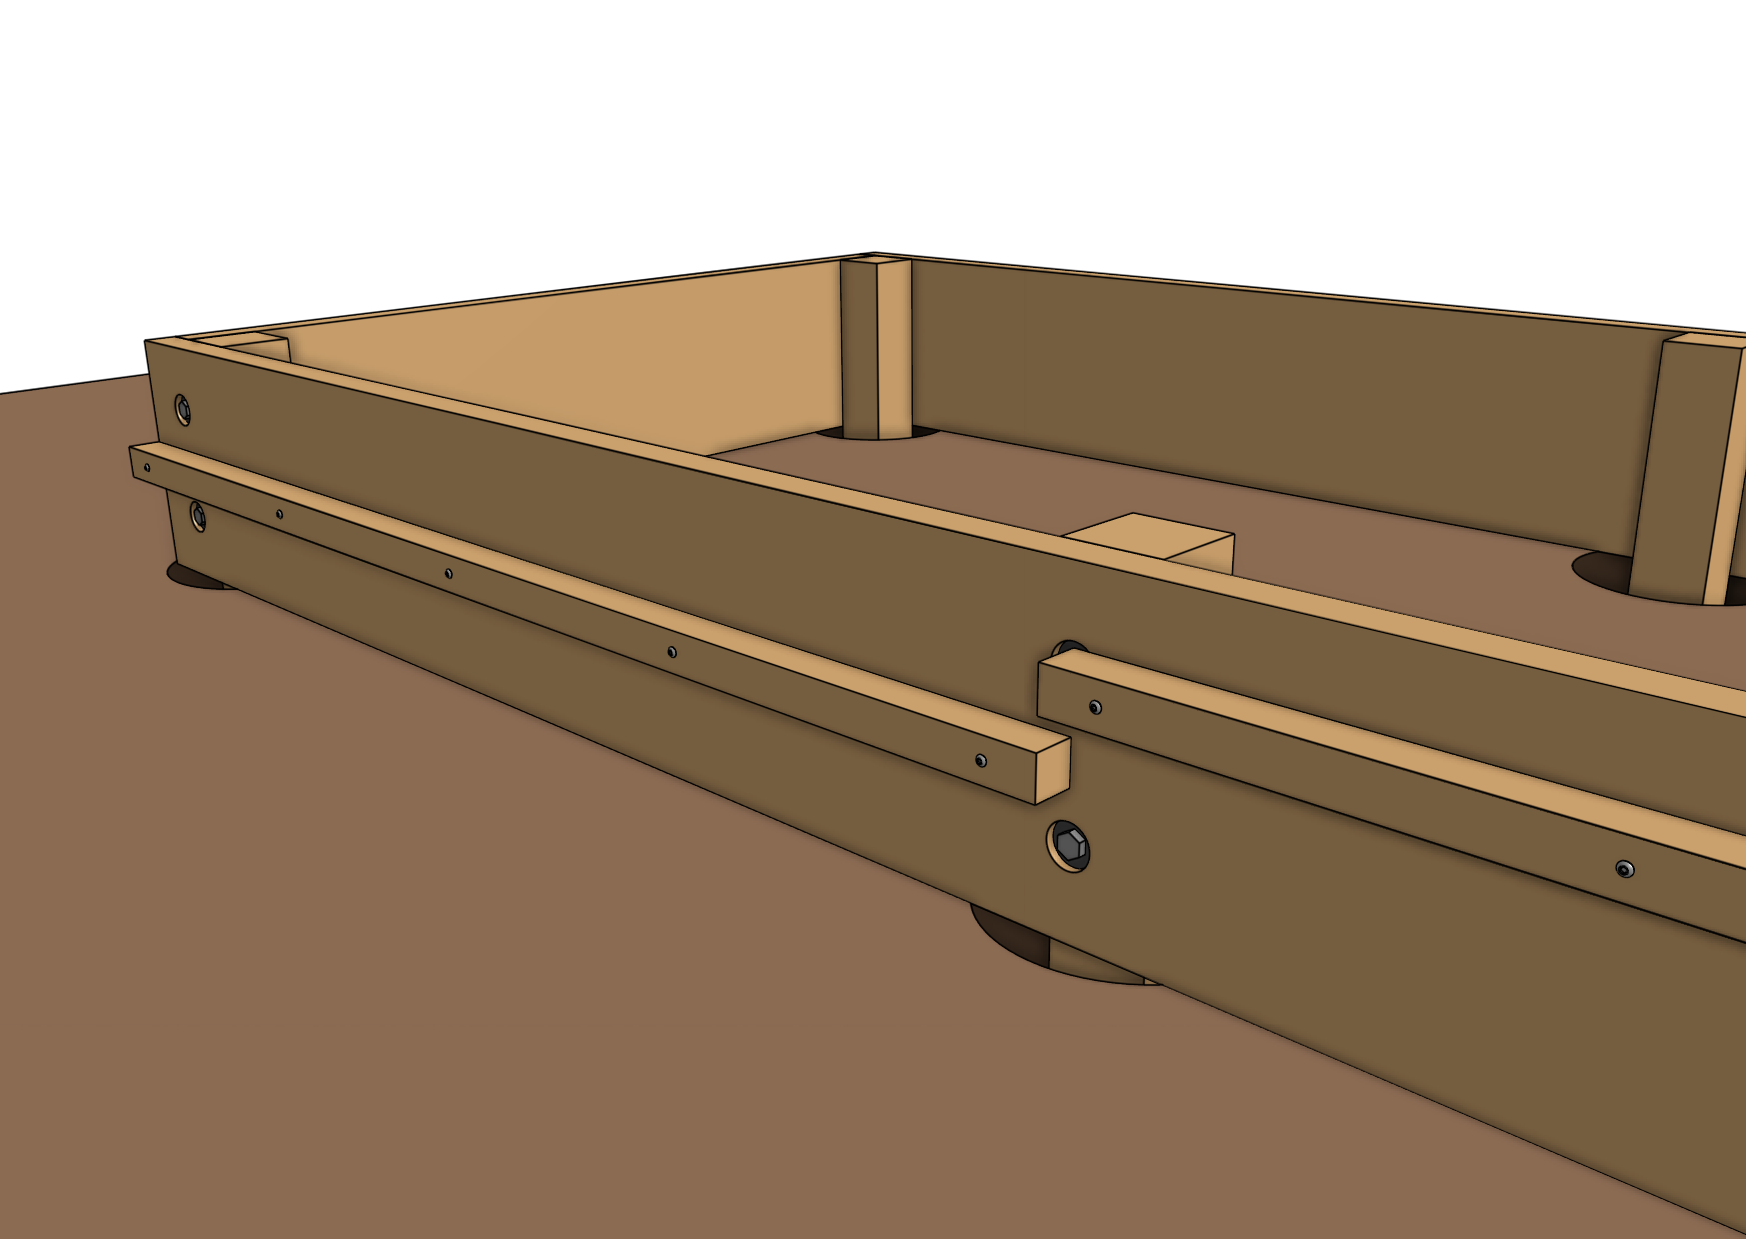
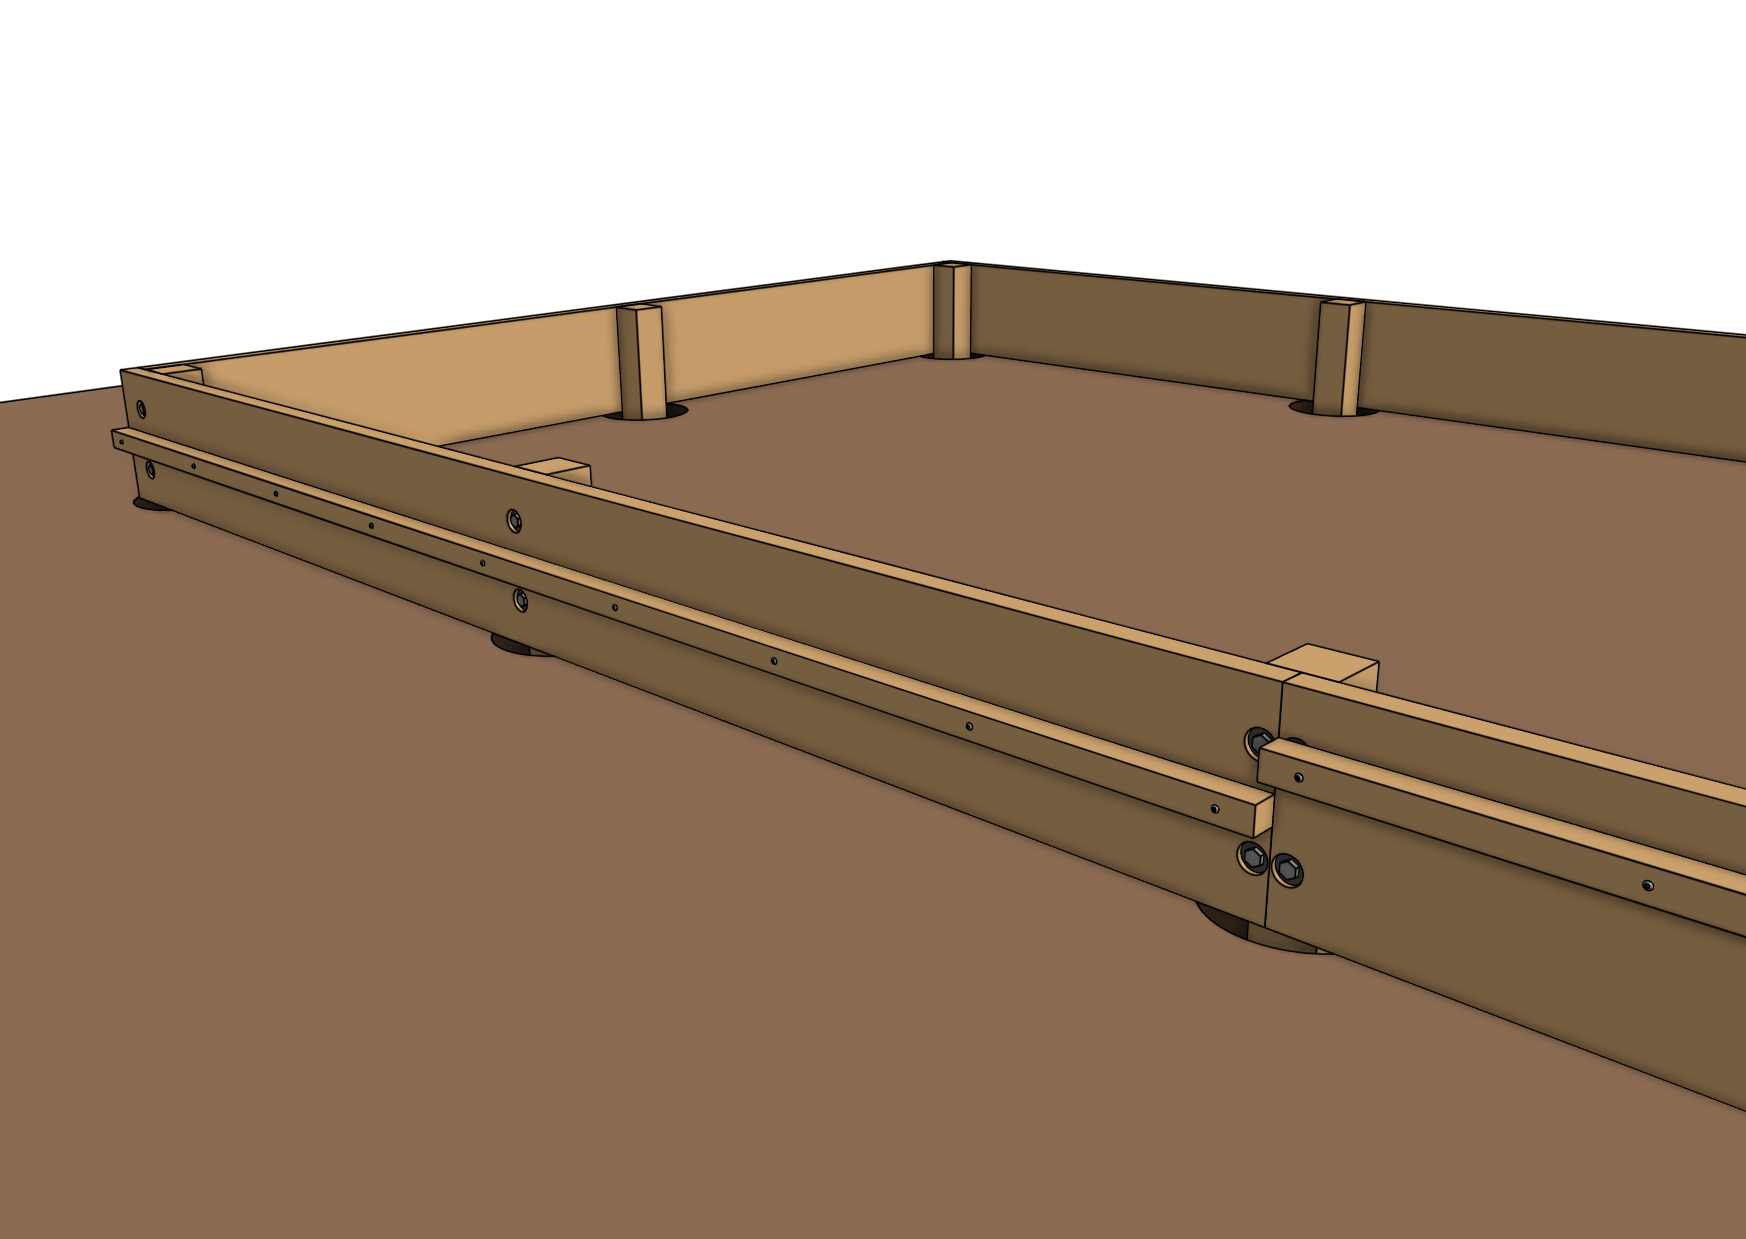
Attach the upper cable carrier support to the long wall using T25 x 75mm wood screws or equivalent. The cable carrier support should be positioned on the long wall where you plan to have your FarmBot’s electronics box (the left long wall when looking at the front of the FarmBot). The top of the support should be positioned 60mm from the top of the bed.
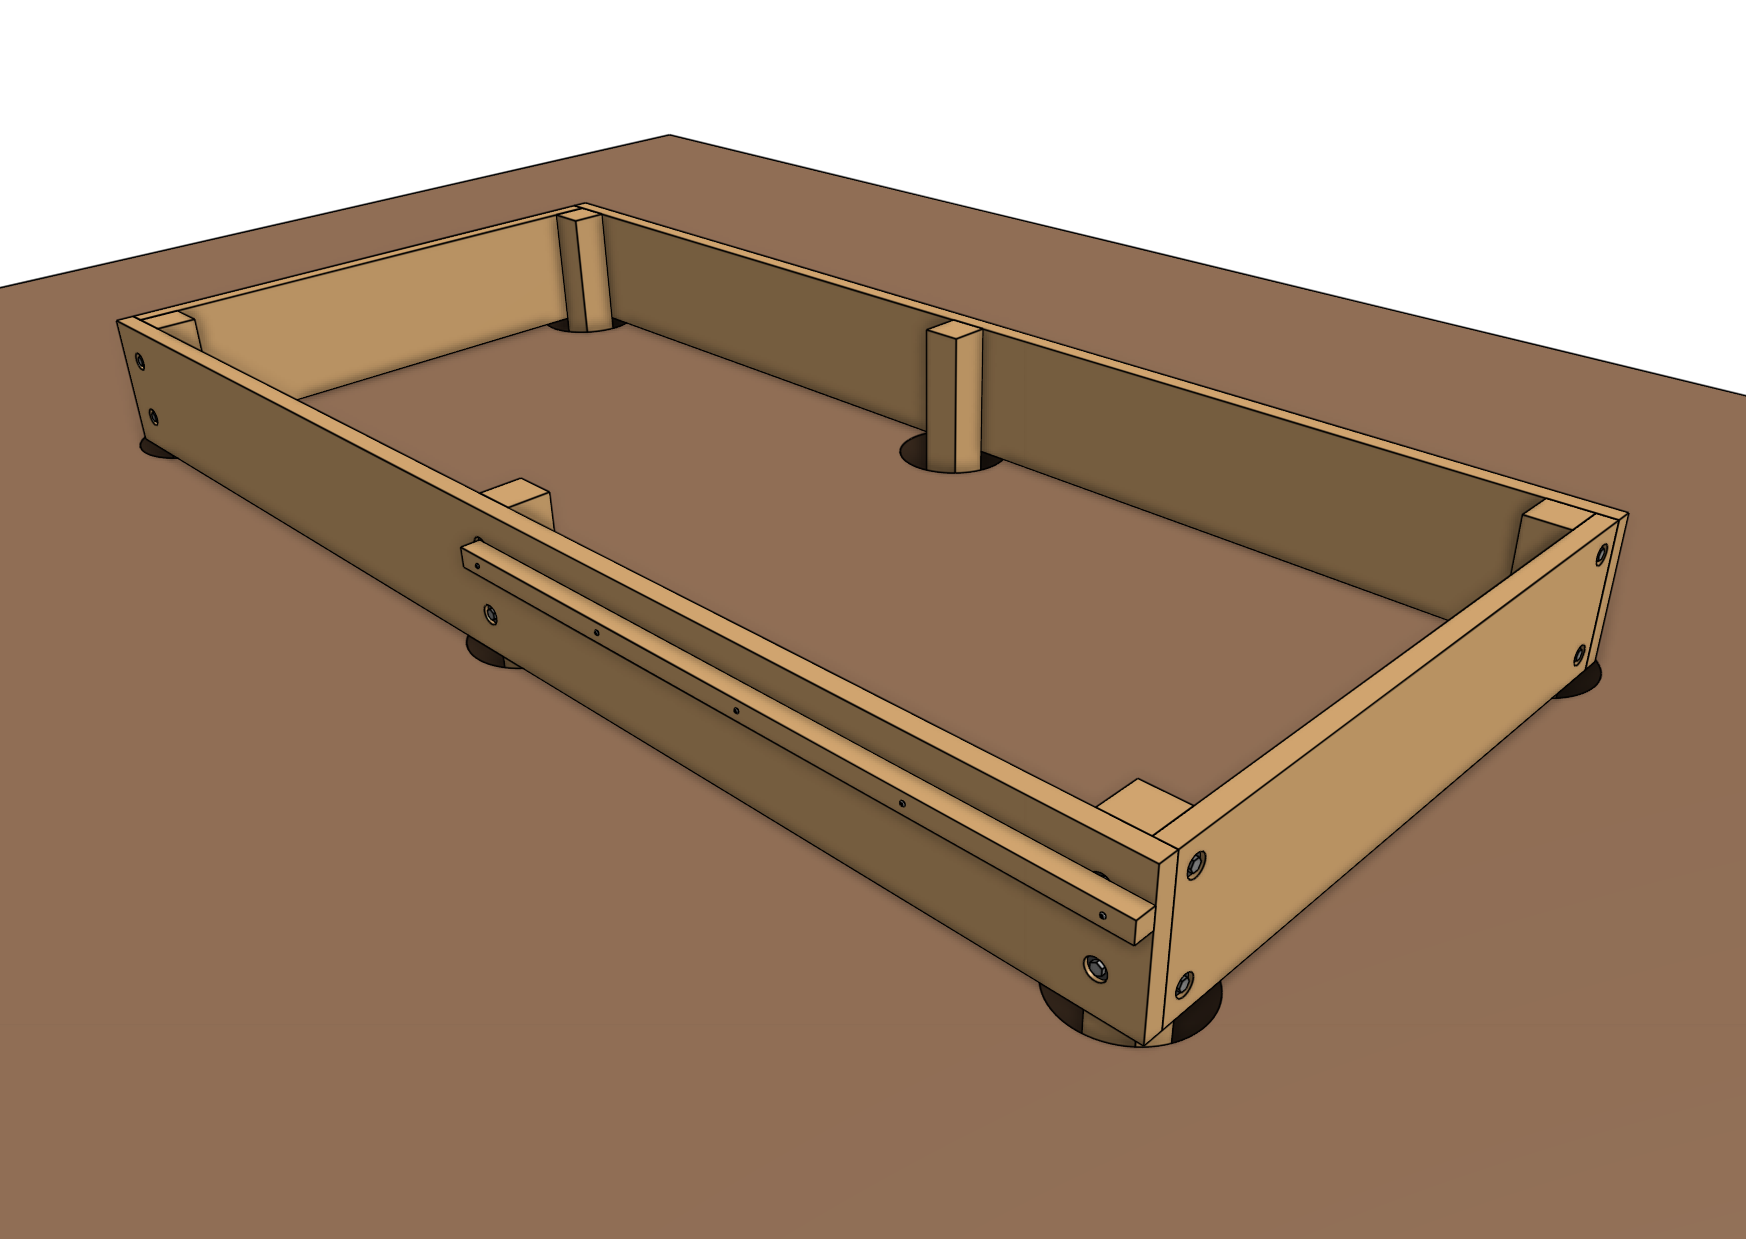

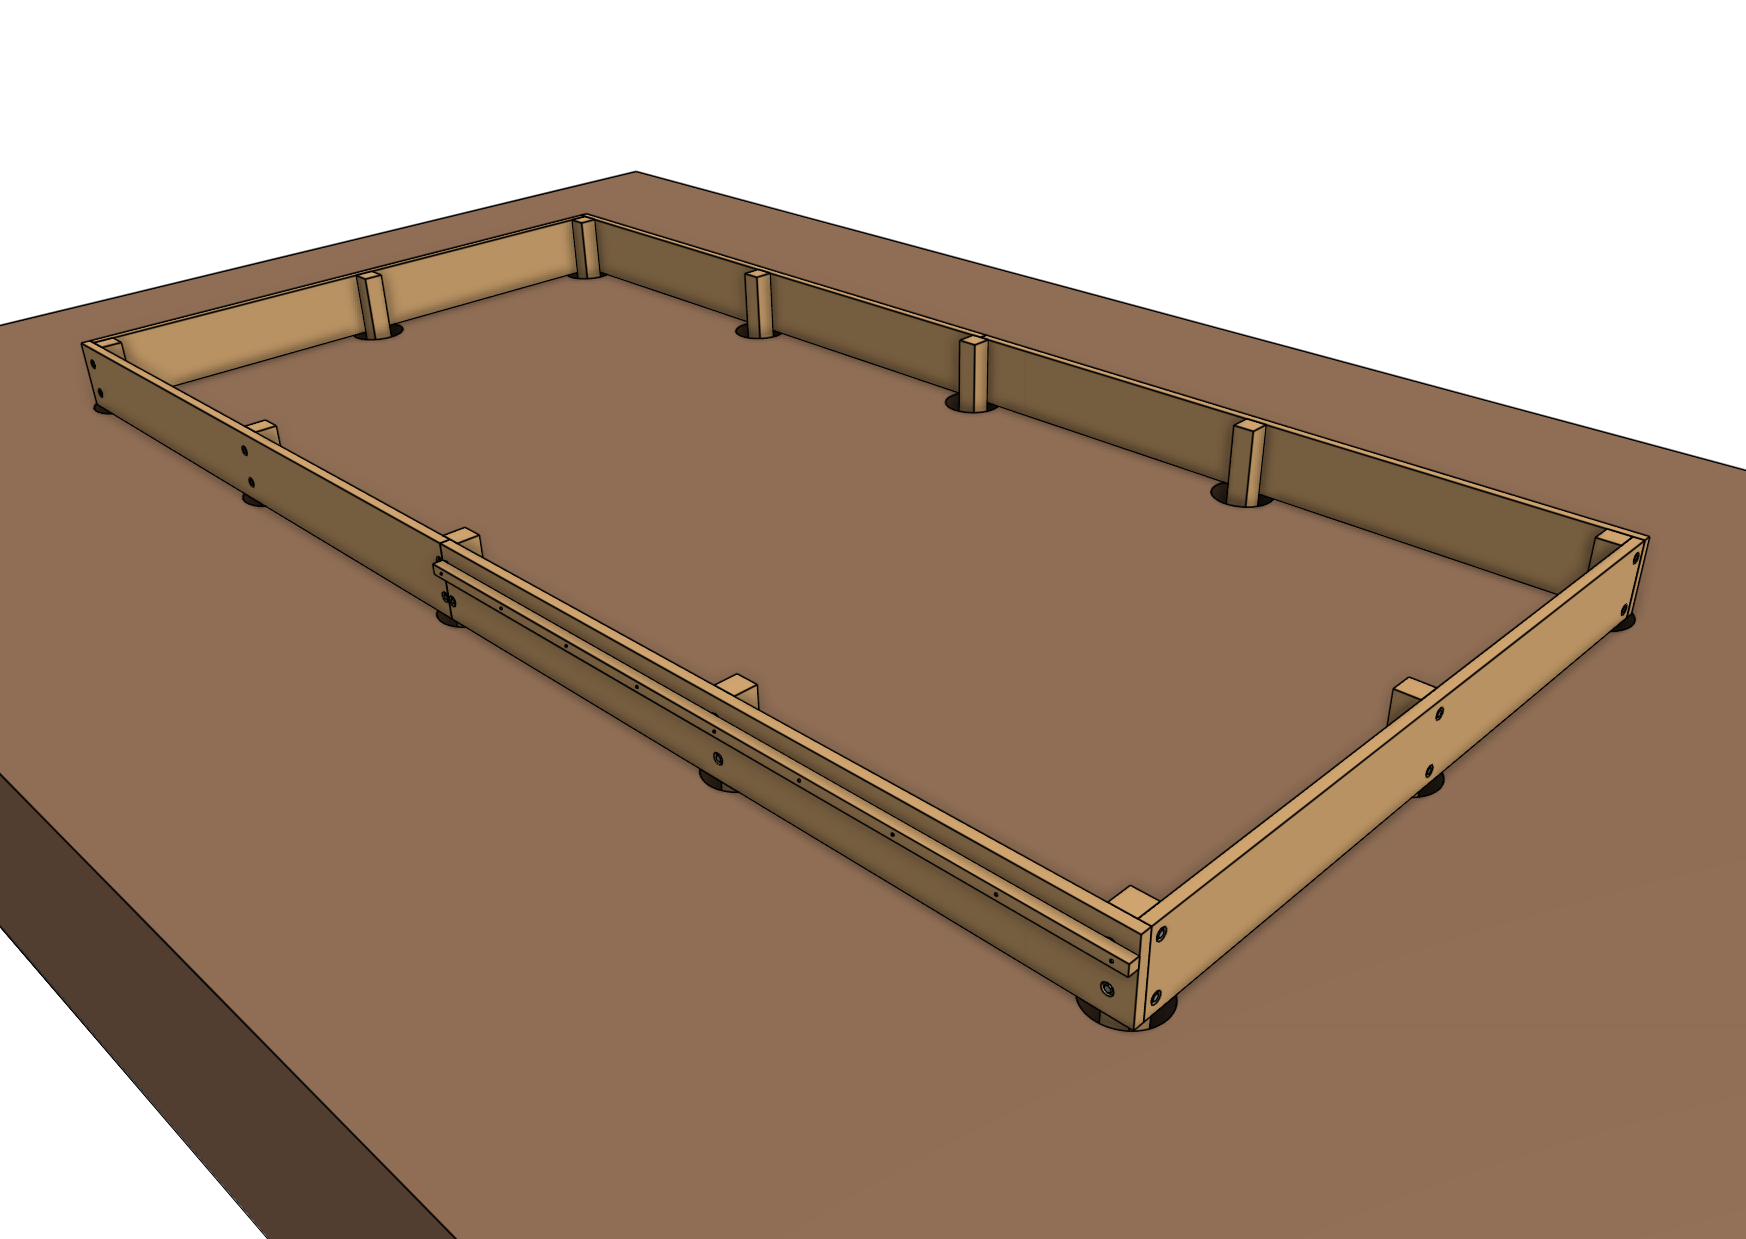
Attach the lower cable carrier support to the long wall using T25 x 75mm wood screws or equivalent. The top surface should be positioned 20mm or more below the bottom surface of the first support.

Step 8: Install tensioning cables (optional)
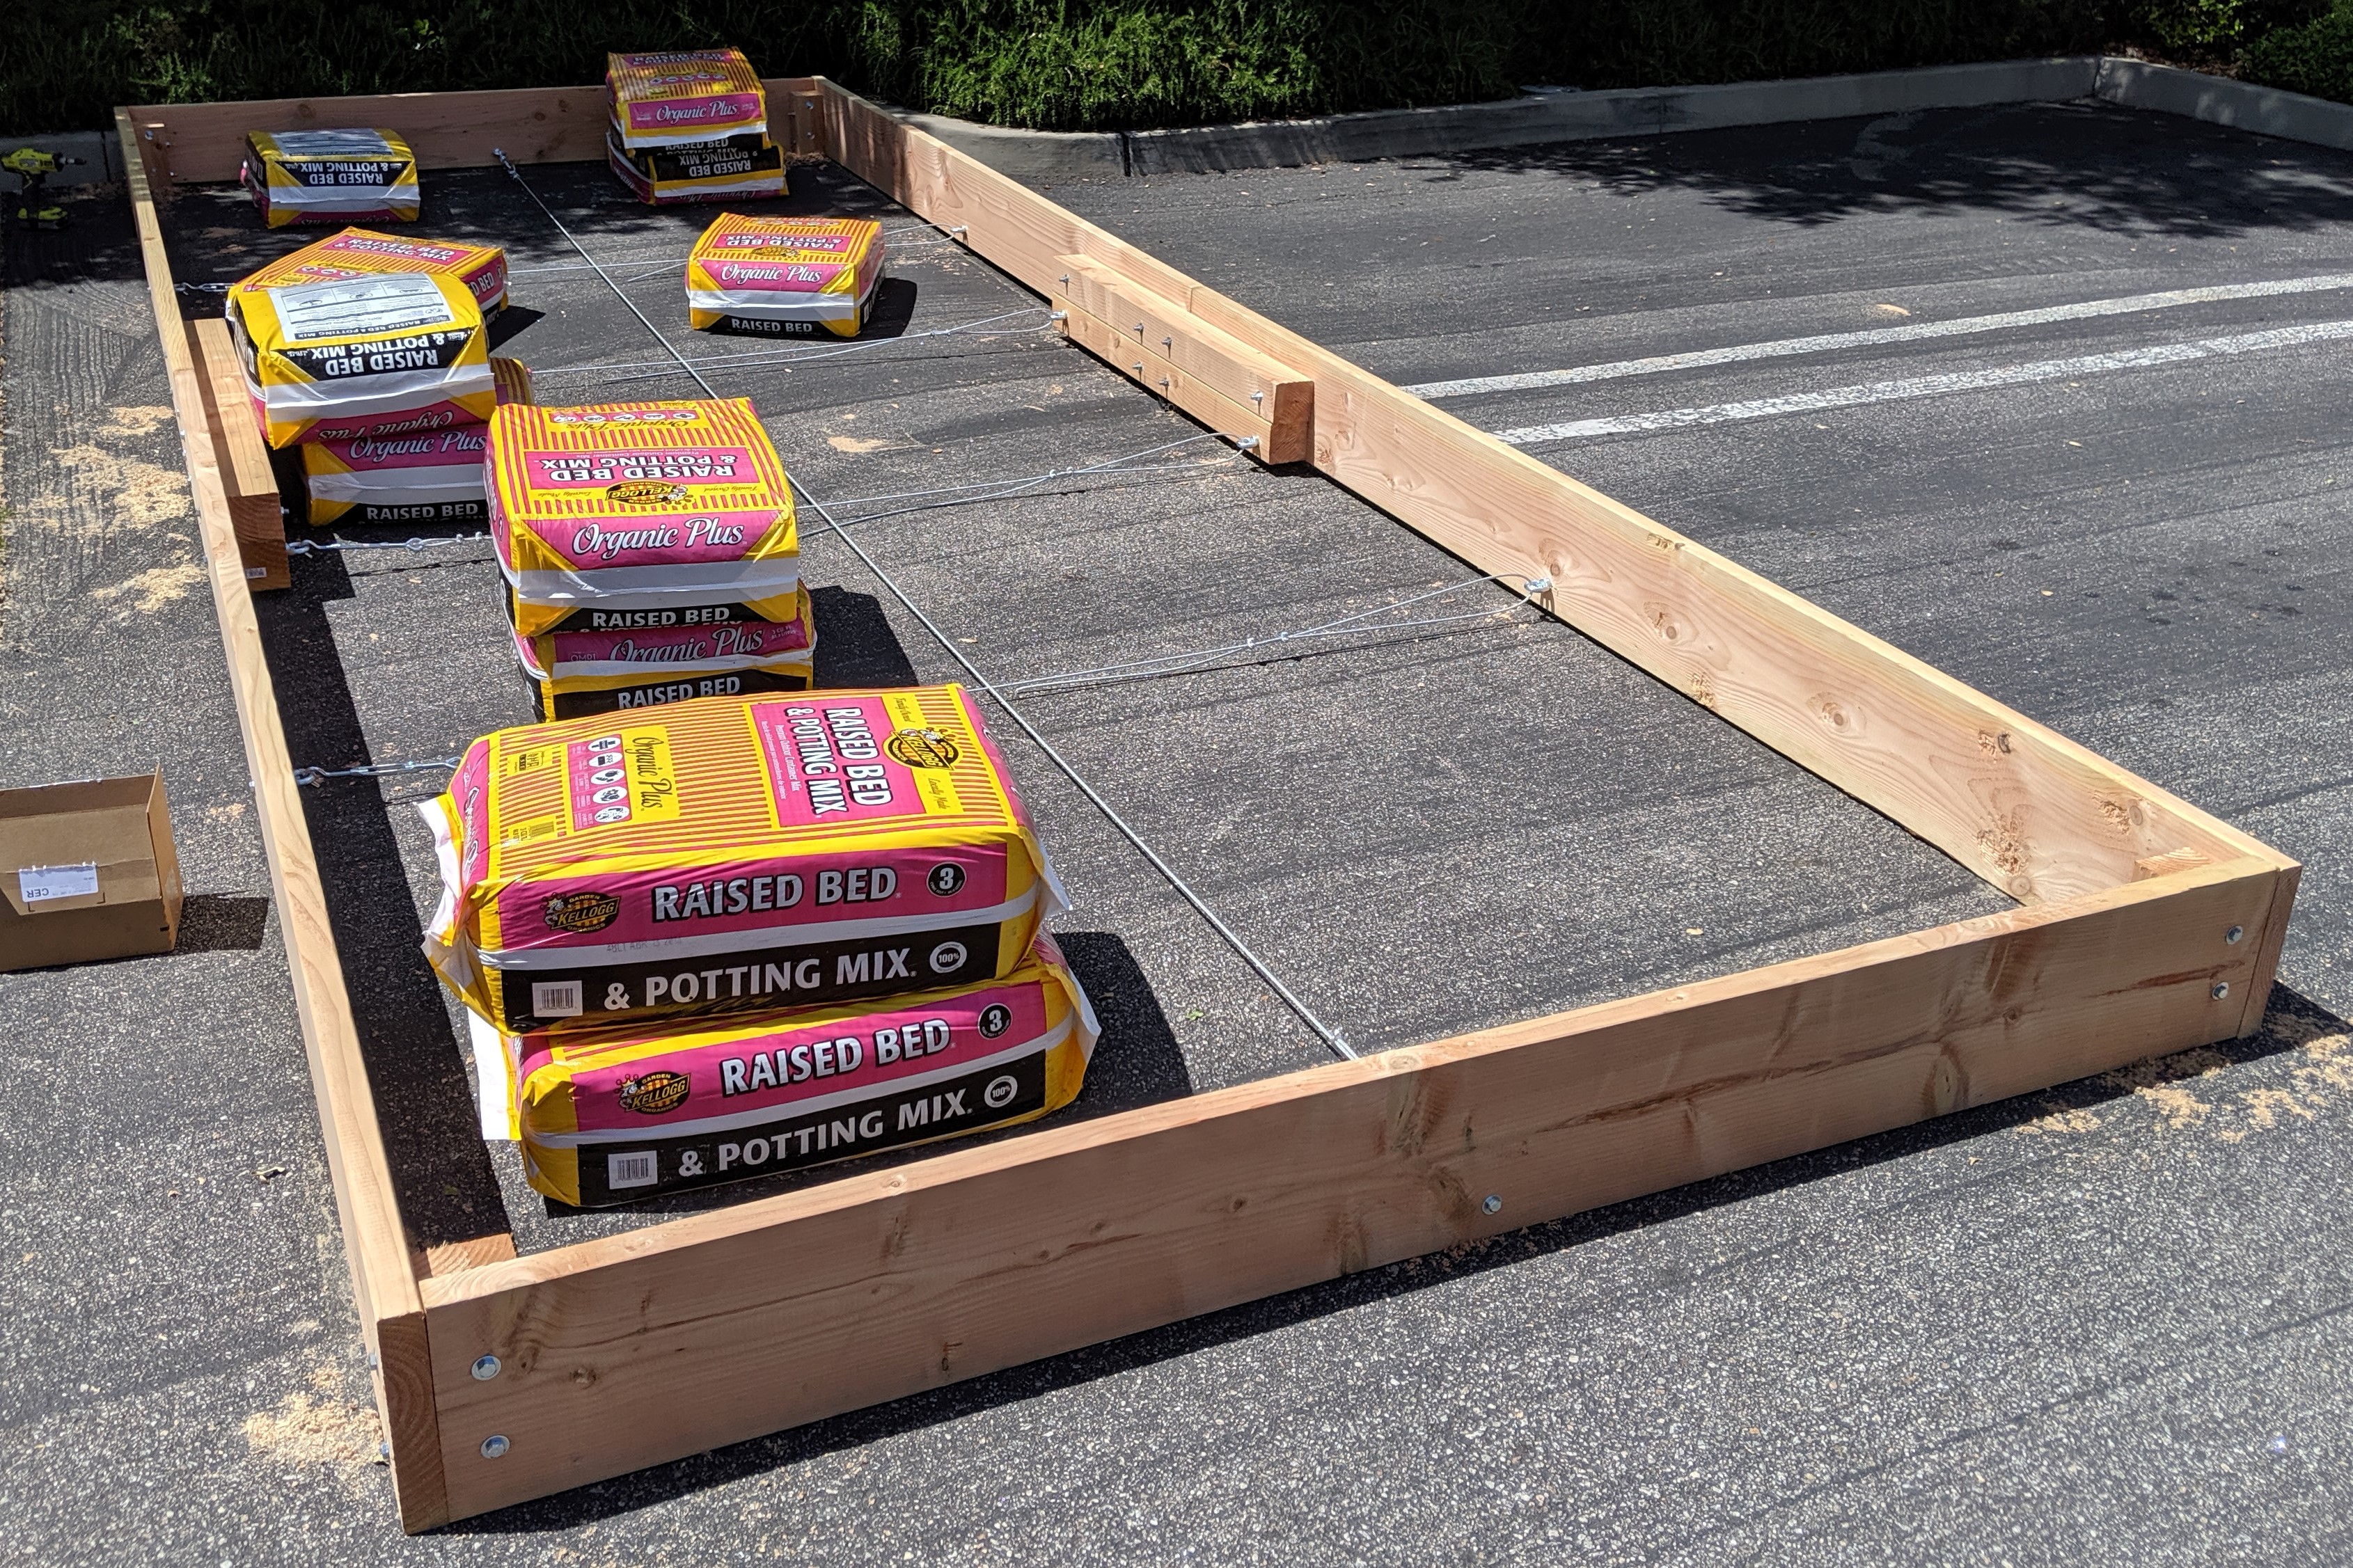
With larger raised beds, especially those for FarmBot Genesis XL, it is possible that expansion and contraction of the soil will cause the longer sides of the raised bed to bend outwards, causing track misalignment. If you think that your bed will not be sturdy enough to resist bending, consider adding stainless steel tensioning cables every 3m to prevent the long sides of the bed from being pushed away from each other. The cables should be positioned in the lower half of the bed so they do not interfere with the FarmBot’s tools once buried in the soil.


Step 9: Fill the bed
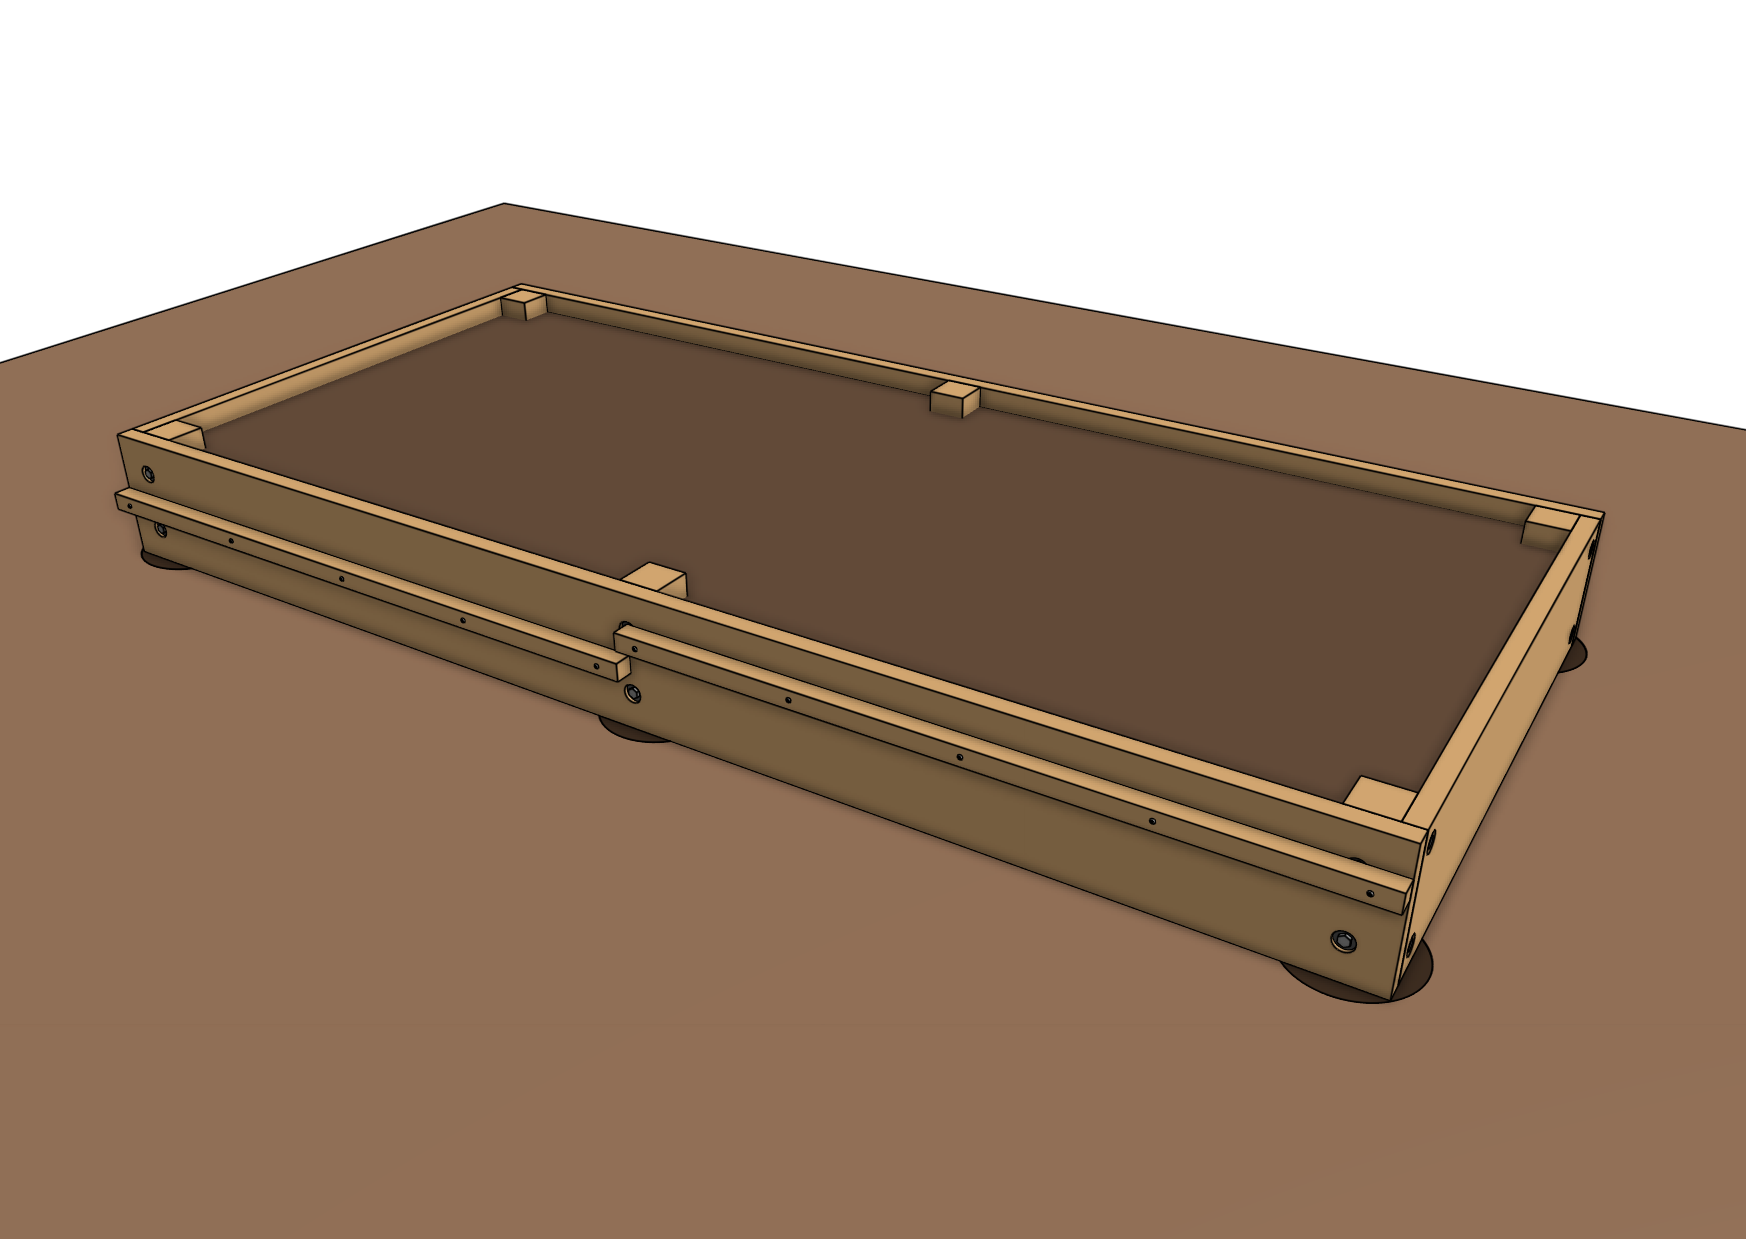
Back-fill the post holes with native soil, making sure to compact around the posts to reduce movement. Then fill the bed with gardening soil or a mix of native soil and compost, keeping out large rocks and branches. The Genesis bed will require approximately 1m2 of soil, while the Genesis XL bed will require approximately 4m2.

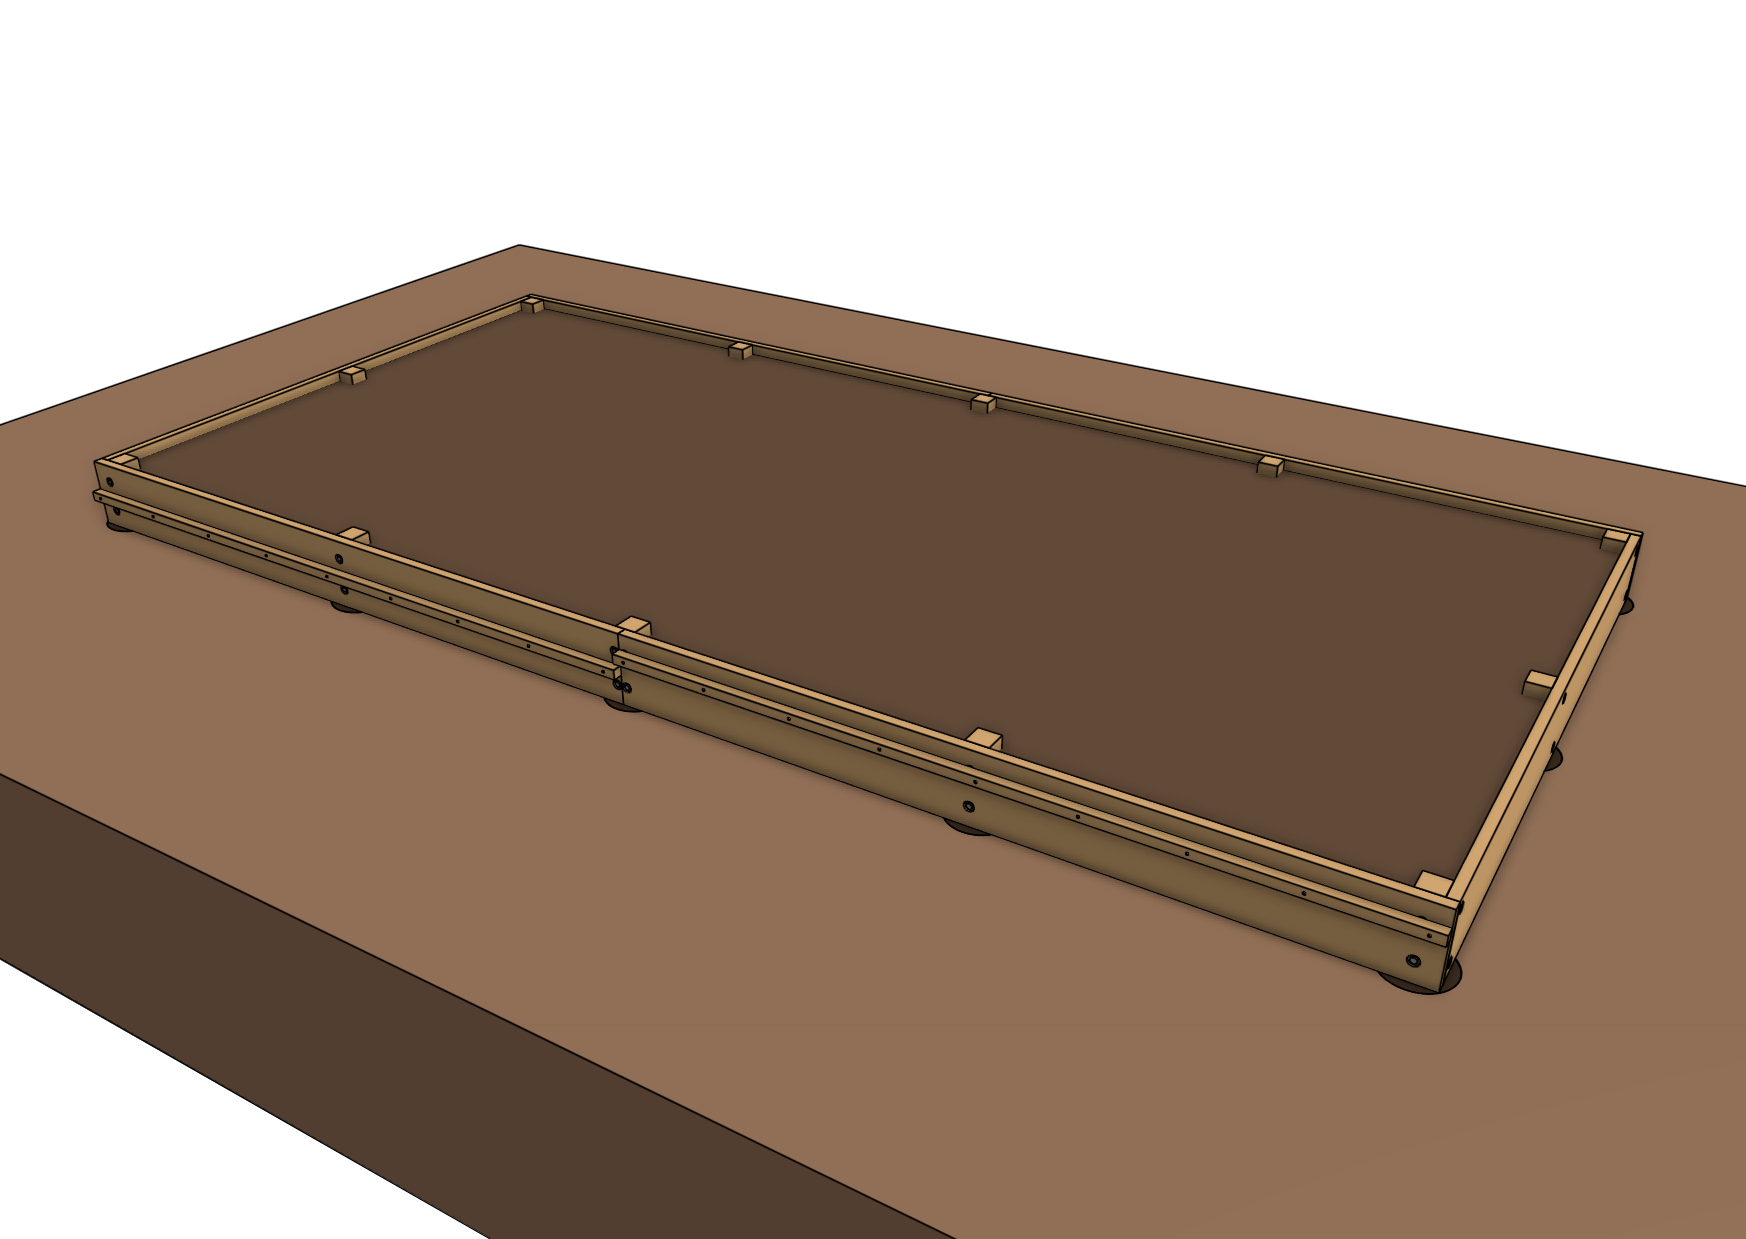
Congrats!
Your raised bed is now ready for your FarmBot installation.