Plug Everything In
- Step 1: Connect the peripherals
- Step 2: Plug in the stepper motors and rotary encoders
- Step 3: Plug in the camera
- Step 4: Plug in the UTM cable
- Step 5: Plug the power supply into the Farmduino
- Step 6: Insert the supergland
- Step 7: Mount the power supply
- Step 8: Plug the power supply into the wall
- What’s next?
The power supply should still be unplugged at this time.
All cables go through the slot
Before proceeding with plugging everything in, remove the black rubber supergland from the slot in the bottom of the electronics box.
When plugging in cables in the following steps, ensure that you pass every cable through the slot in the bottom of the electronics box. Once everything is connected to the electronics, you will organize all of the cables into the supergland, and then push the supergland back into the slot.
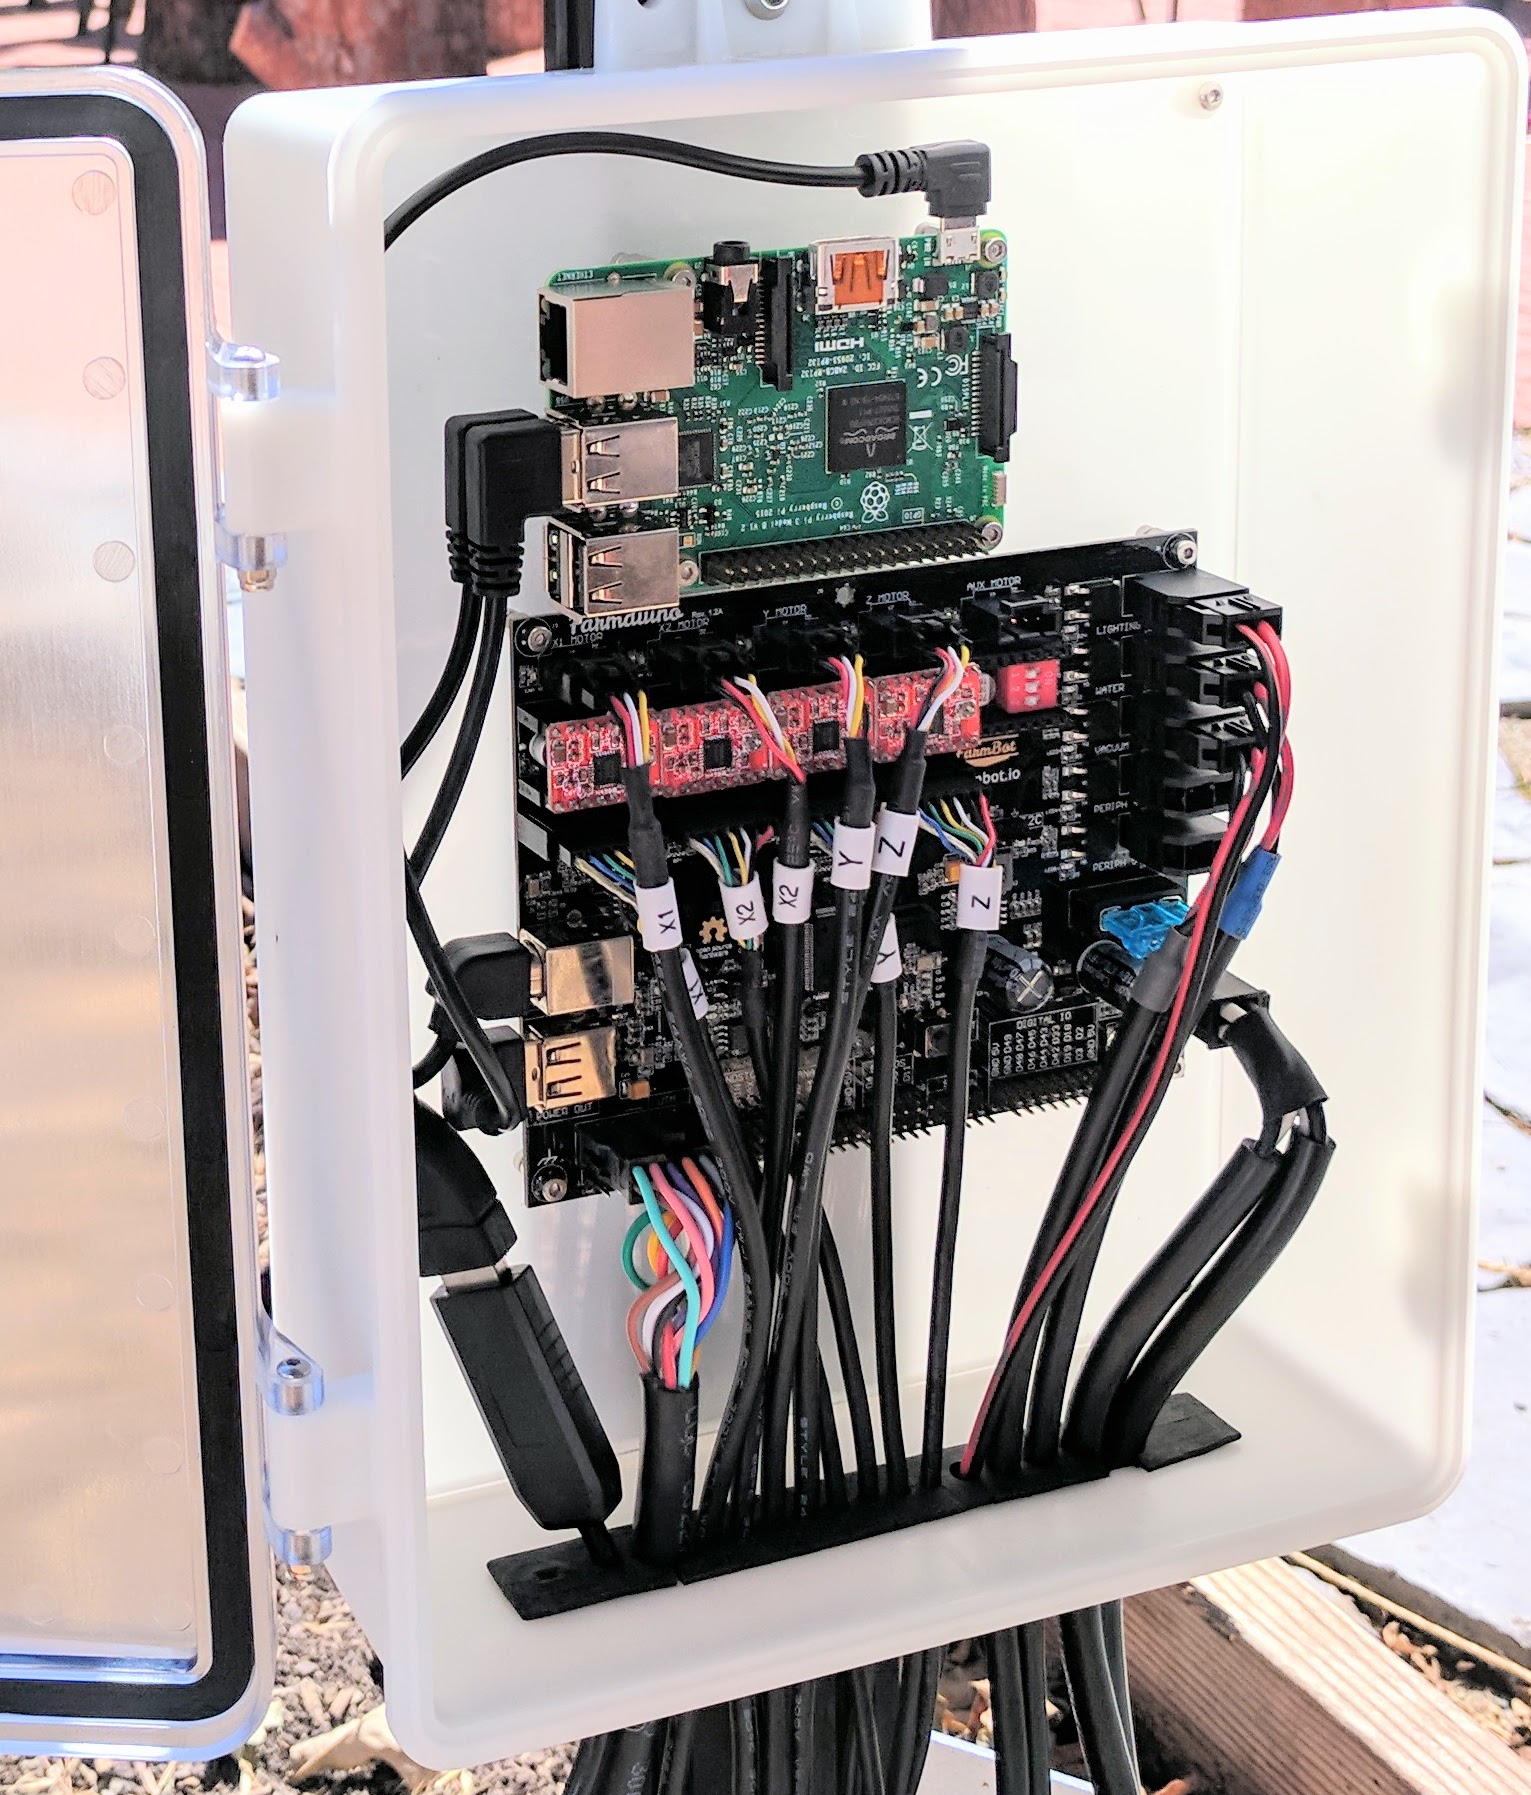
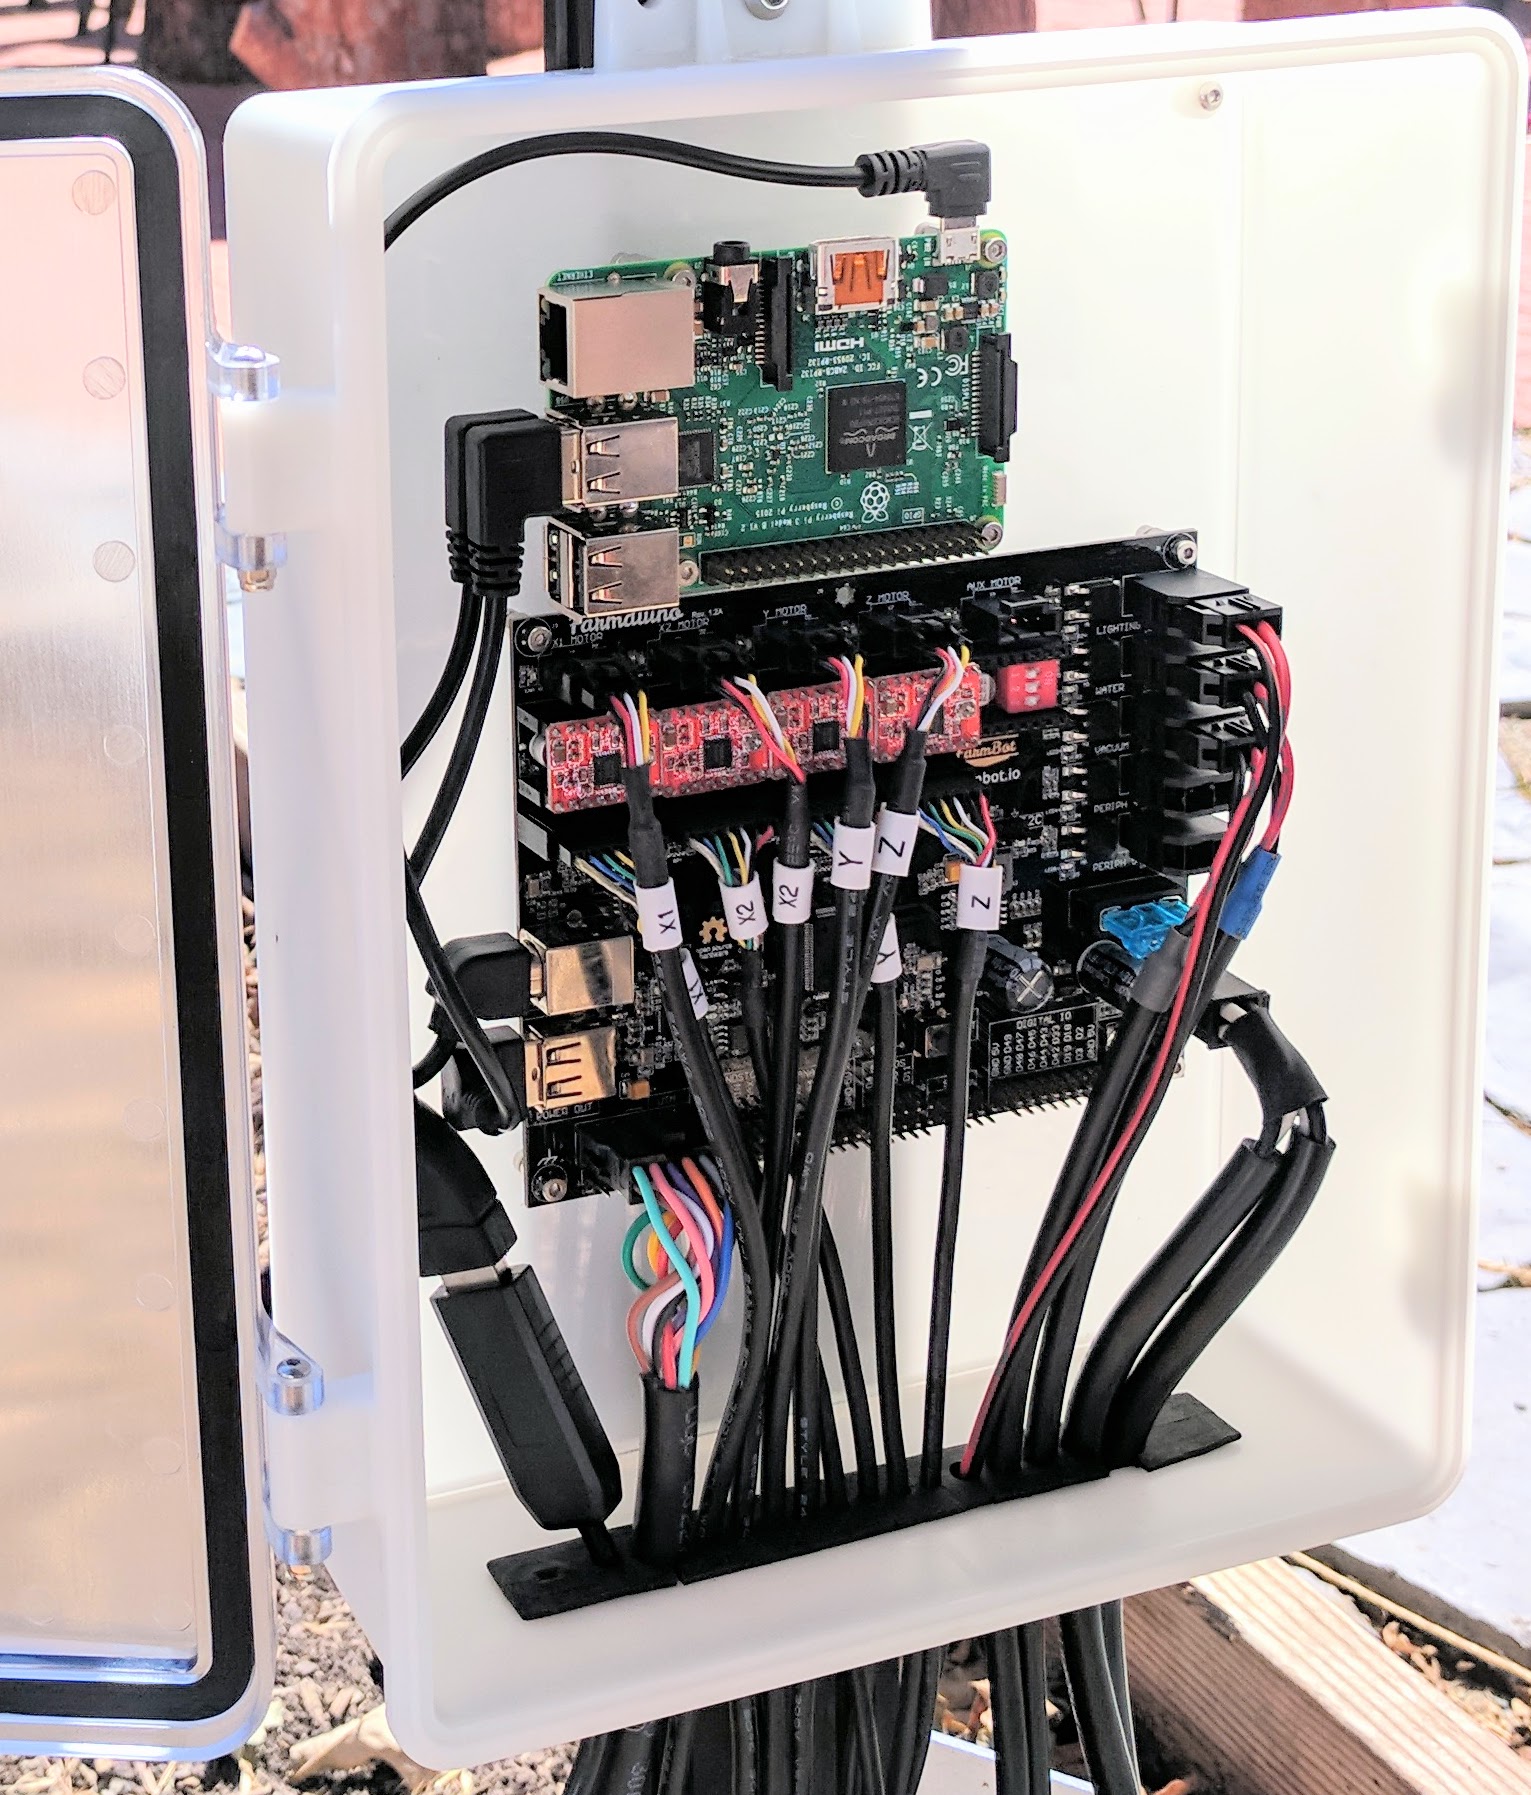
Note: the electronics box will look like the following image when everything is completed.
Step 1: Connect the peripherals
- Connect the LED lights to the Farmduino peripheral connector labelled
LIGHTING(the top right connector on Farmduino). The connector will only fit in one direction. - Connect the solenoid valve cable (with blue heat shrink) to the Farmduino peripheral connector labelled
WATER(directly underneath the lighting connector). The connector will only fit in one direction. - Connect the vacuum pump cable (with gray heat shrink) to the Farmduino peripheral connector labelled
VACUUM(directly underneath the water connector). The connector will only fit in one direction.
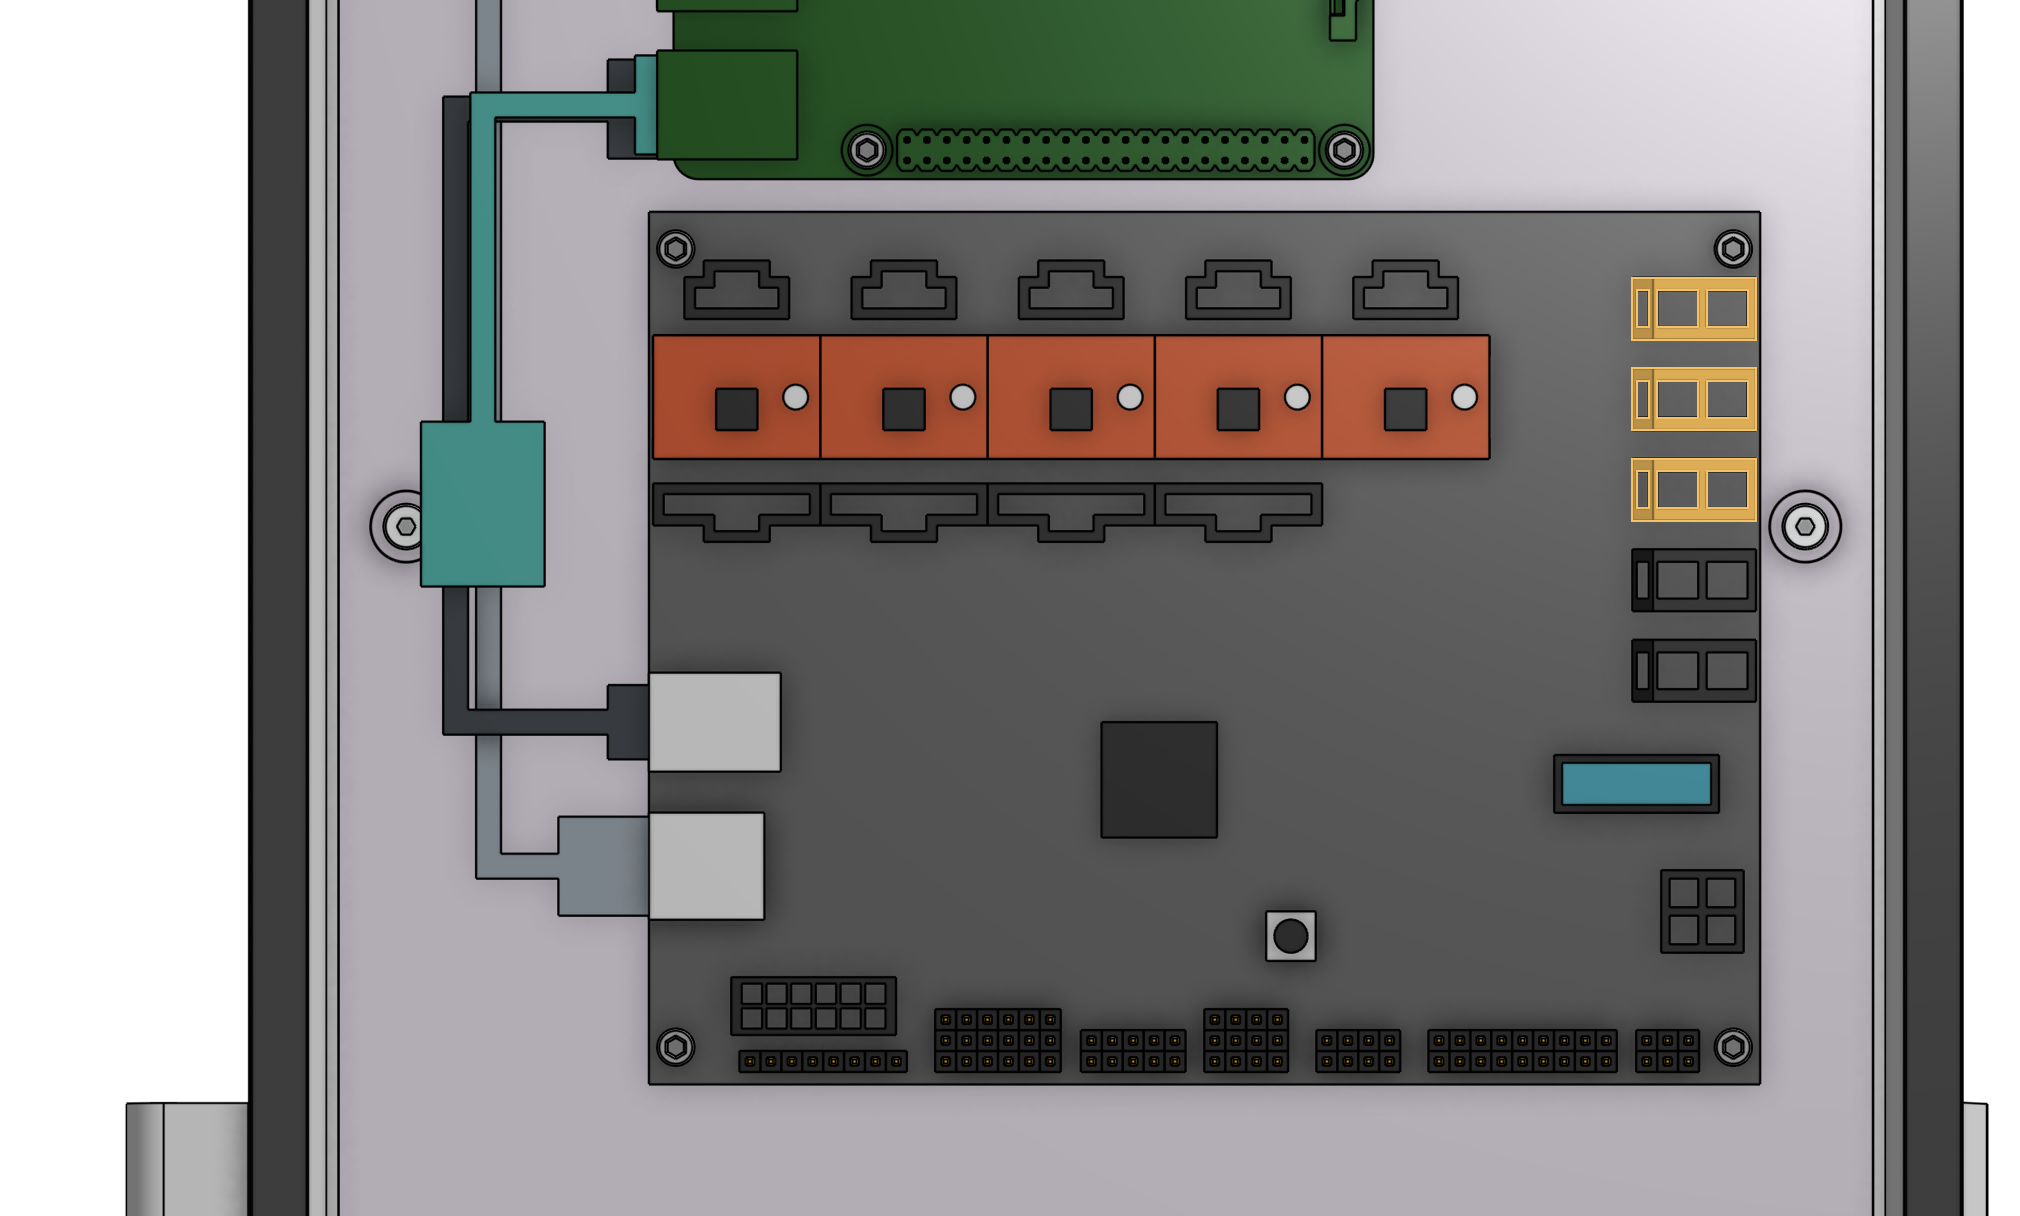
The peripheral connectors are highlighted in orange
See Farmduino Peripheral Pin Numbers for information about controlling the peripherals from the web app.
Step 2: Plug in the stepper motors and rotary encoders
Plug in the motor and encoder cables to the Farmduino. Each cable is labelled with a white sleeve, which corresponds to the connectors on the Farmduino. From left to right, the connectors on Farmduino are X1, X2, Y, and Z. Each connector can only be inserted in one direction, and has a locking tab to prevent it from falling out.
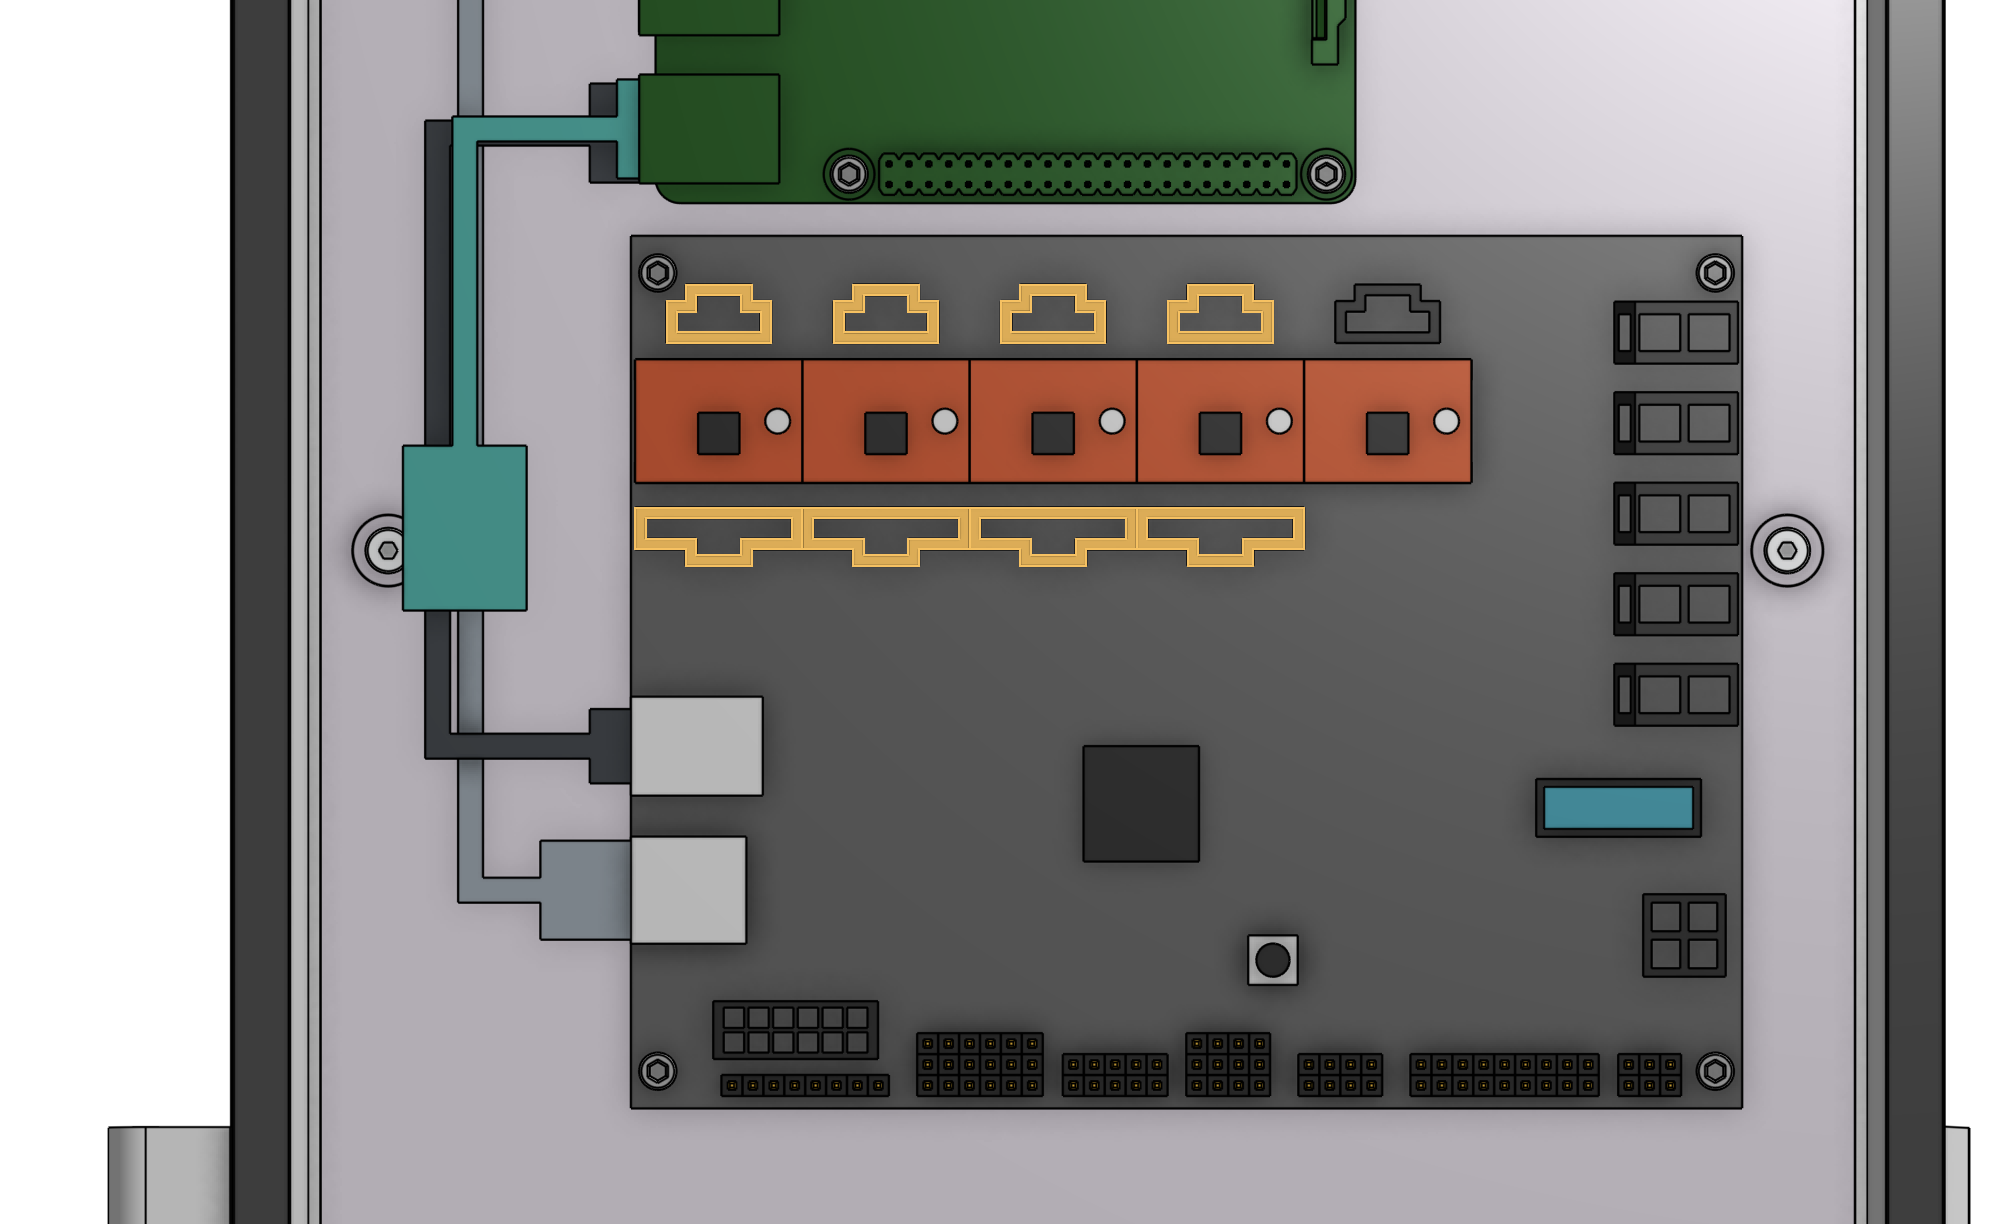
The motor and encoder connectors are highlighted in orange
Need to remove a cable?
Each connector has a locking tab which must be pressed in before a cable can be removed from the Farmduino. Be delicate when removing cables, as excessive force could damage the Farmduino.
We recommend slightly pushing the connector away from the locking tab (while you are pressing the locking tab in) to facilitate the tab and connector coming free.
Step 3: Plug in the camera
Plug in the camera to the USB adapter cable.
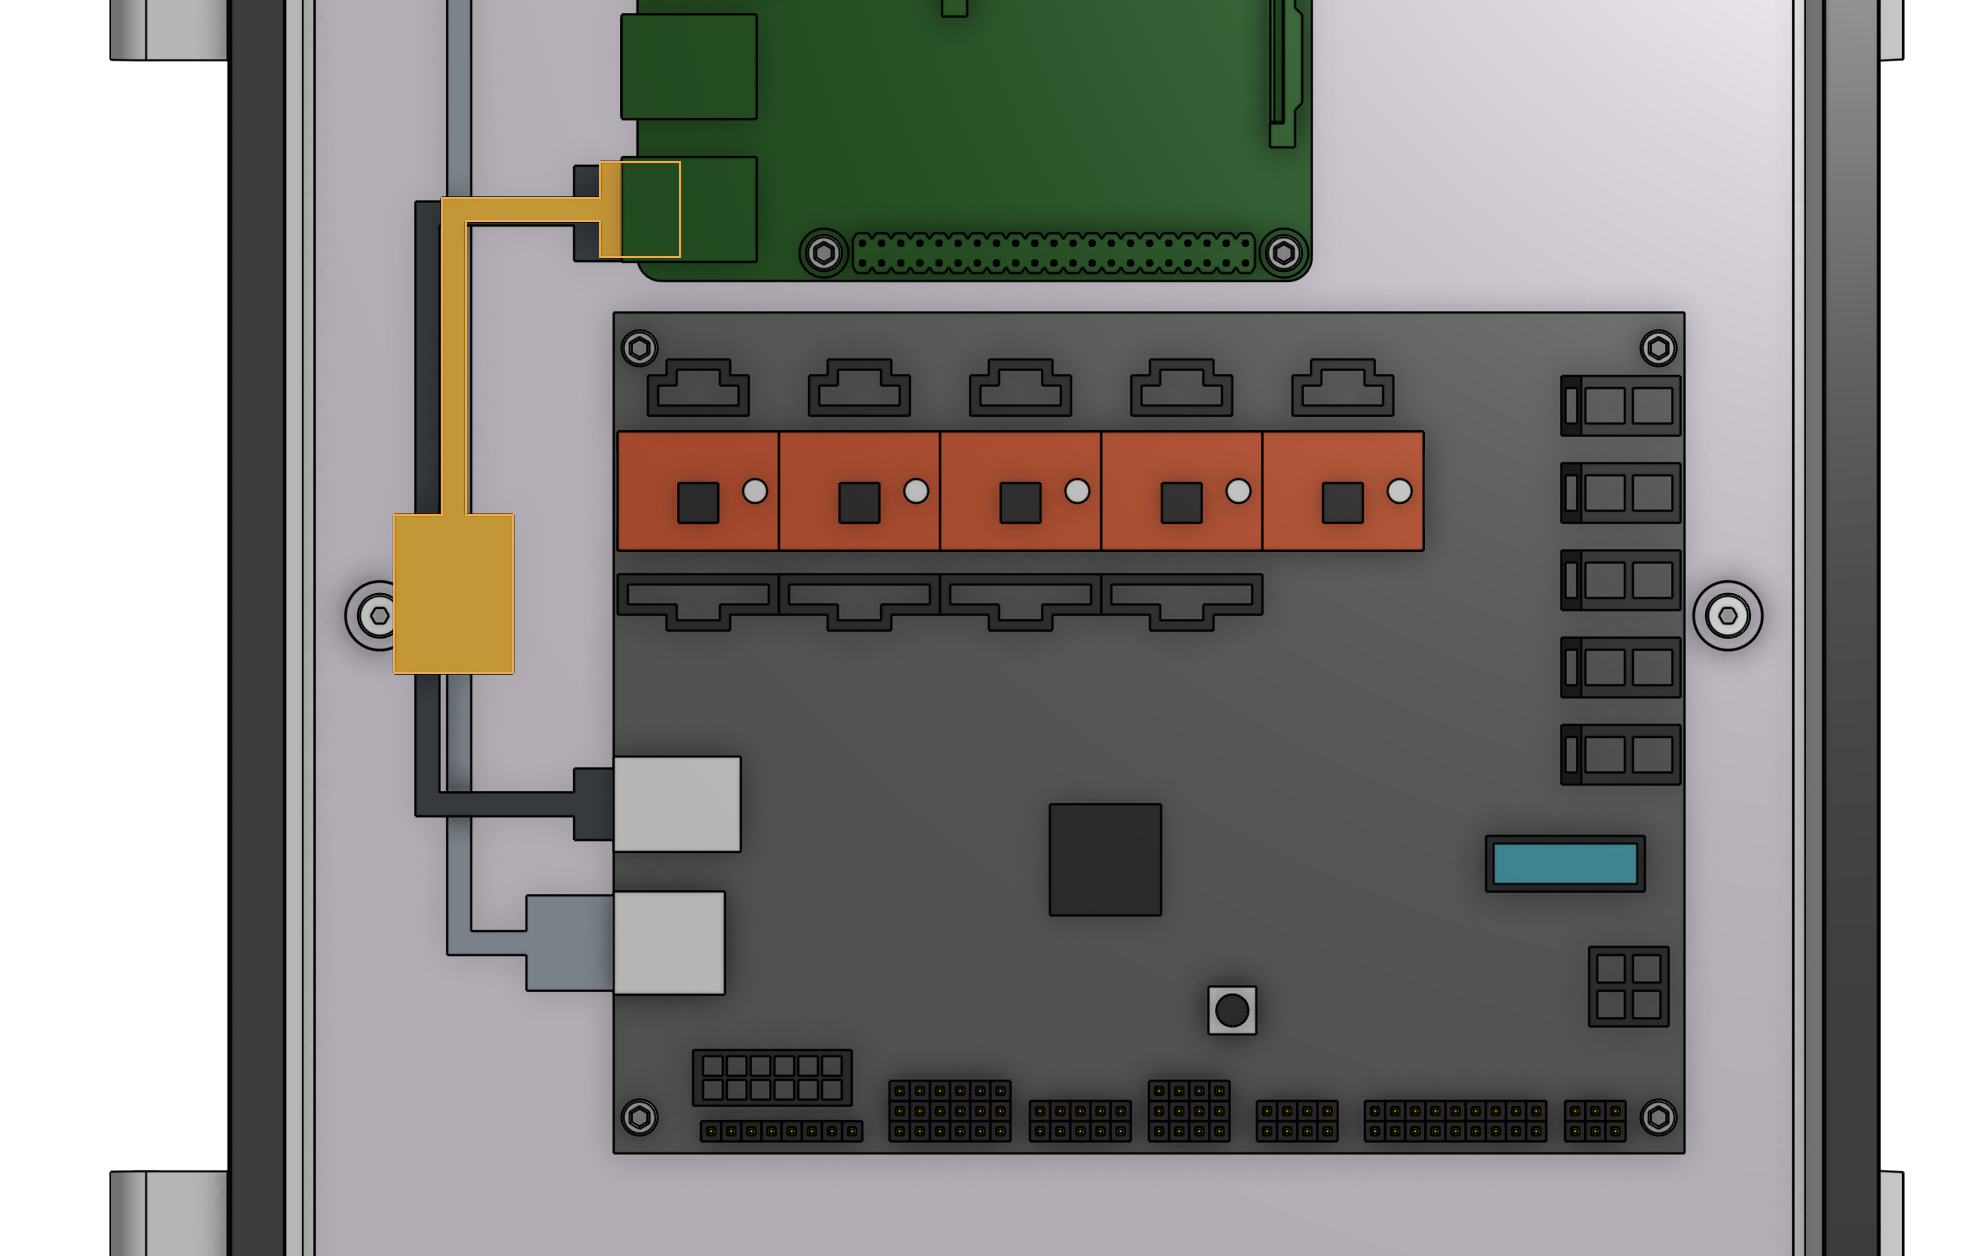
The USB adapter cable is highlighted in orange
Step 4: Plug in the UTM cable
Plug in the UTM cable to the Farmduino. The connector will only fit in one direction.
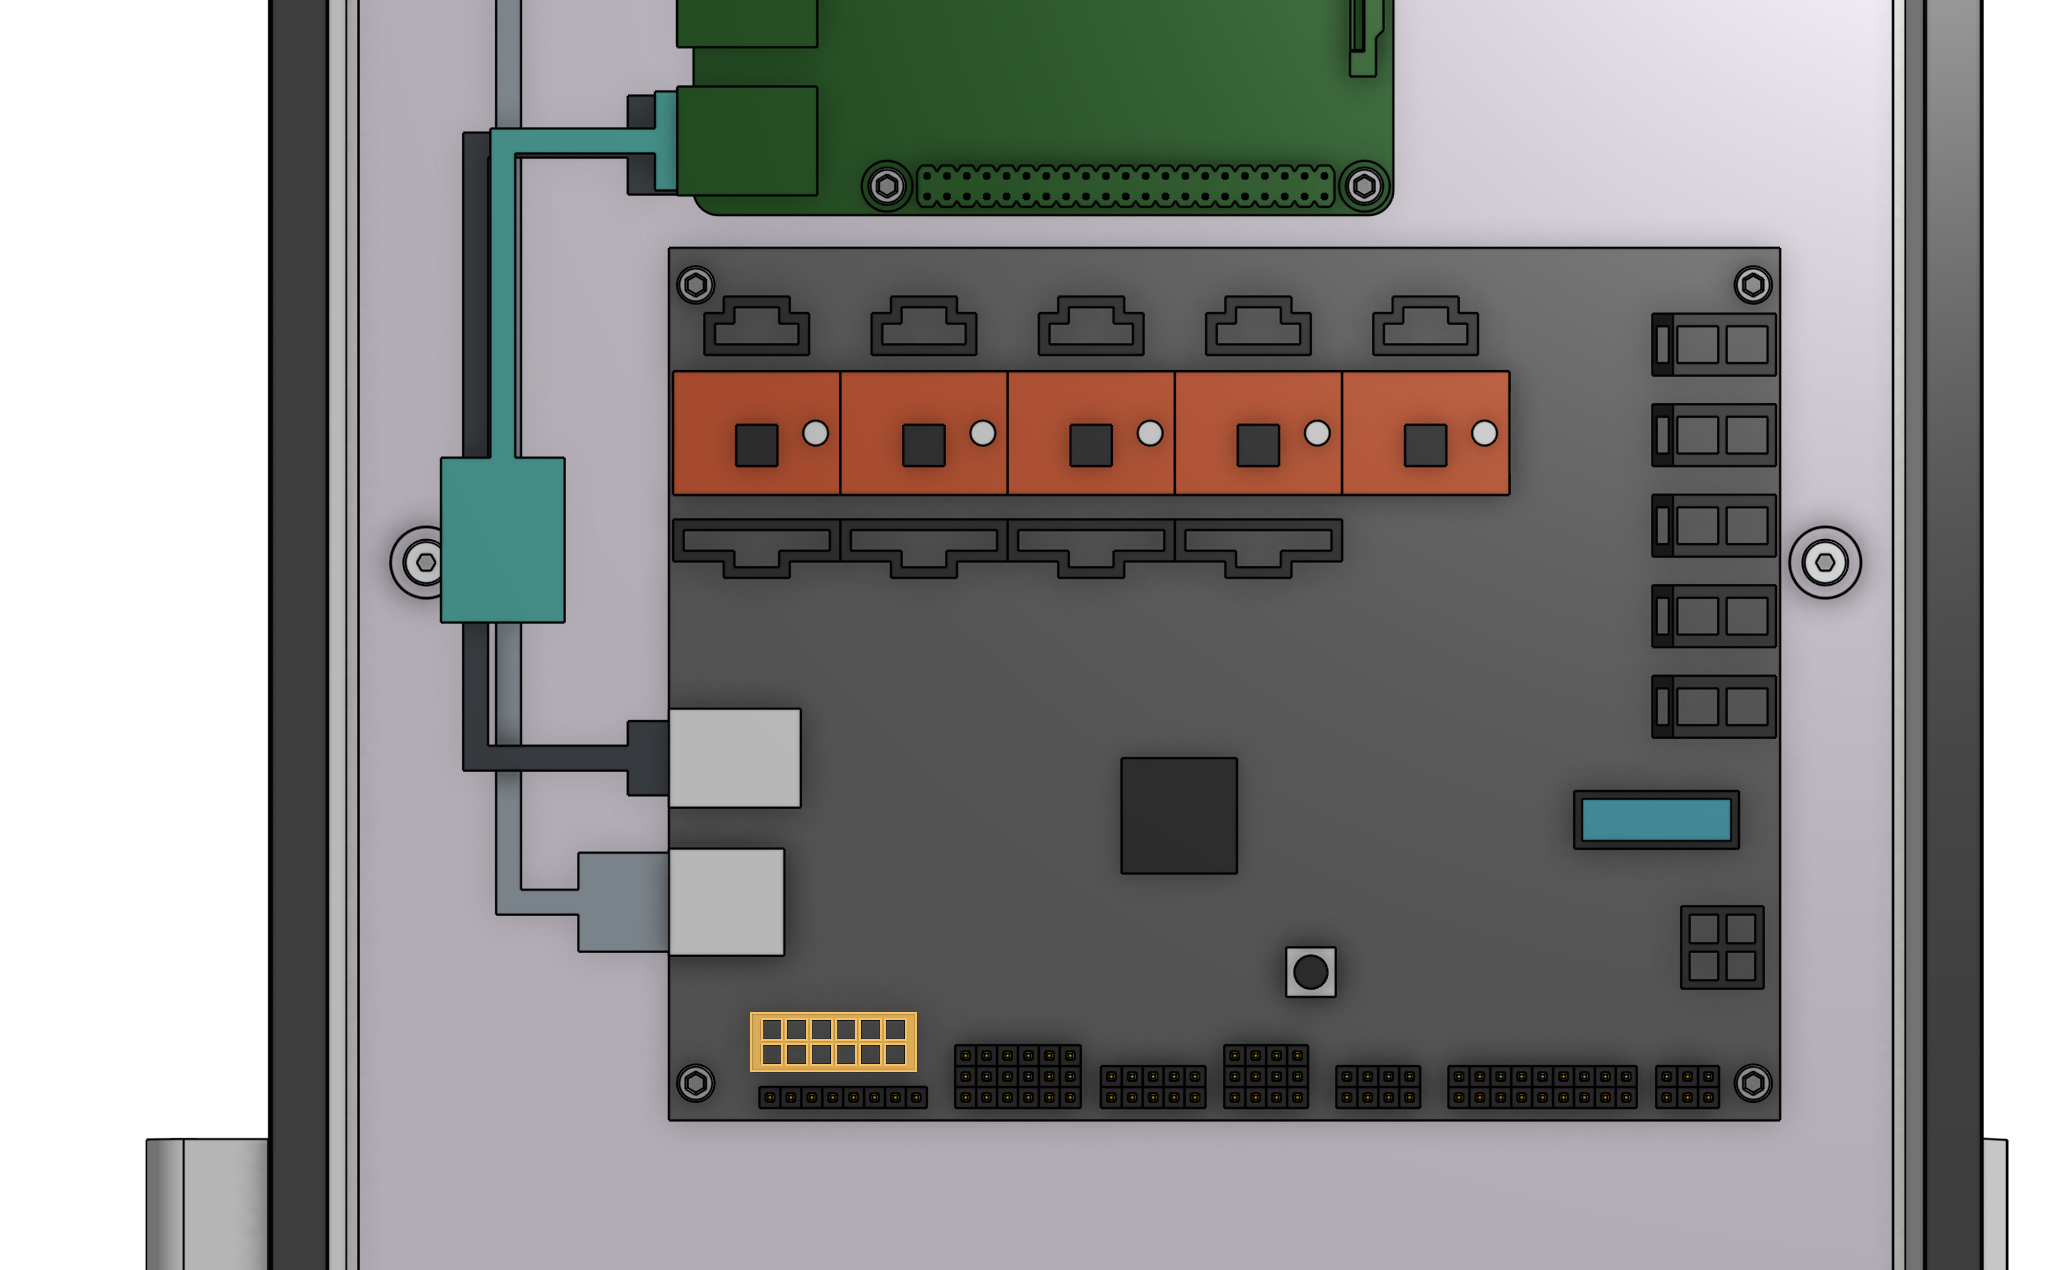
The UTM connector is highlighted in orange
Step 5: Plug the power supply into the Farmduino
Connect the 4-pin power supply connector to the Farmduino’s power input. The connector will only fit in one direction.
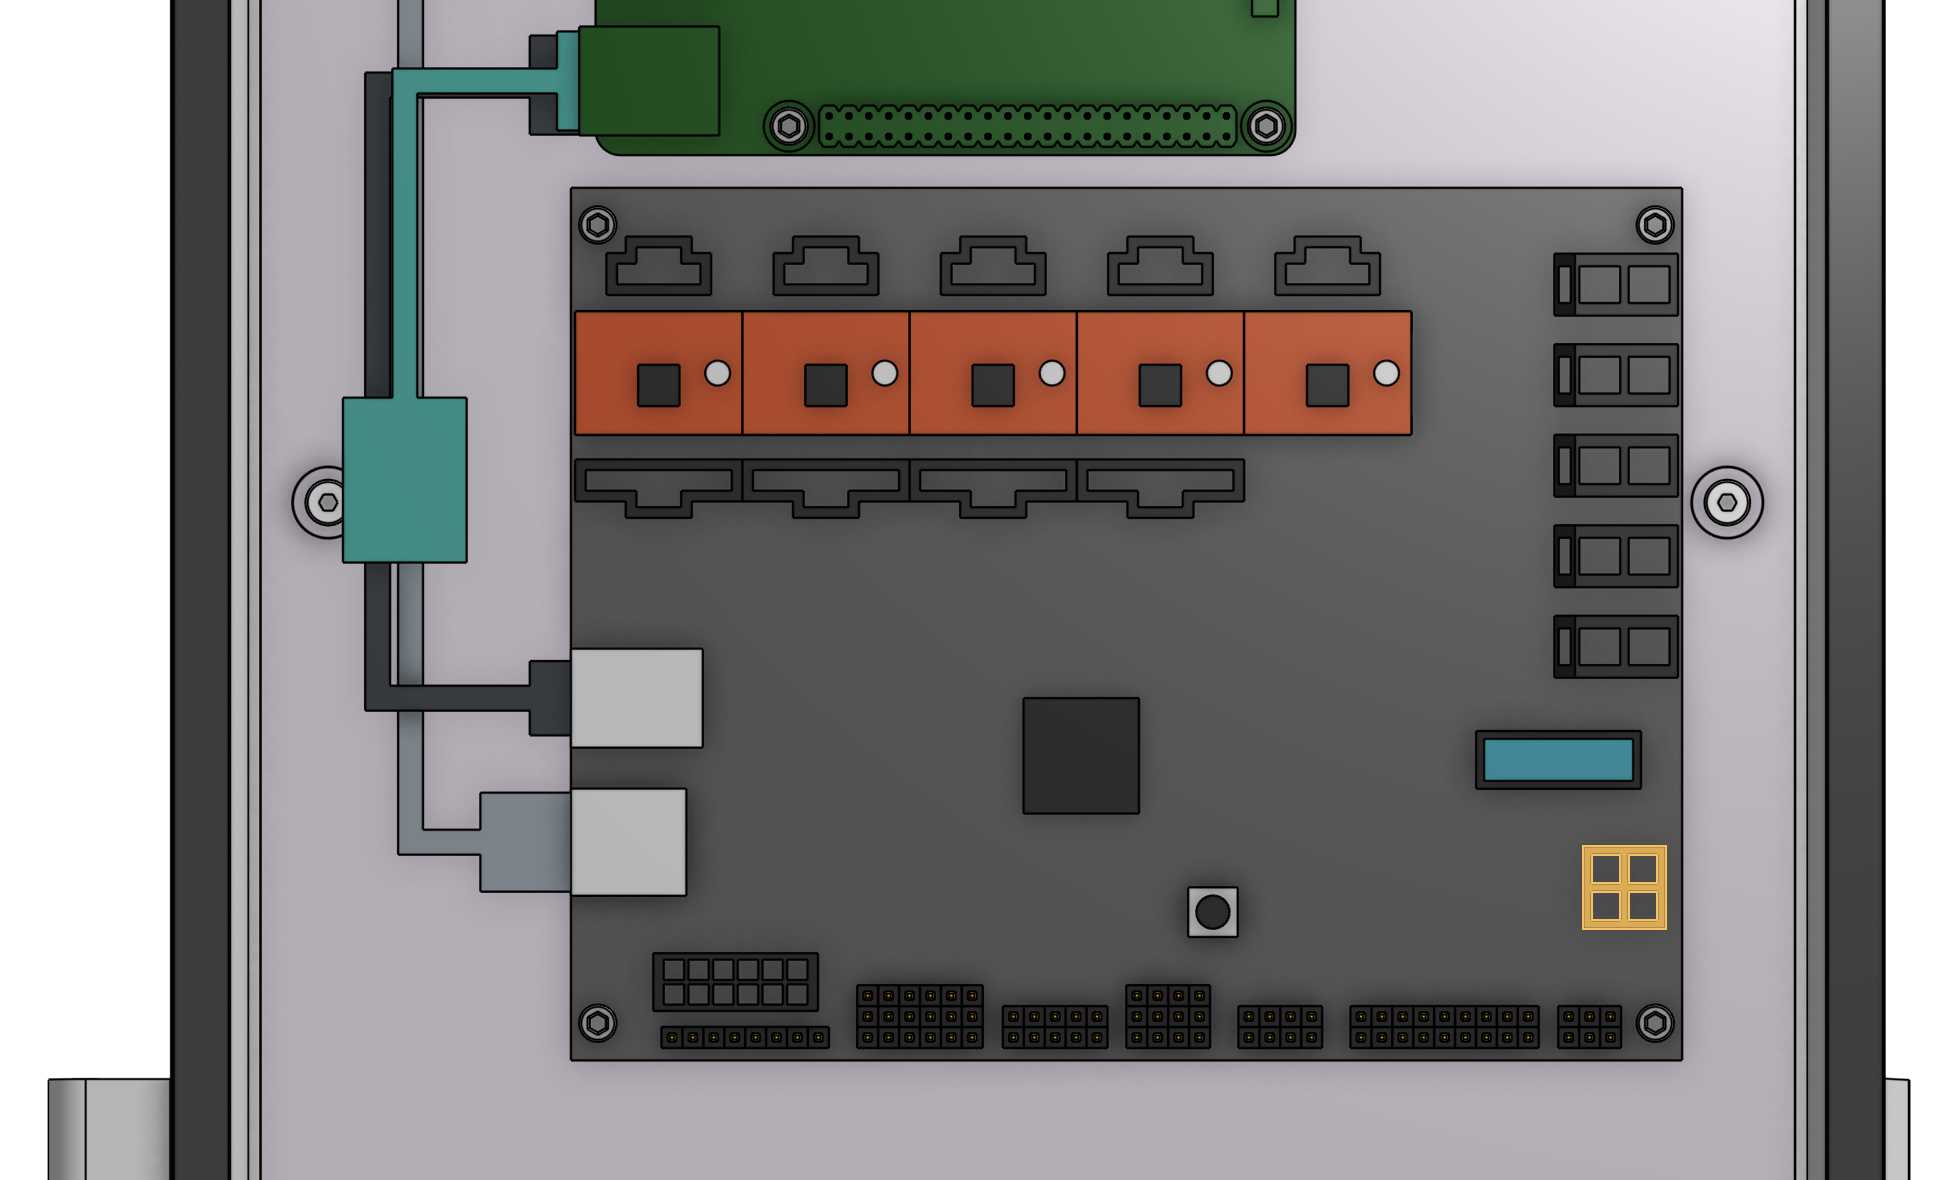
The power input connector is highlighted in orange
Step 6: Insert the supergland
Organize and insert all of the cables into the supergland by bending the supergland so the small cuts are opened up and you can insert a cable. You should organize and insert the cables outside of the electronics box but as close as possible to the slot, so that you can scoot the supergland up the cables and into the slot once all cables are inserted.
From left to right, the cables should be organized in the following order: camera, UTM, motors, encoders, peripherals, power supply. Note that both of the power supply cables must be inserted into a single hole in the supergland. The rubber is soft and flexible enough to accommodate this.
Once the cables are all inserted into the supergland, gently scoot the supergland up the cables and push it into the slot in the electronics box. Ensure that the flanges of the supergland are on either side of the electronics box wall.
Be gentle
Do not pull any cables away from the electronics box during this process as you could damage a connector or cable.
Step 7: Mount the power supply
Mount the power supply to your supporting infrastructure using four 25mm wood screws. The power supply is IP67 rated, so it can withstand rain and the elements.
Step 8: Plug the power supply into the wall
Plug the power supply plug into a waterproof GFCI outlet. If an appropriate outlet is not close enough to plug in directly, use an extension cord and a waterproof connection box such as the Sockit Box.
Before plugging in...
Double check all of your connections, ensuring there are no loose wires that could short circuit.
Beware of electrical shock
Remember that once you plug in the power supply, your system will be powered. Once powered, you cannot add, remove, or change any motor cables, peripheral wires, stepper drivers, etc, or you risk frying your electronics and/or being electrically shocked.
Once powered, be especially careful working around the electronics. Do not touch or handle any exposed contacts or other electrical components.
If everything looks good, and you understand the precautions needed around powered electronics, go ahead and plug the power supply into the wall.
The mark of success
If all has gone well, the Raspberry Pi and Farmduino should boot up and you should revel in the blinking lights!
Something wrong?
See smoke? Heard a loud pop? If anything seems suspicious or hazardous, immediately unplug the power supply from the wall and contact us at contact@farm.bot.
Need to make changes?
If you need to add, remove, or change any of the wiring now or in the future, you MUST unplug the power supply from the wall first. This will minimize the risk of electrical shock and the potential to permanently damage your electronics.