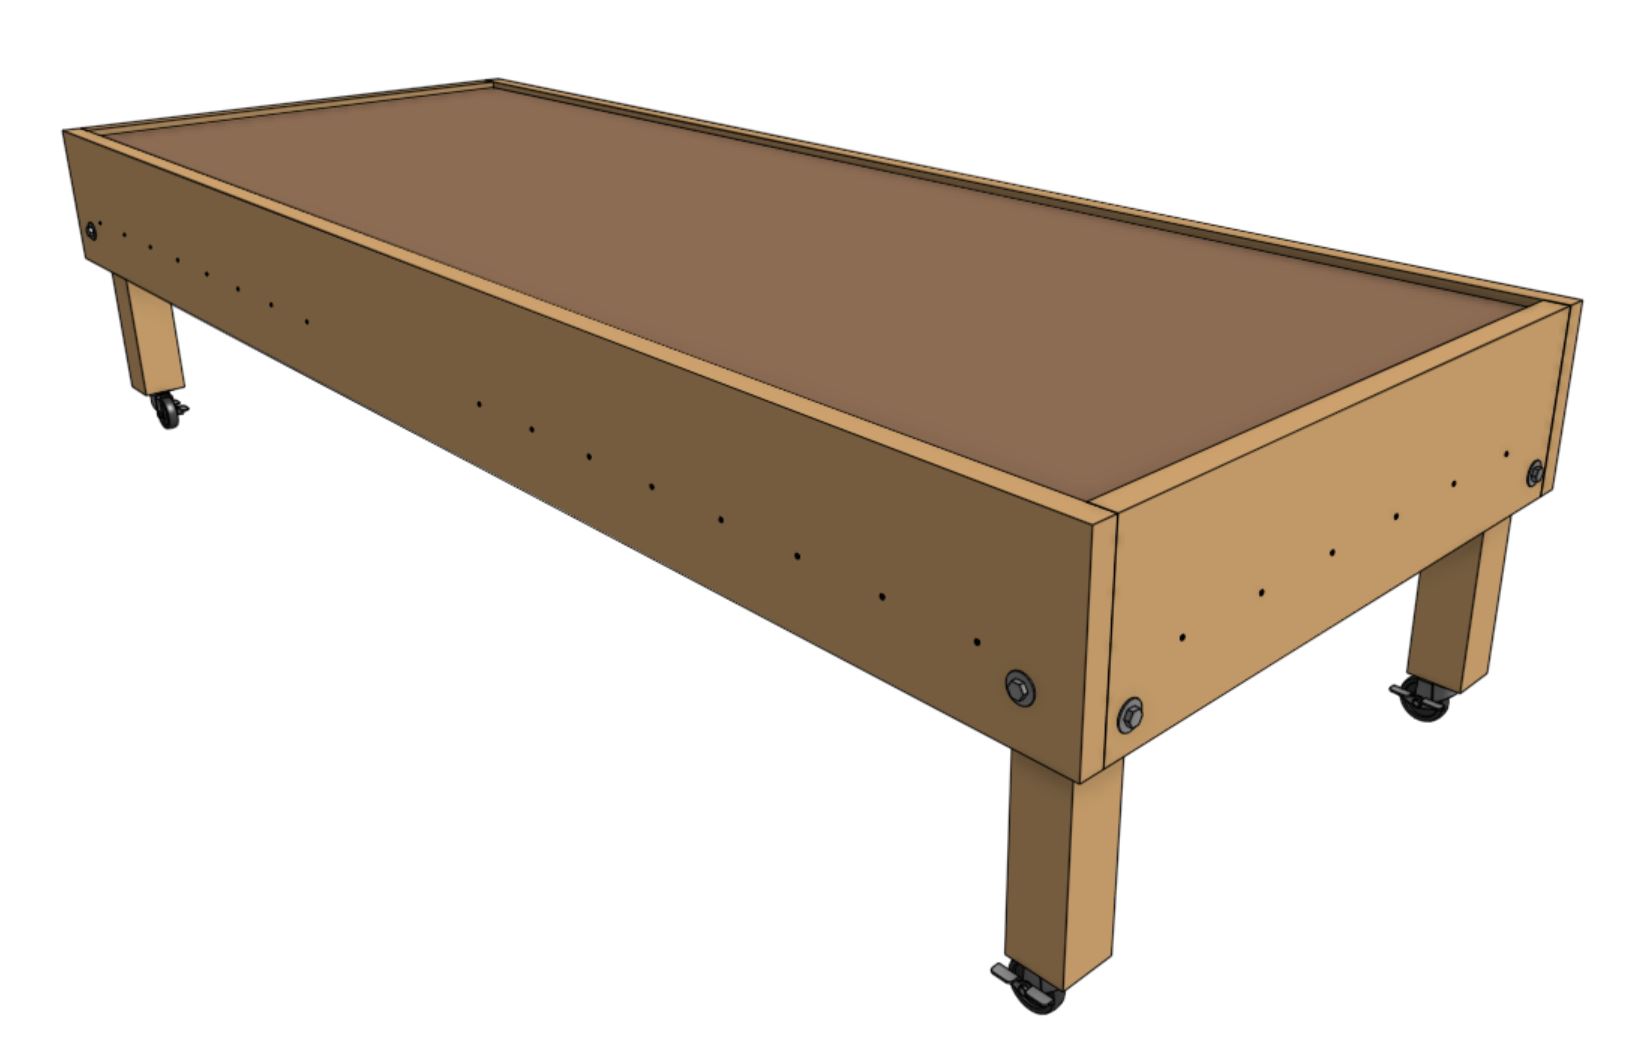
Mobile Raised Bed
Step-by-step instructions for building a mobile raised bed for FarmBot Genesis
Building a mobile raised bed is the recommended method for installing FarmBot Genesis indoors. In these instructions we show you how to build a simple but sturdy bed that can be easily moved around a classroom, warehouse, or museum space.
Not suitable for Genesis XL or Genesis MAX
We do not recommend building a mobile raised bed for Genesis XL or Genesis MAX devices because it would be extremely heavy and difficult to move.
6 hours
This is the estimated time it will take to build a mobile raised bed.
Determining bed size
We recommend building your mobile raised bed as big as it can be for your space, without exceeding the maximum assembled size of the FarmBot. This will ensure you get the most value out of your FarmBot without making the bed unnecessarily large. See the economies of scale section for more information on maximizing FarmBot value.
Consider your space
In determining how large your bed can be, consider if you will ever need to move the bed from room to room, down any hallways, around any corners, and/or through any doorways. Your bed should be able to fit nicely in all the places you want to place it and be moveable between those places.
For FarmBot Genesis kits, the outer width of your bed must not be wider than 1.48m. While the outer length can be longer than 3m, we do not recommend building beyond 3m long, as any larger and the bed will become unwieldy, and that soil space will not be reachable by the FarmBot.
Refer to the table below for the recommended maximum outer dimensions of the bed.
| FarmBot Model | Outer Bed Width | Outer Bed Length |
|---|---|---|
| Genesis | 1.48m max | 3m max |
In the step-by-step instructions below, we’ll be building a bed that is narrower than the maximum size to facilitate reaching into the center of the bed. The outer dimensions of our bed will be 1.13m wide by 3m in length. The height from the floor to the top of the bed will be approximately 0.75m.
Step 1: Acquire materials
| Qty | Component | $/Unit | Subtotal |
|---|---|---|---|
| 2 | Side floor panels (105cm x 122cm x 2cm thick) | $30 | $60 |
| 1 | Middle floor panel (105cm x 70cm x 2cm thick) | $20 | $20 |
| 2 | Long walls (4cm x 30cm x 300cm) | $15 | $30 |
| 2 | Short walls (4cm x 30cm x 105cm) | $7.50 | $15 |
| 4 | Long floor supports (4cm x 4cm x 113cm) | $3 | $12 |
| 2 | Short floor supports (4cm x 4cm x 87cm) | $2 | $4 |
| 4 | Legs (9cm x 9cm x 45cm) | $3 | $12 |
| 4 | Heavy duty locking swivel casters | $10 | $40 |
| 4 | Corner brackets | $3 | $12 |
| 1 | Box of 30mm wood screws | $8 | $8 |
| 1 | Box of 65mm wood screws | $8 | $8 |
| 8 | M10 x 150mm bolts | $0.75 | $6 |
| 8 | M10 nuts | $0.25 | $2 |
| 16 | Large M10 washers | $0.20 | $3.20 |
| 1 | Sealer, stain, or polyurethane | $20 | $20 |
| 1 | 2m x 4m tarp | $15 | $15 |
| TOTAL | $267.20 |
Step 2: Lay out the floor panels and legs
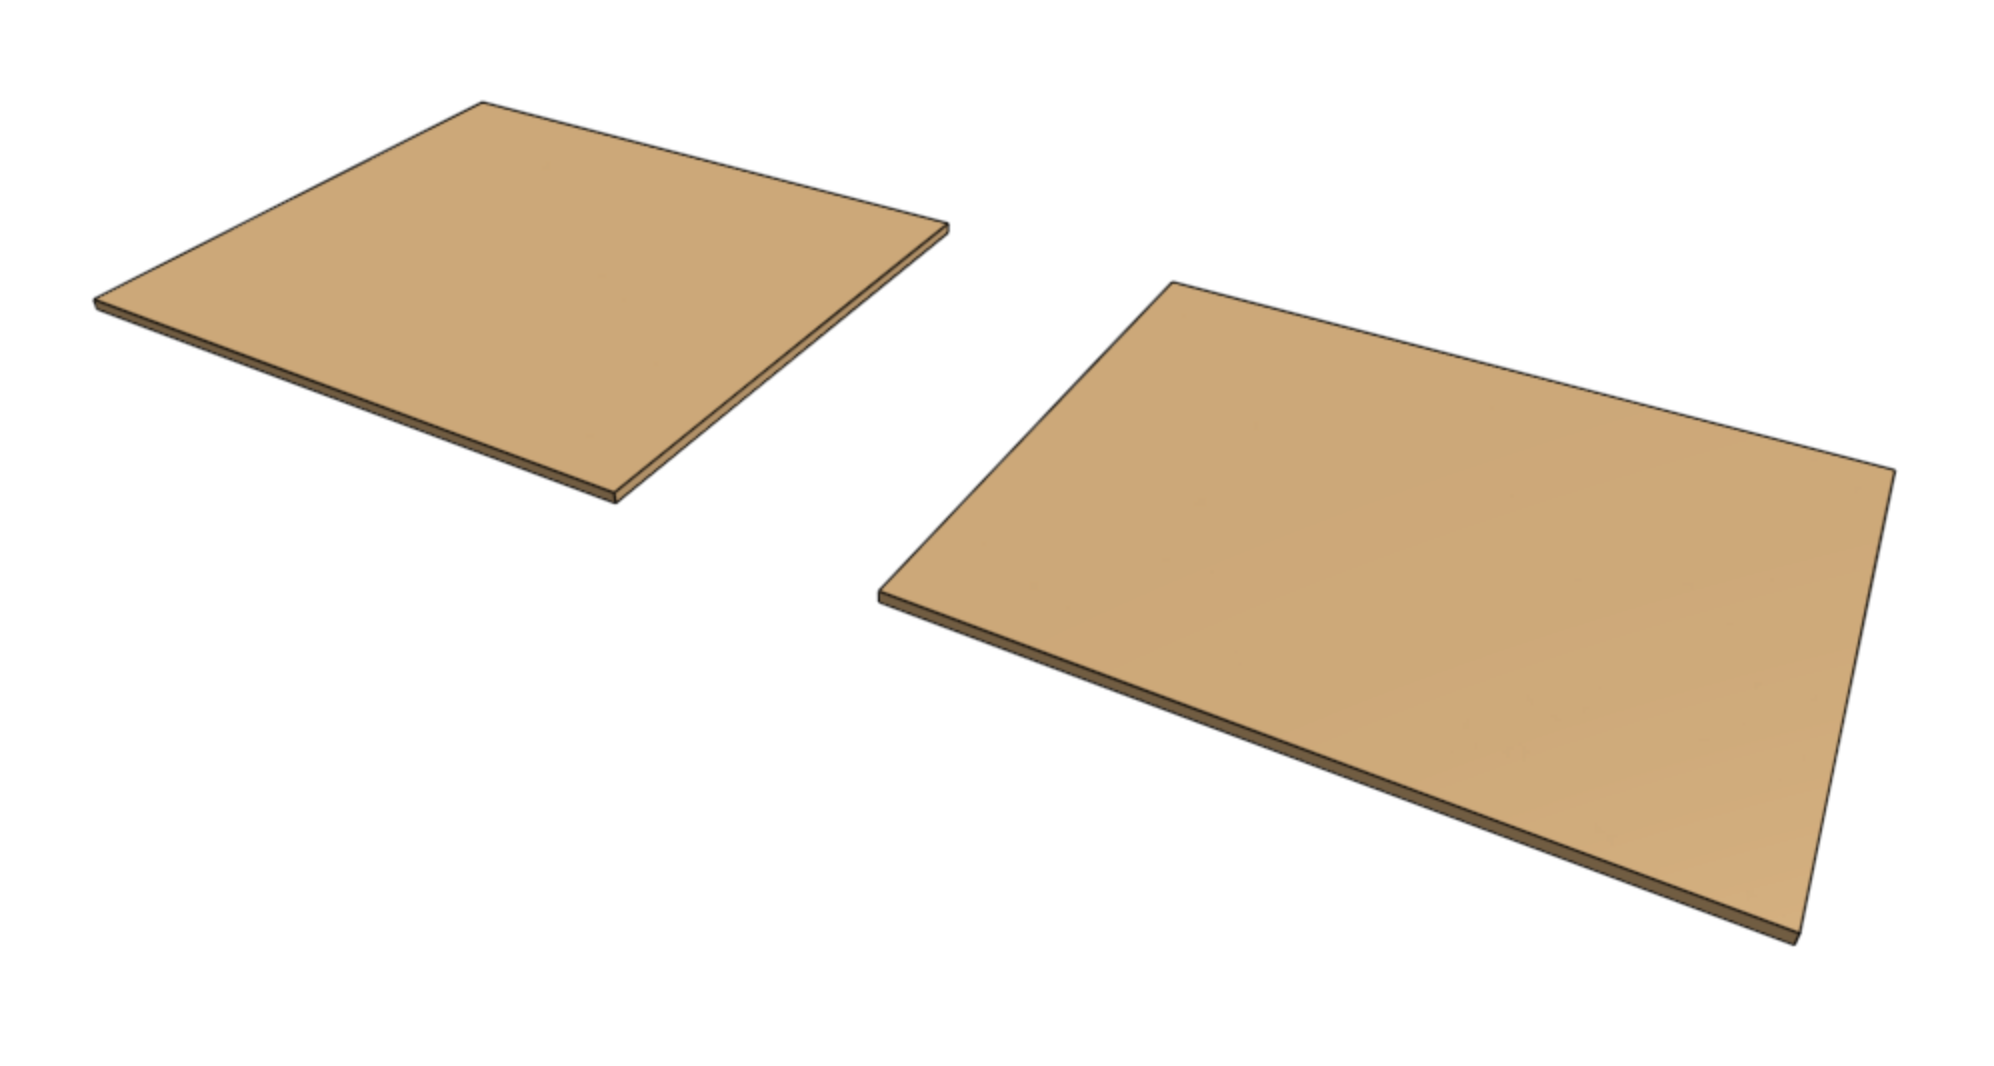
Lay the two side floor panels on the floor to form the outer shape of the bed. There should be about a 0.5m gap between them. The 105cm edges should be on the short sides of the bed outline.
Step 3: Mark where the legs will go
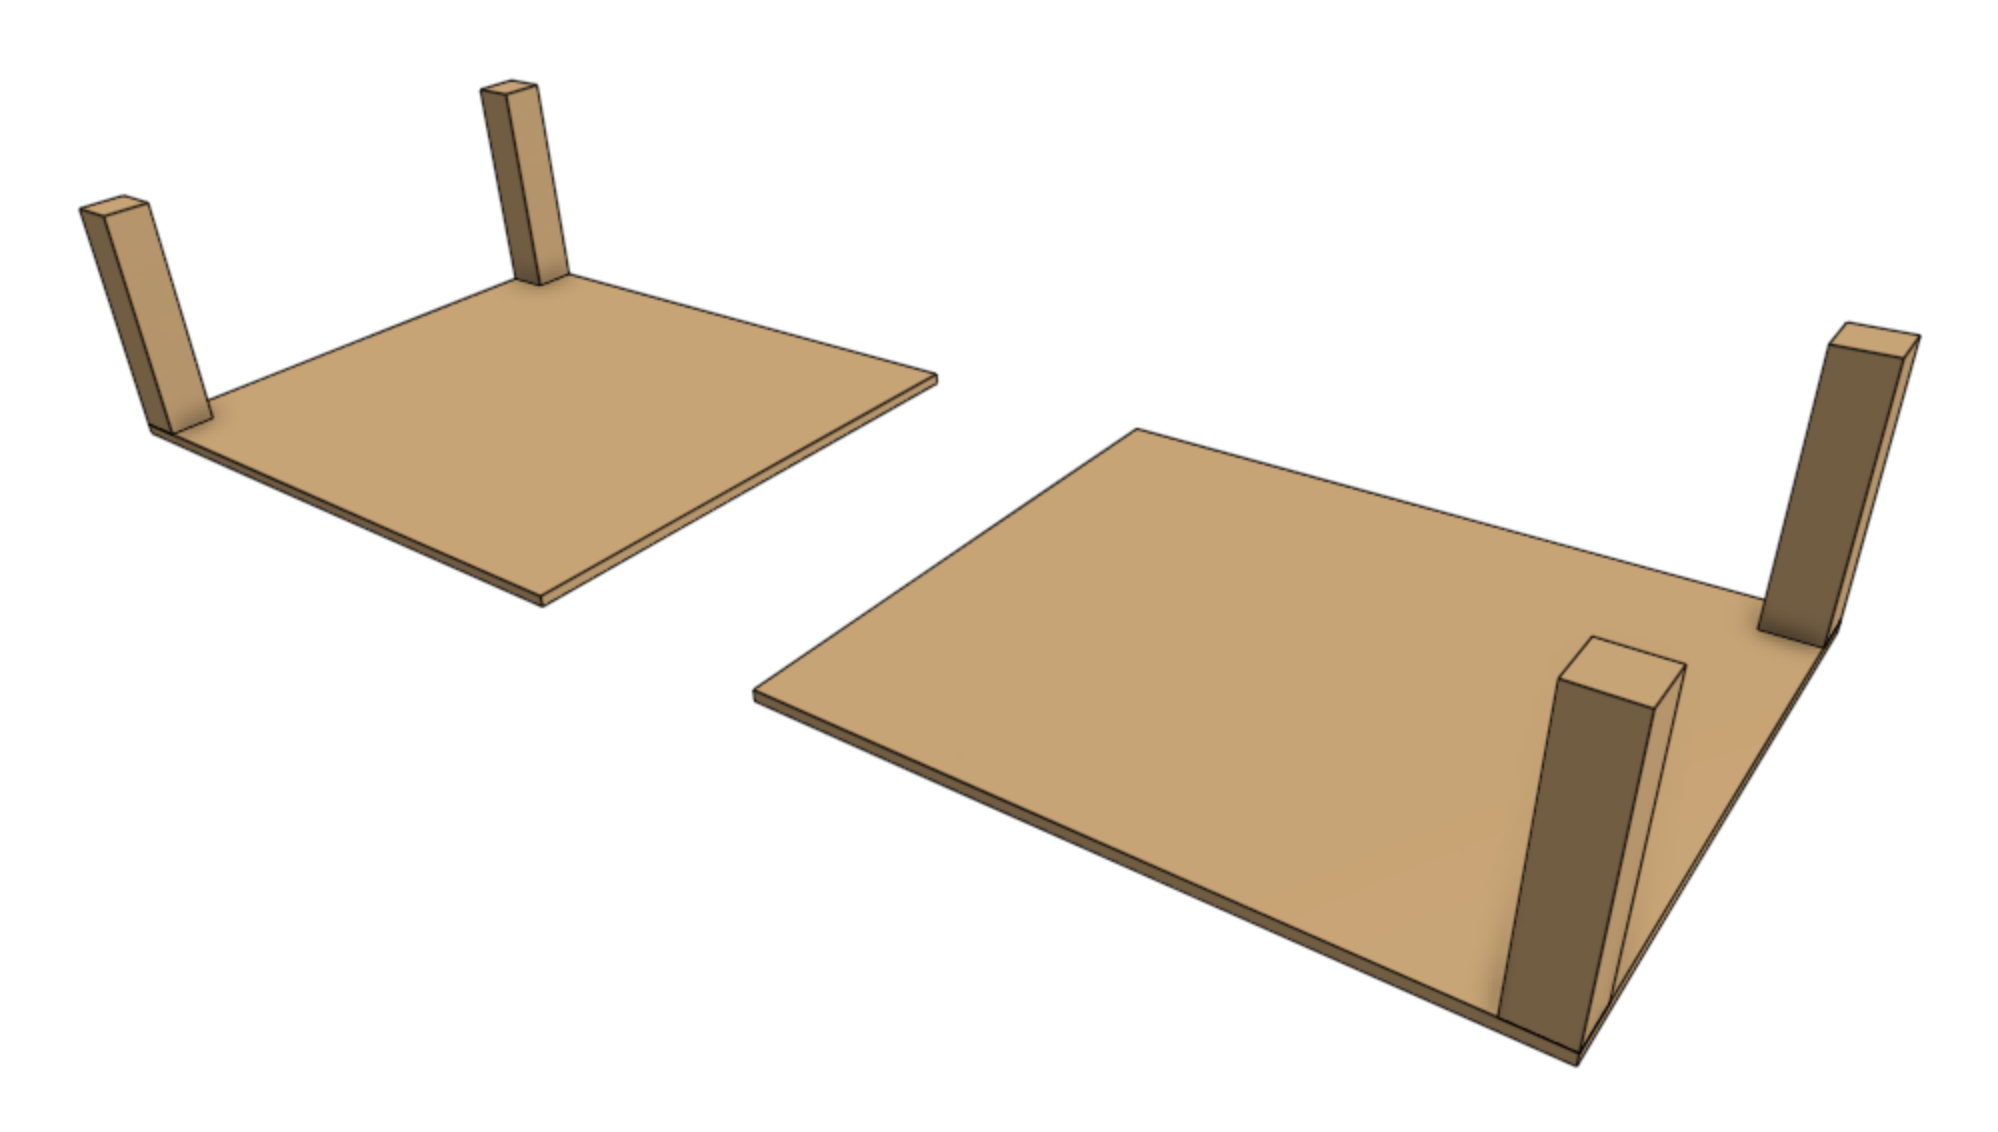
Stand the four legs up on the four corners of the floor panels. Using a pencil, mark where the inner edges of the legs meet the floor panels. Then remove the legs.
Step 4: Cut and attach the floor supports
If not already cut to length, cut the floor supports such that they will fit on the floor panels as shown, ensuring that they do not intrude on the space needed for the legs as marked in the previous step.
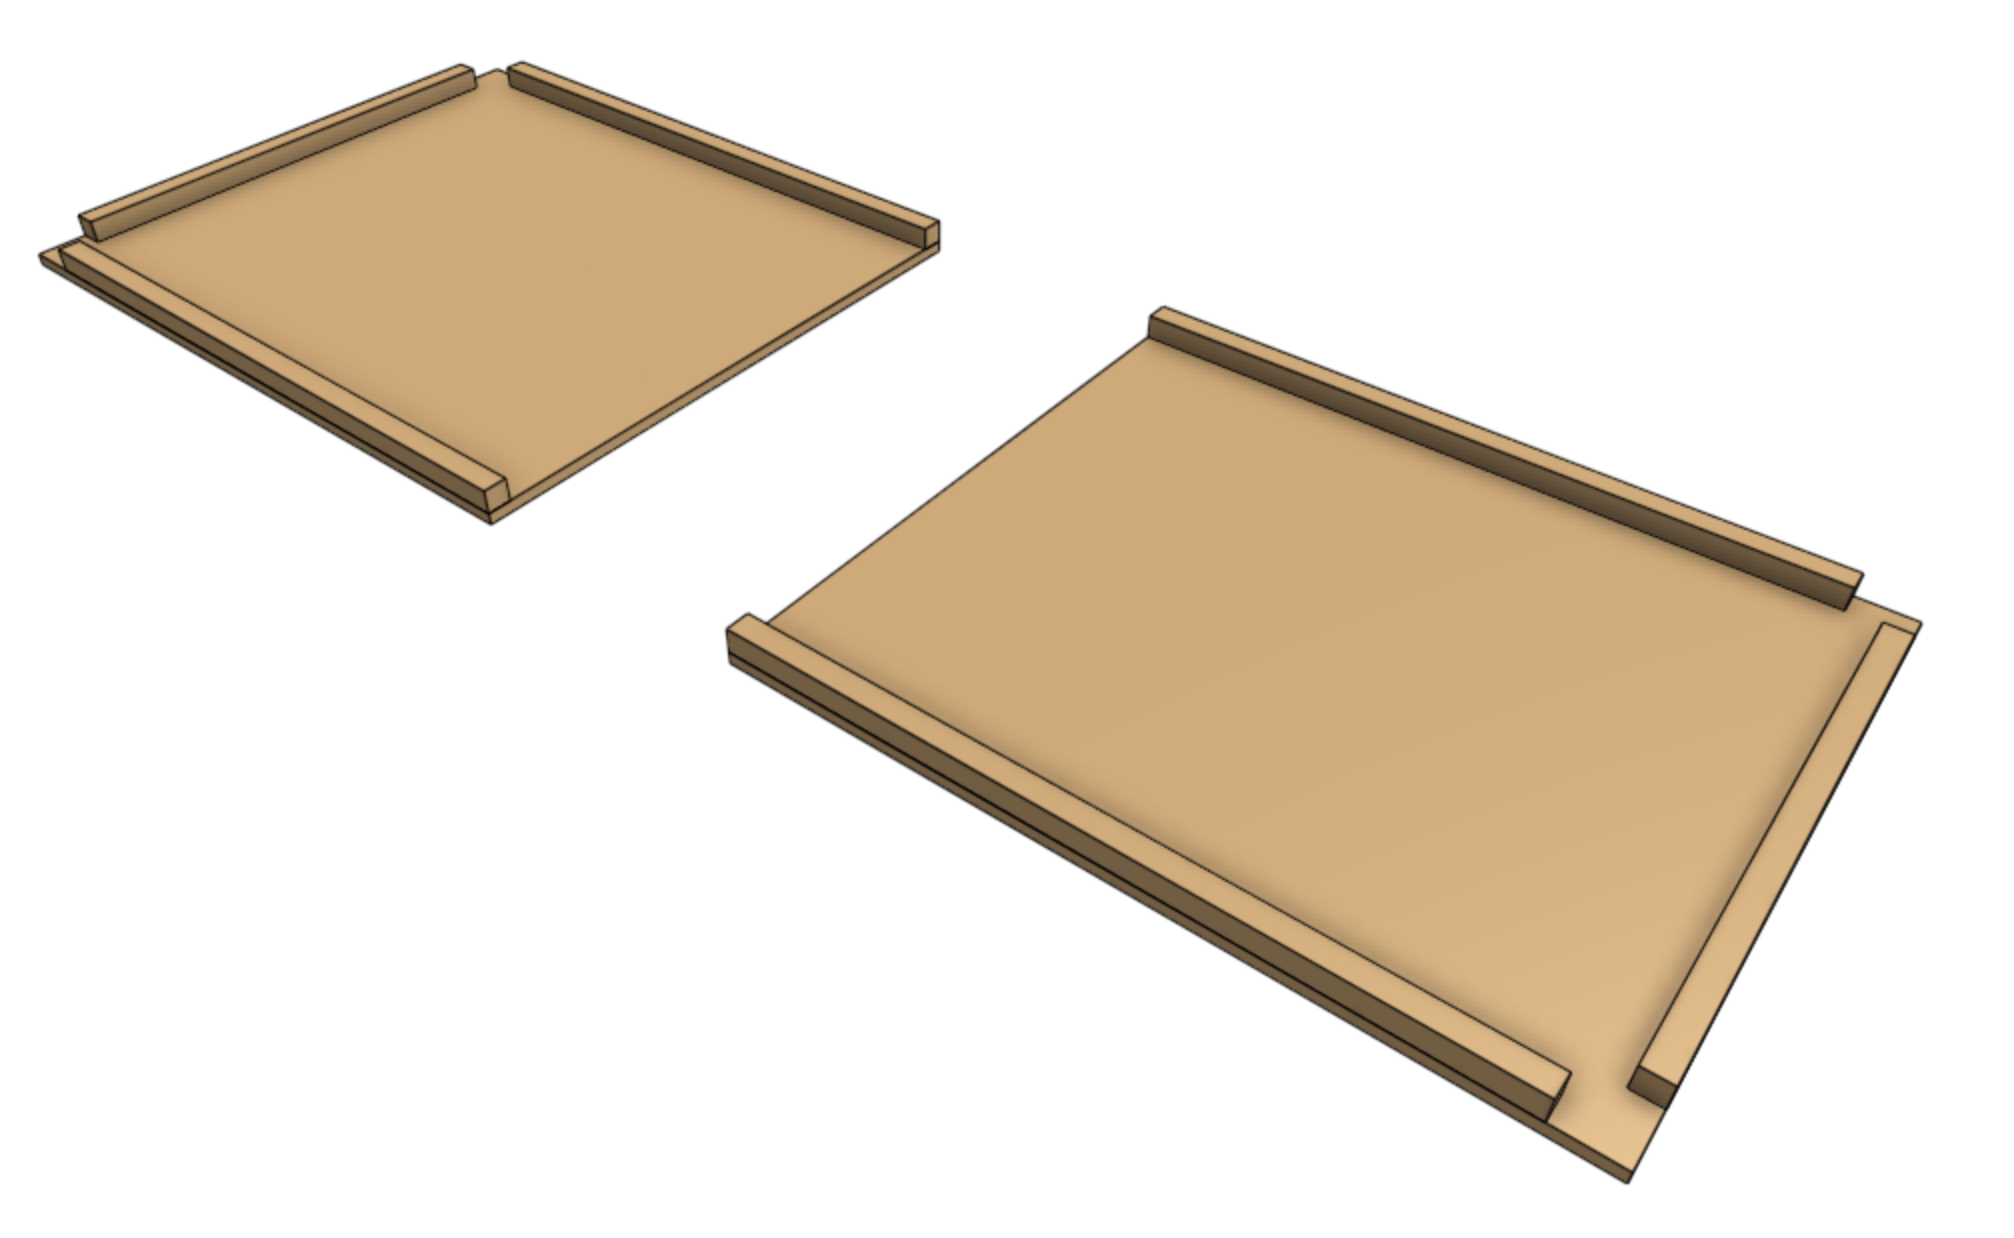
Flip everything over and attach the supports to the panels using 30mm screws spaced roughly every 150mm.
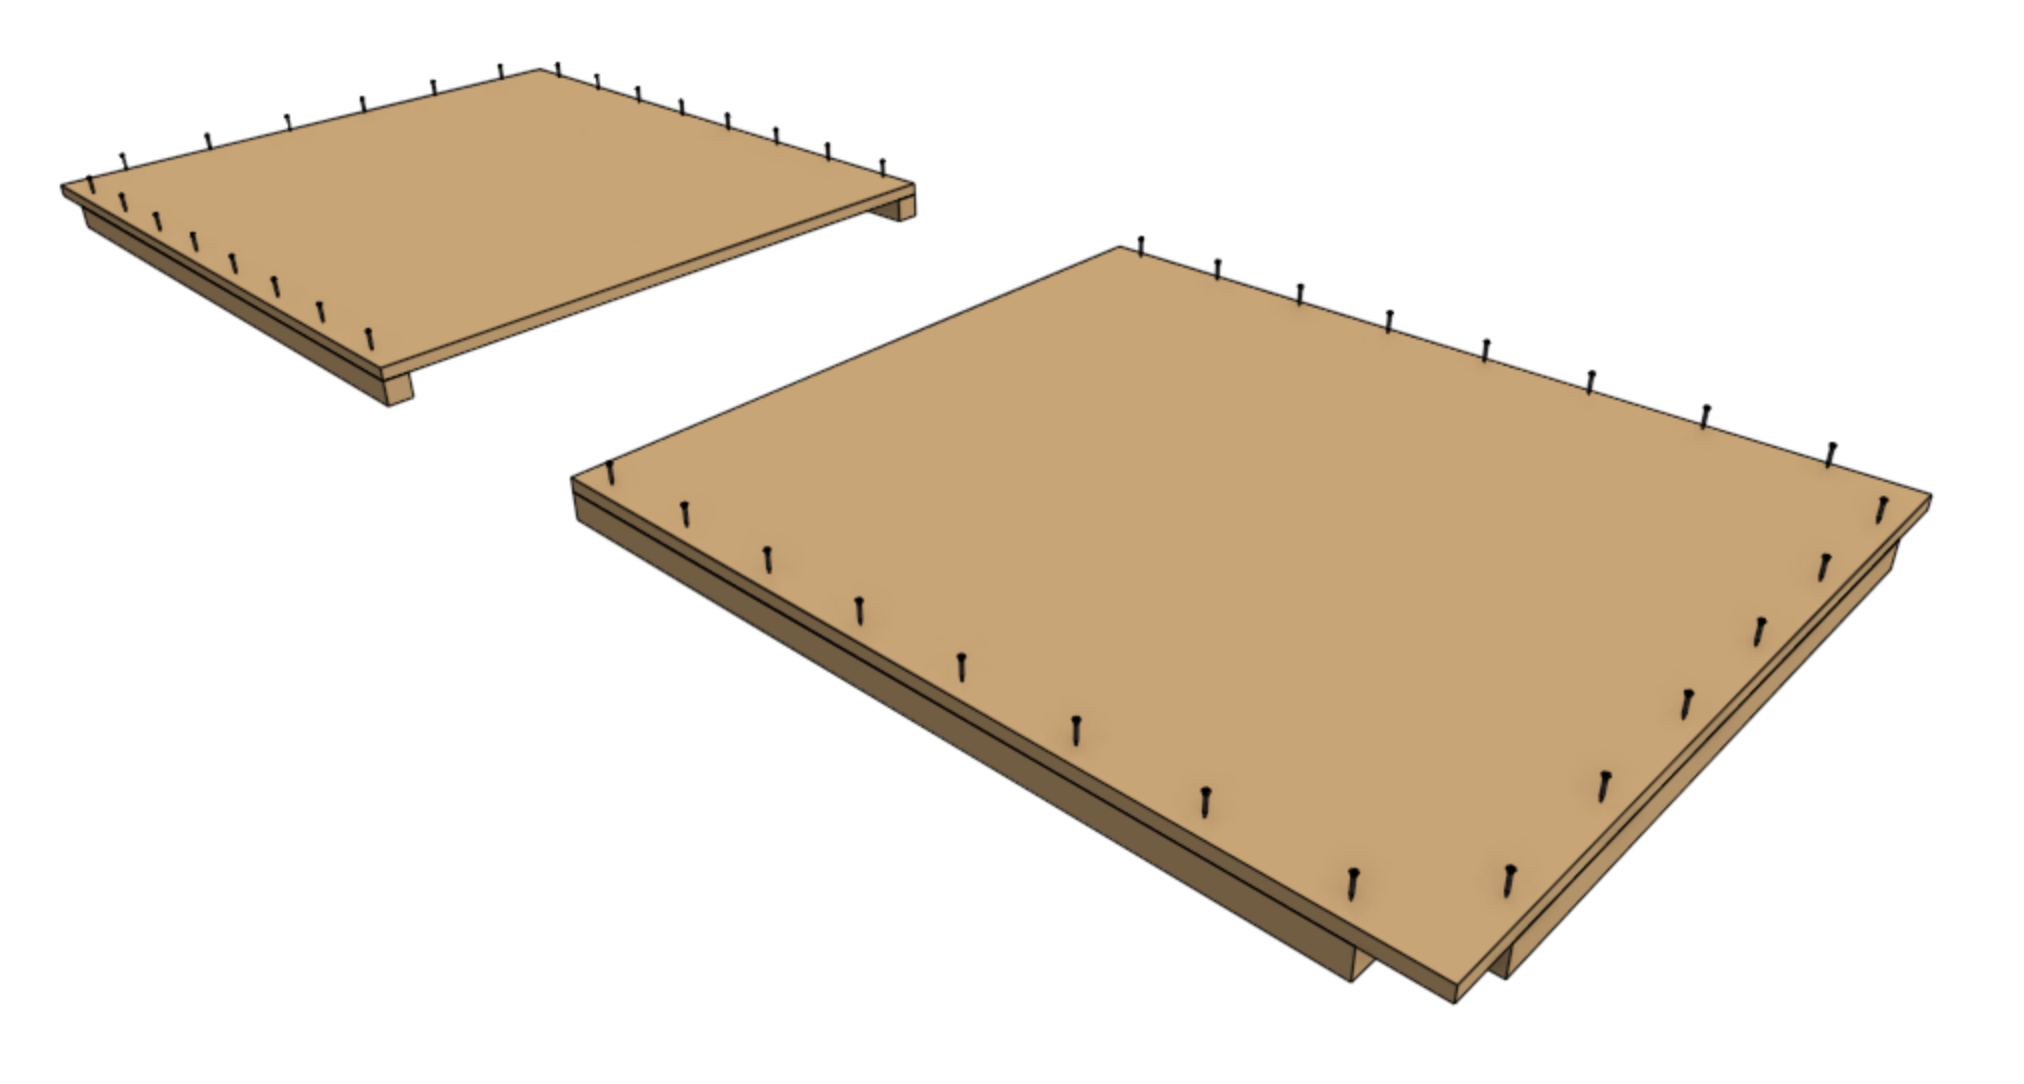
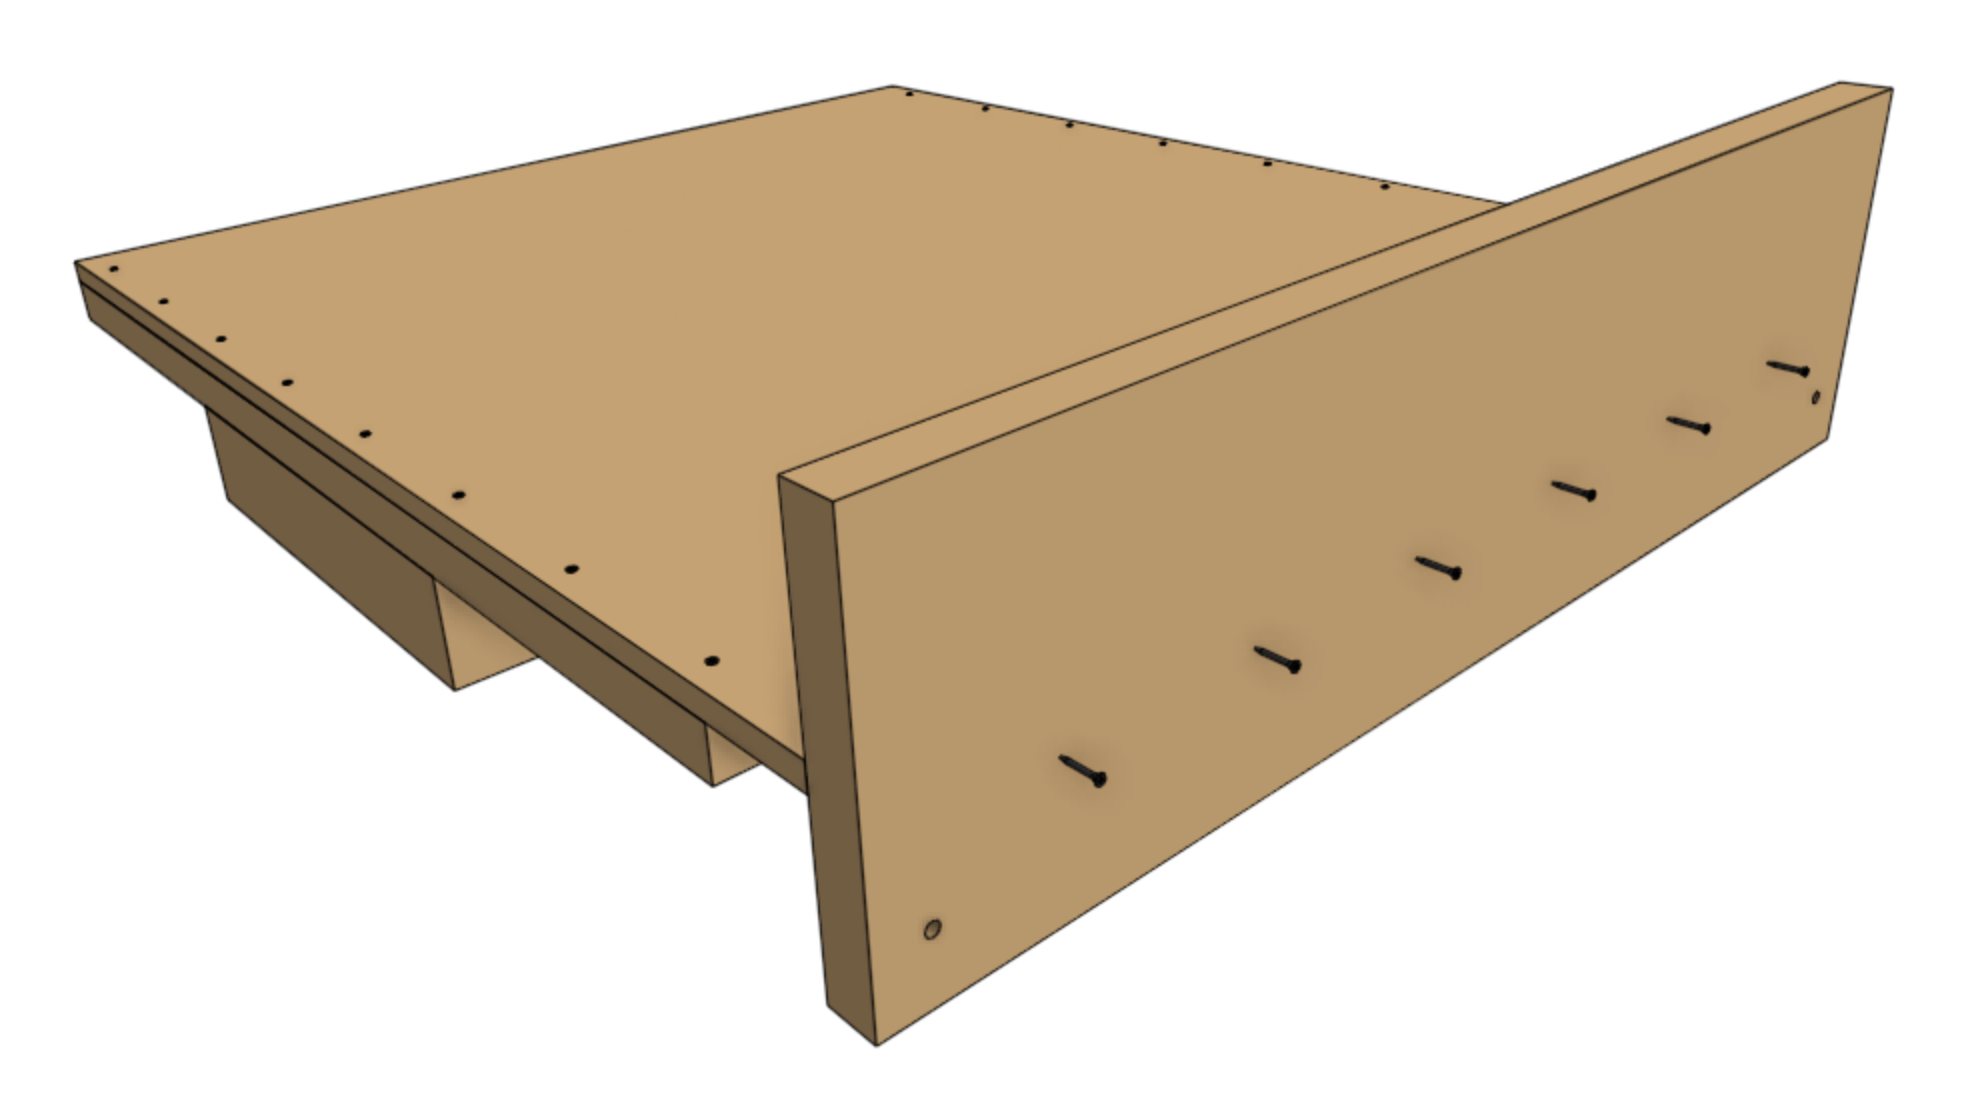
Step 5: Attach the short walls
Temporarily raise one floor panel subassembly off of the floor by 90mm by positioning legs underneath the floor supports.
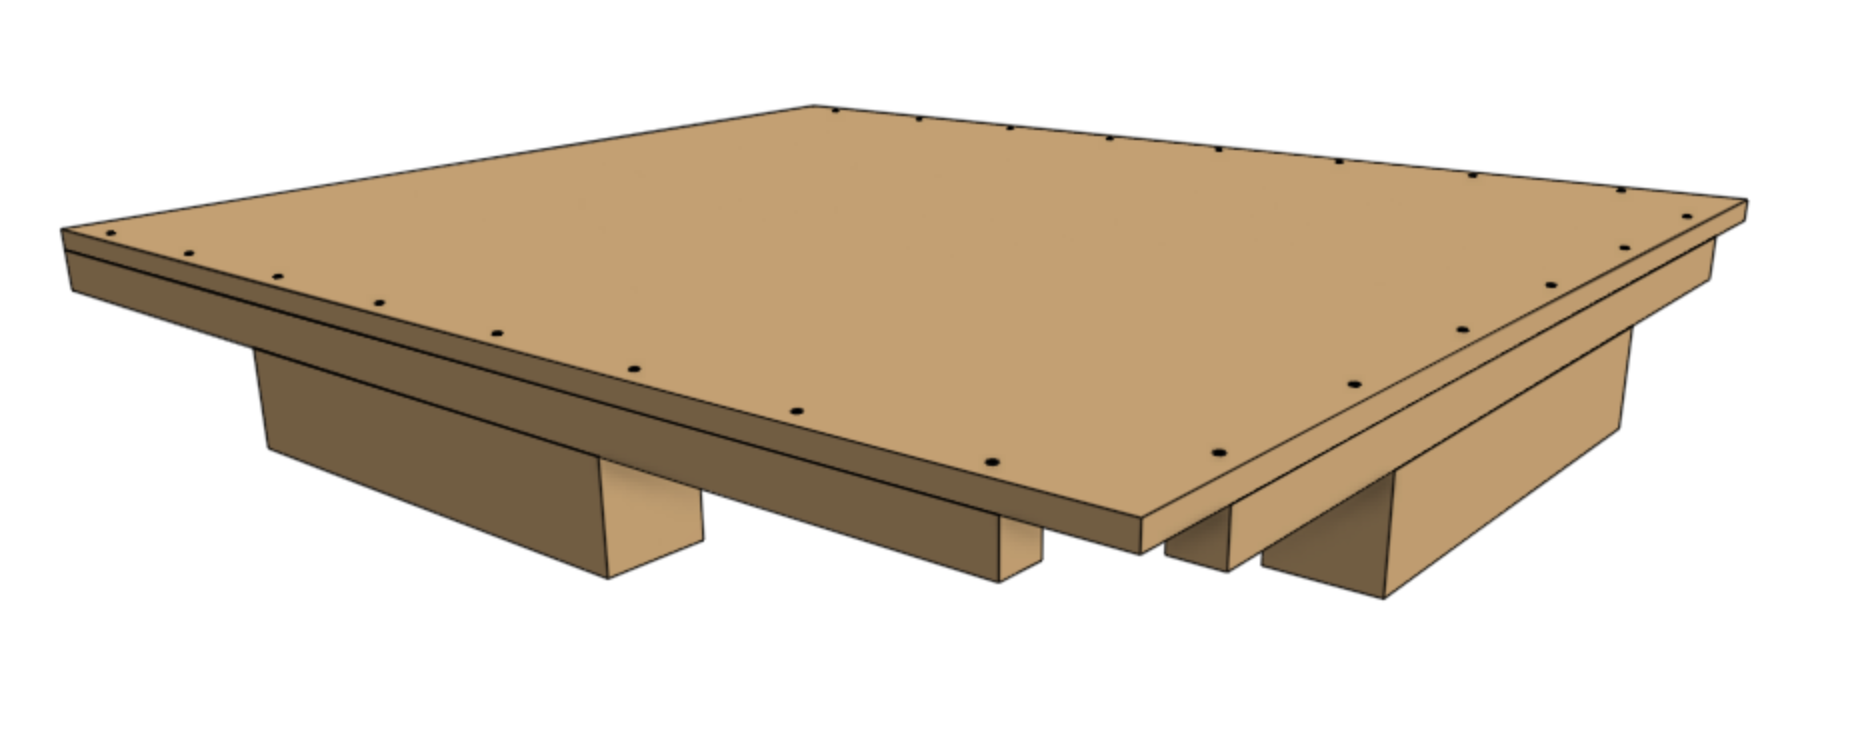
Now position one of the short walls against the short edge of the floor panel as shown.
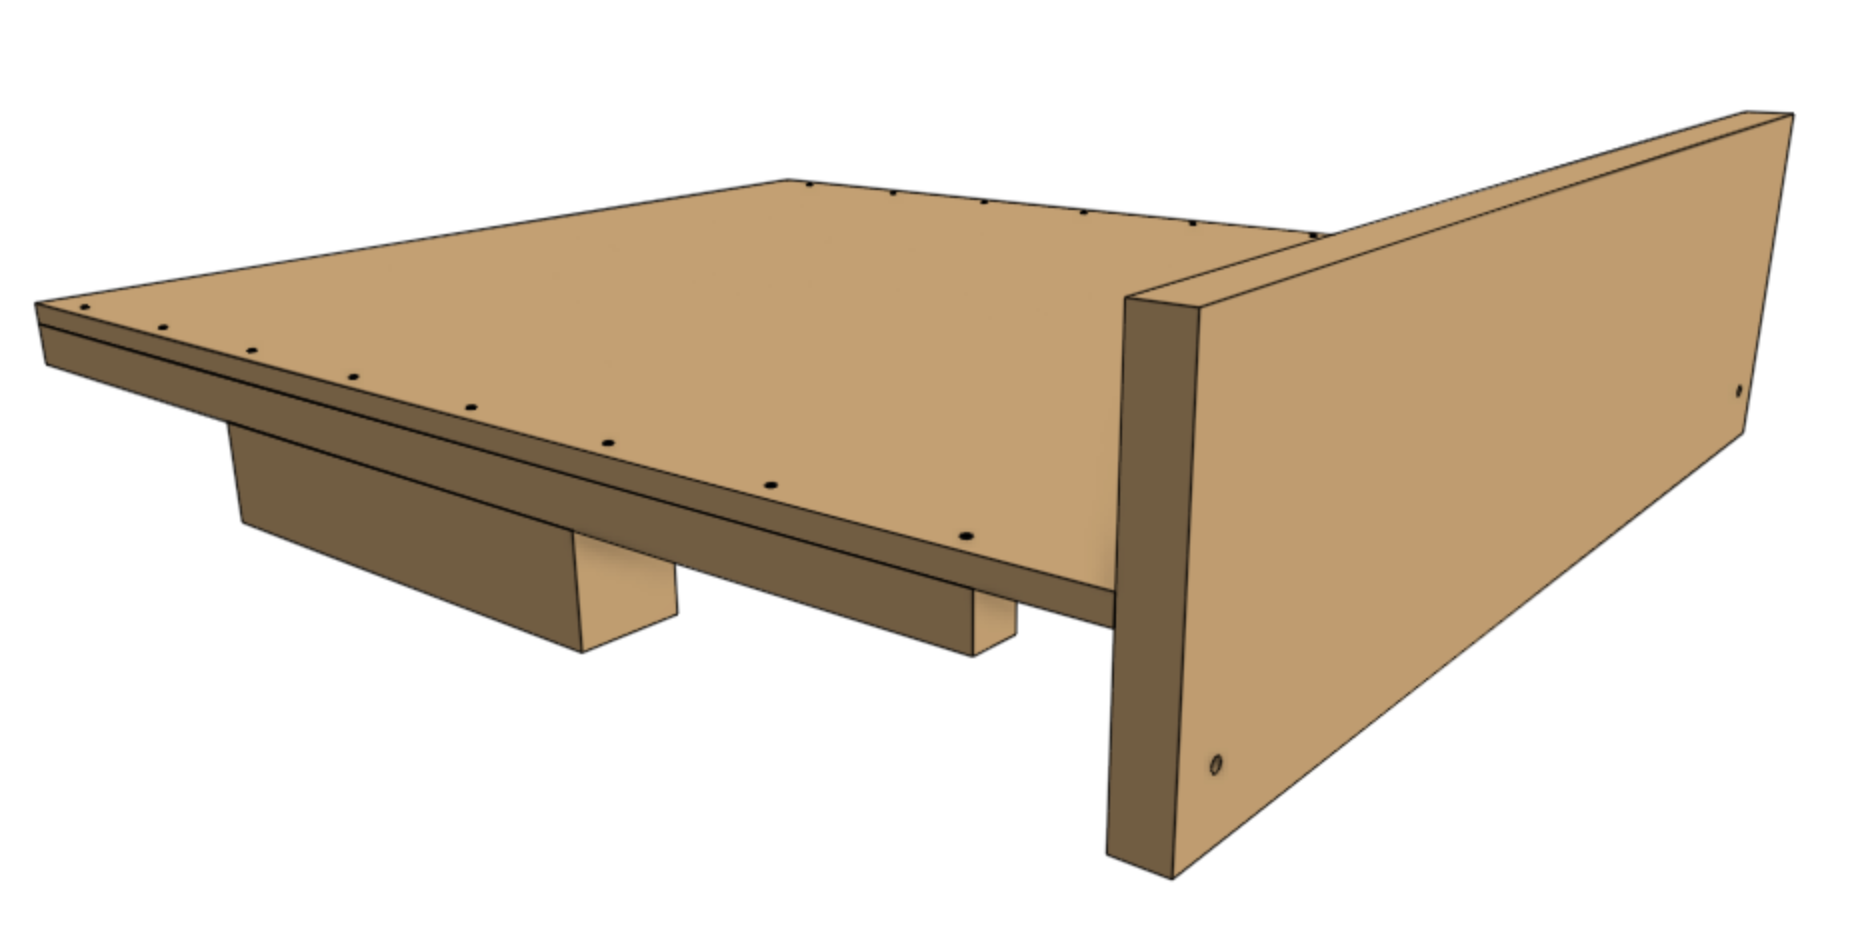
Attach the short wall to the short floor support using 65mm screws spaced roughly every 150mm. Ensure you offset the screws from those used in the previous step to ensure there are no collisions. You may want to pre-drill through the short wall.
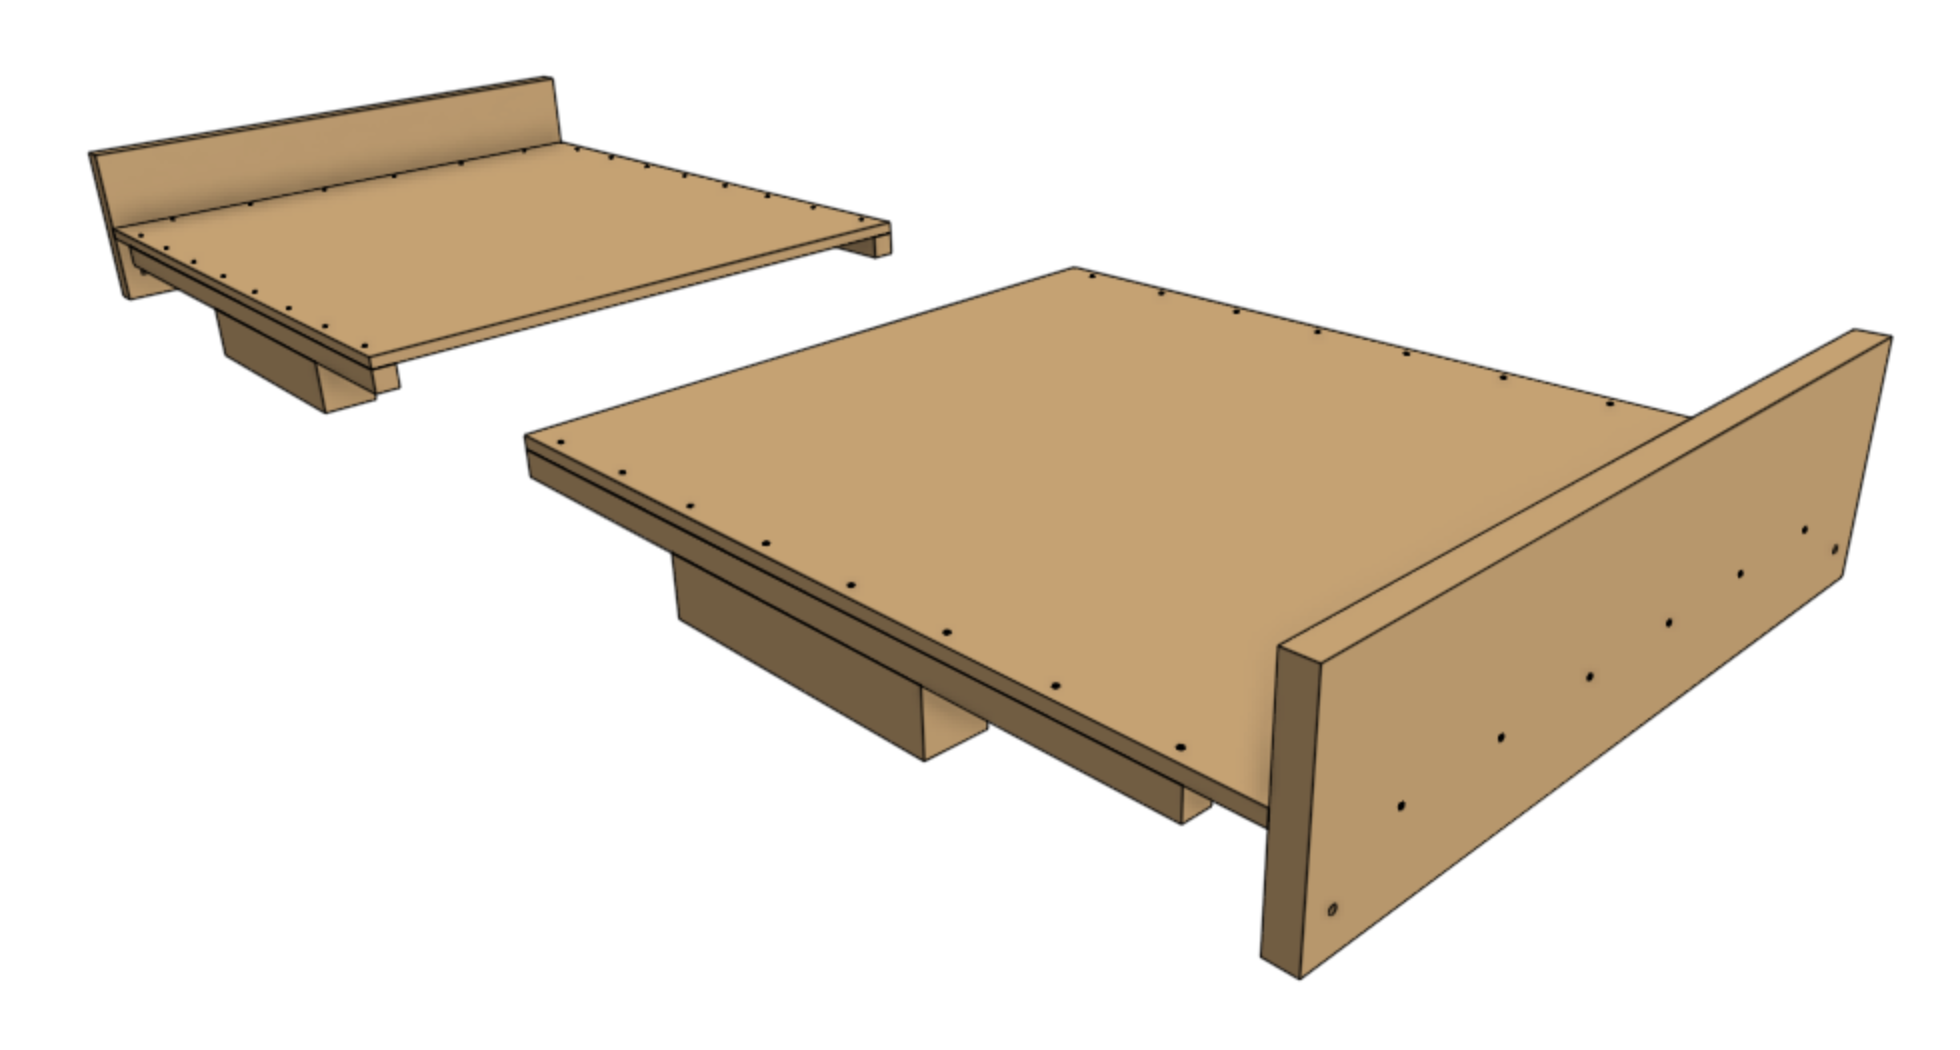
Repeat for the second panel and second short wall.
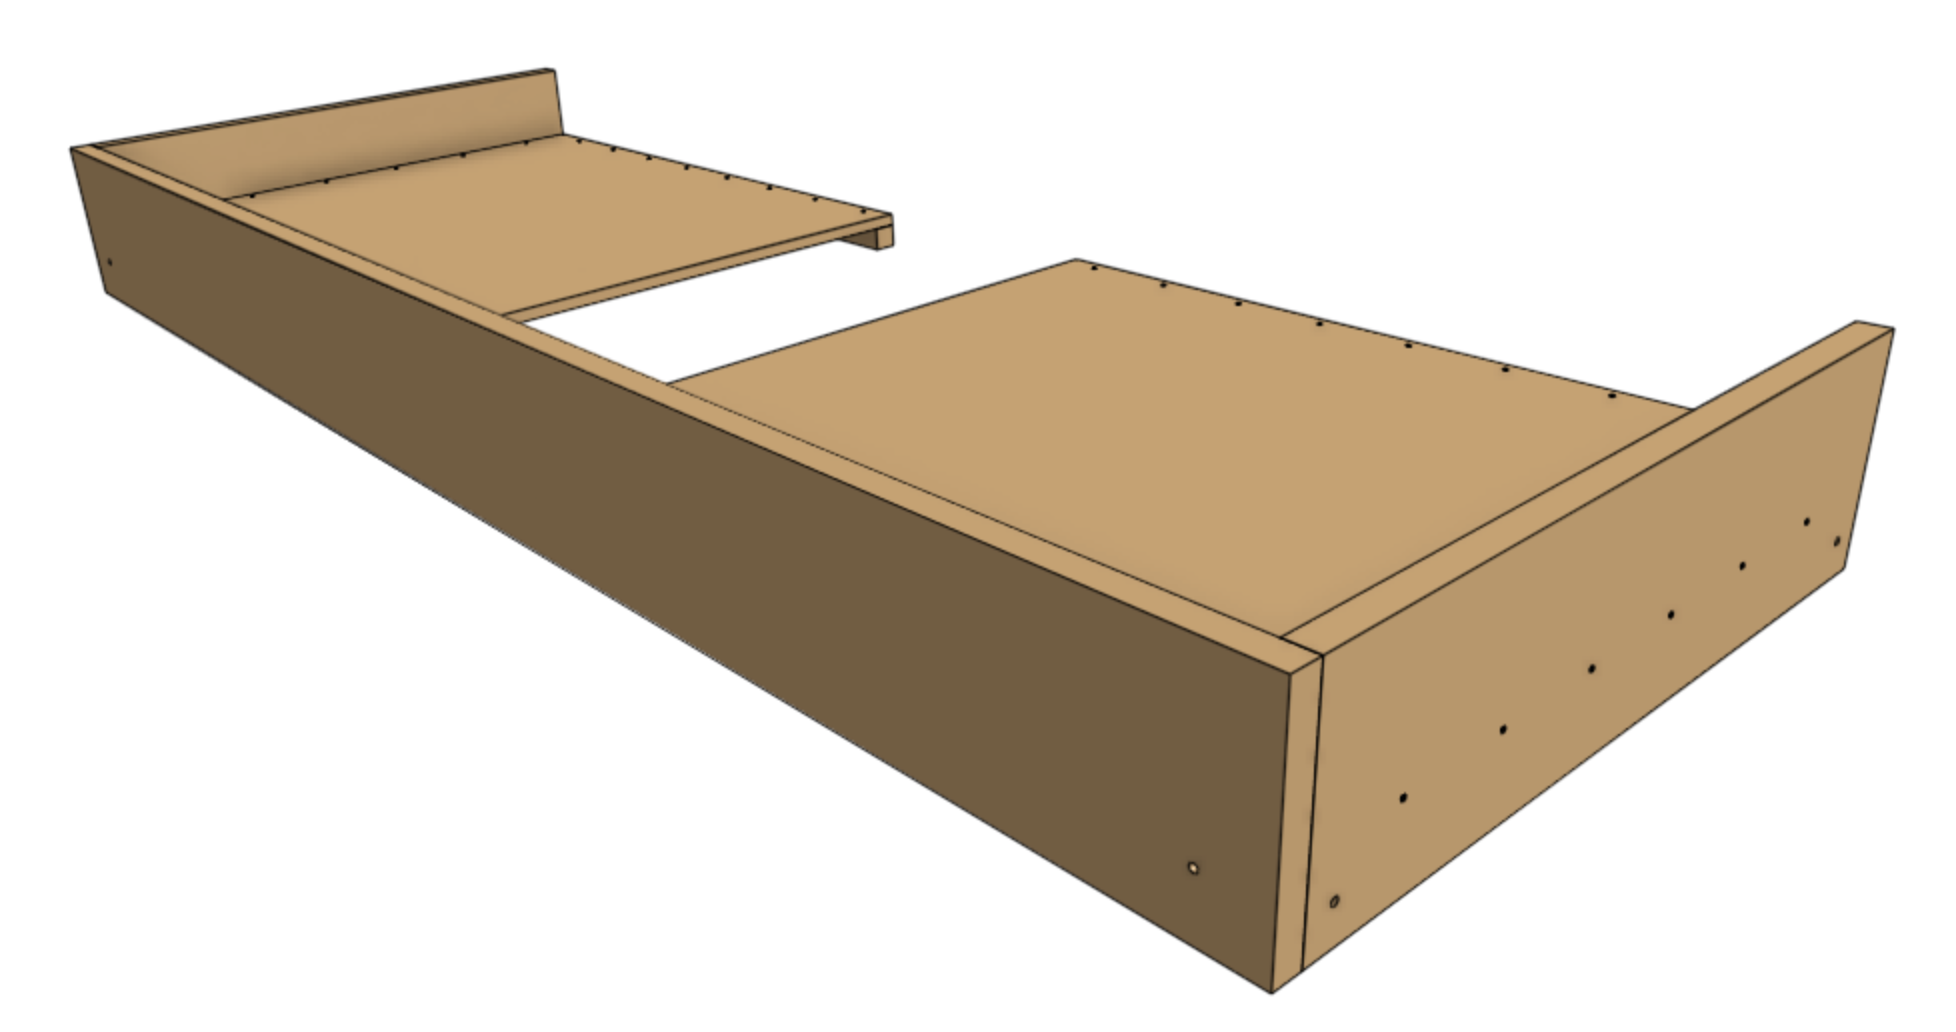
Step 6: Attach the long walls
Position one of the long walls such that its end faces are flush with the outer faces of the short walls.
Attach the long wall to the long floor supports using 65mm screws spaced roughly every 150mm. Ensure you offset the screws from those used in the previous steps to ensure there are no collisions. You may want to pre-drill through the long wall.
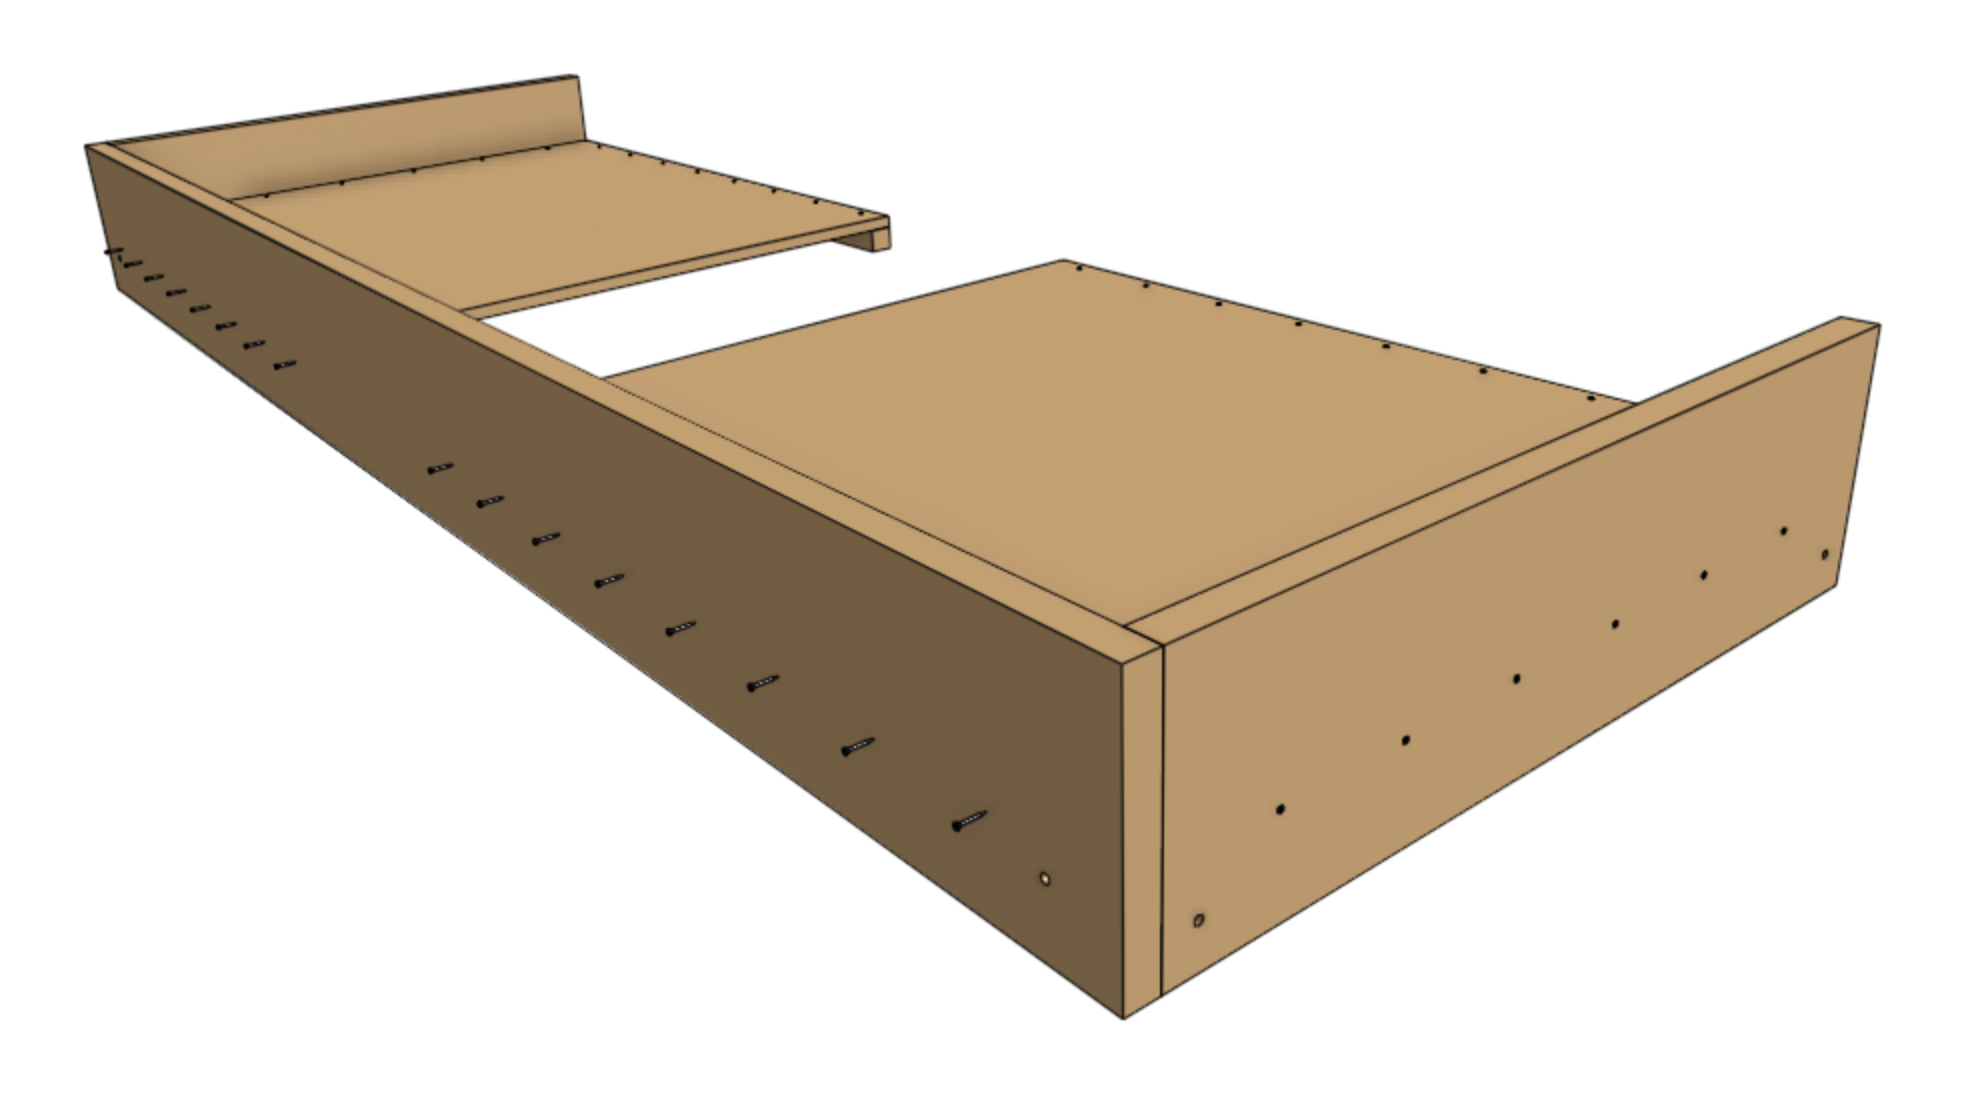
Repeat for the second long wall.
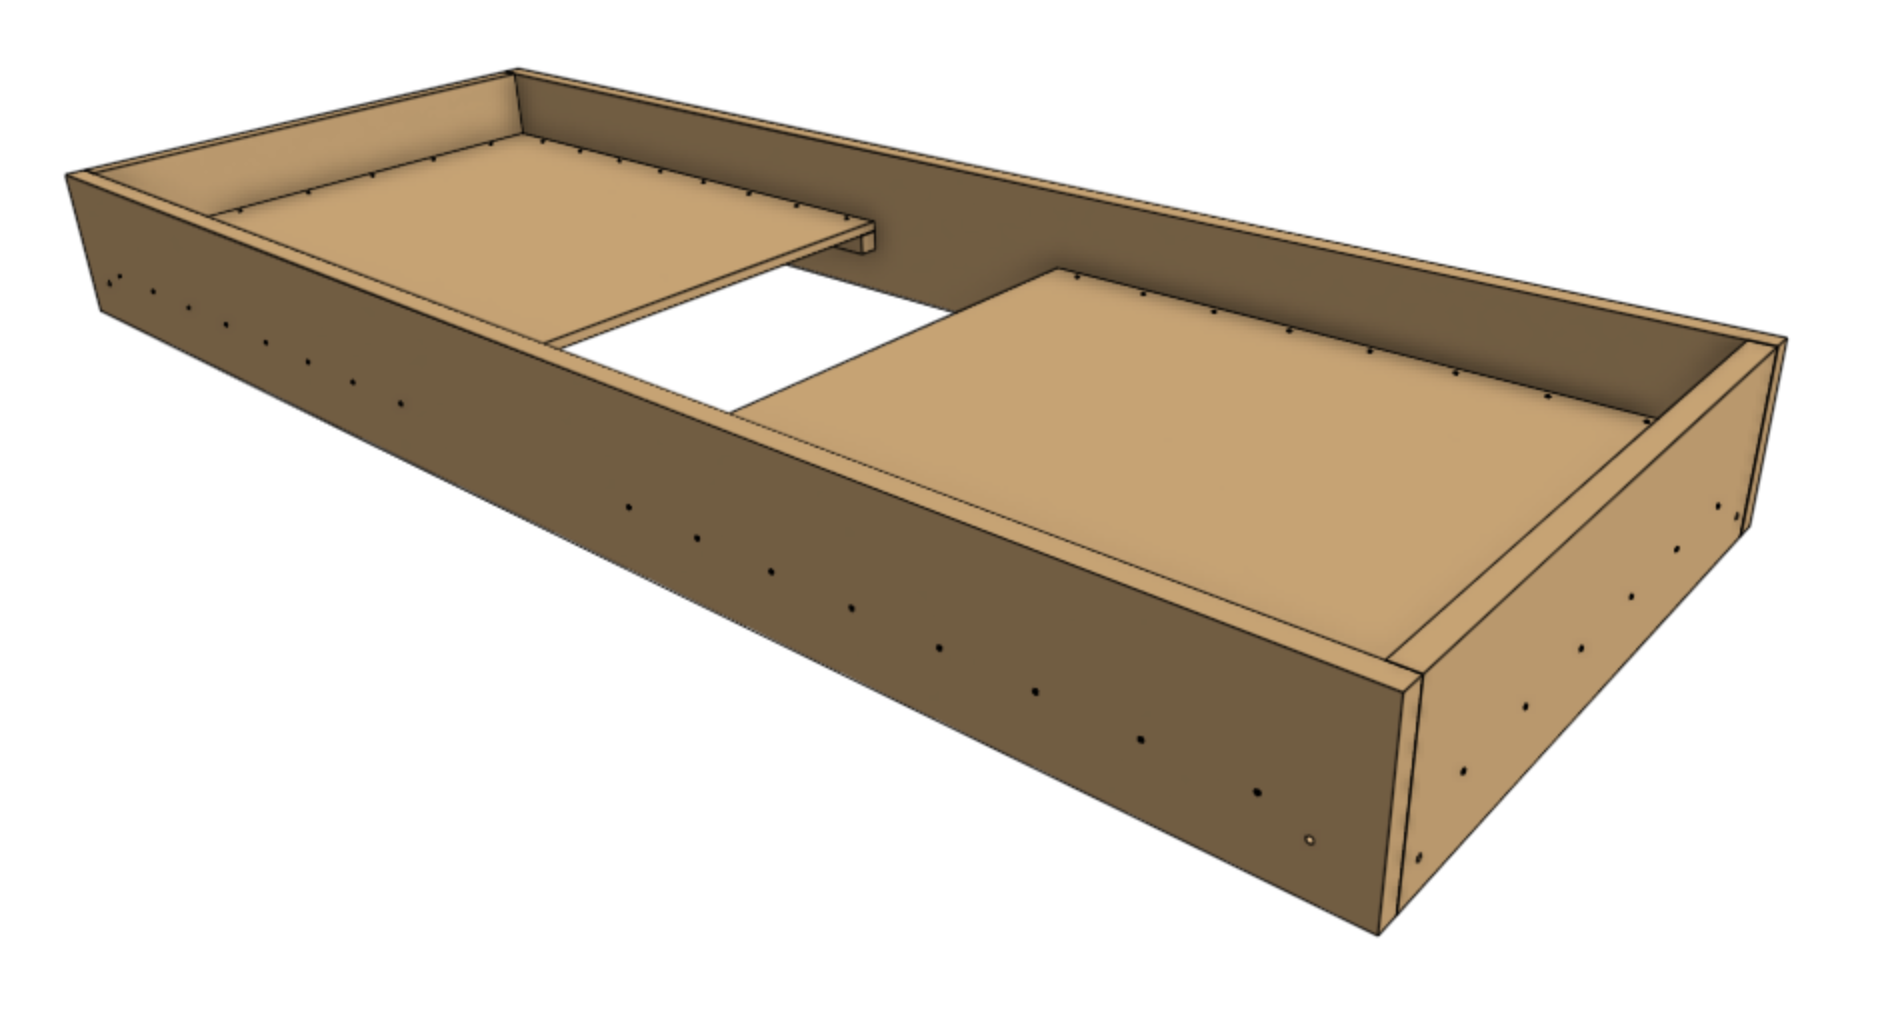
Step 7: Attach the legs
Using the help of another person (or two), carefully flip the raised bed upside down.
Don't trip!
Remember: the legs are underneath the bed because you temporarily used them to offset the panels from the floor. Make sure not to trip on them when flipping the bed.
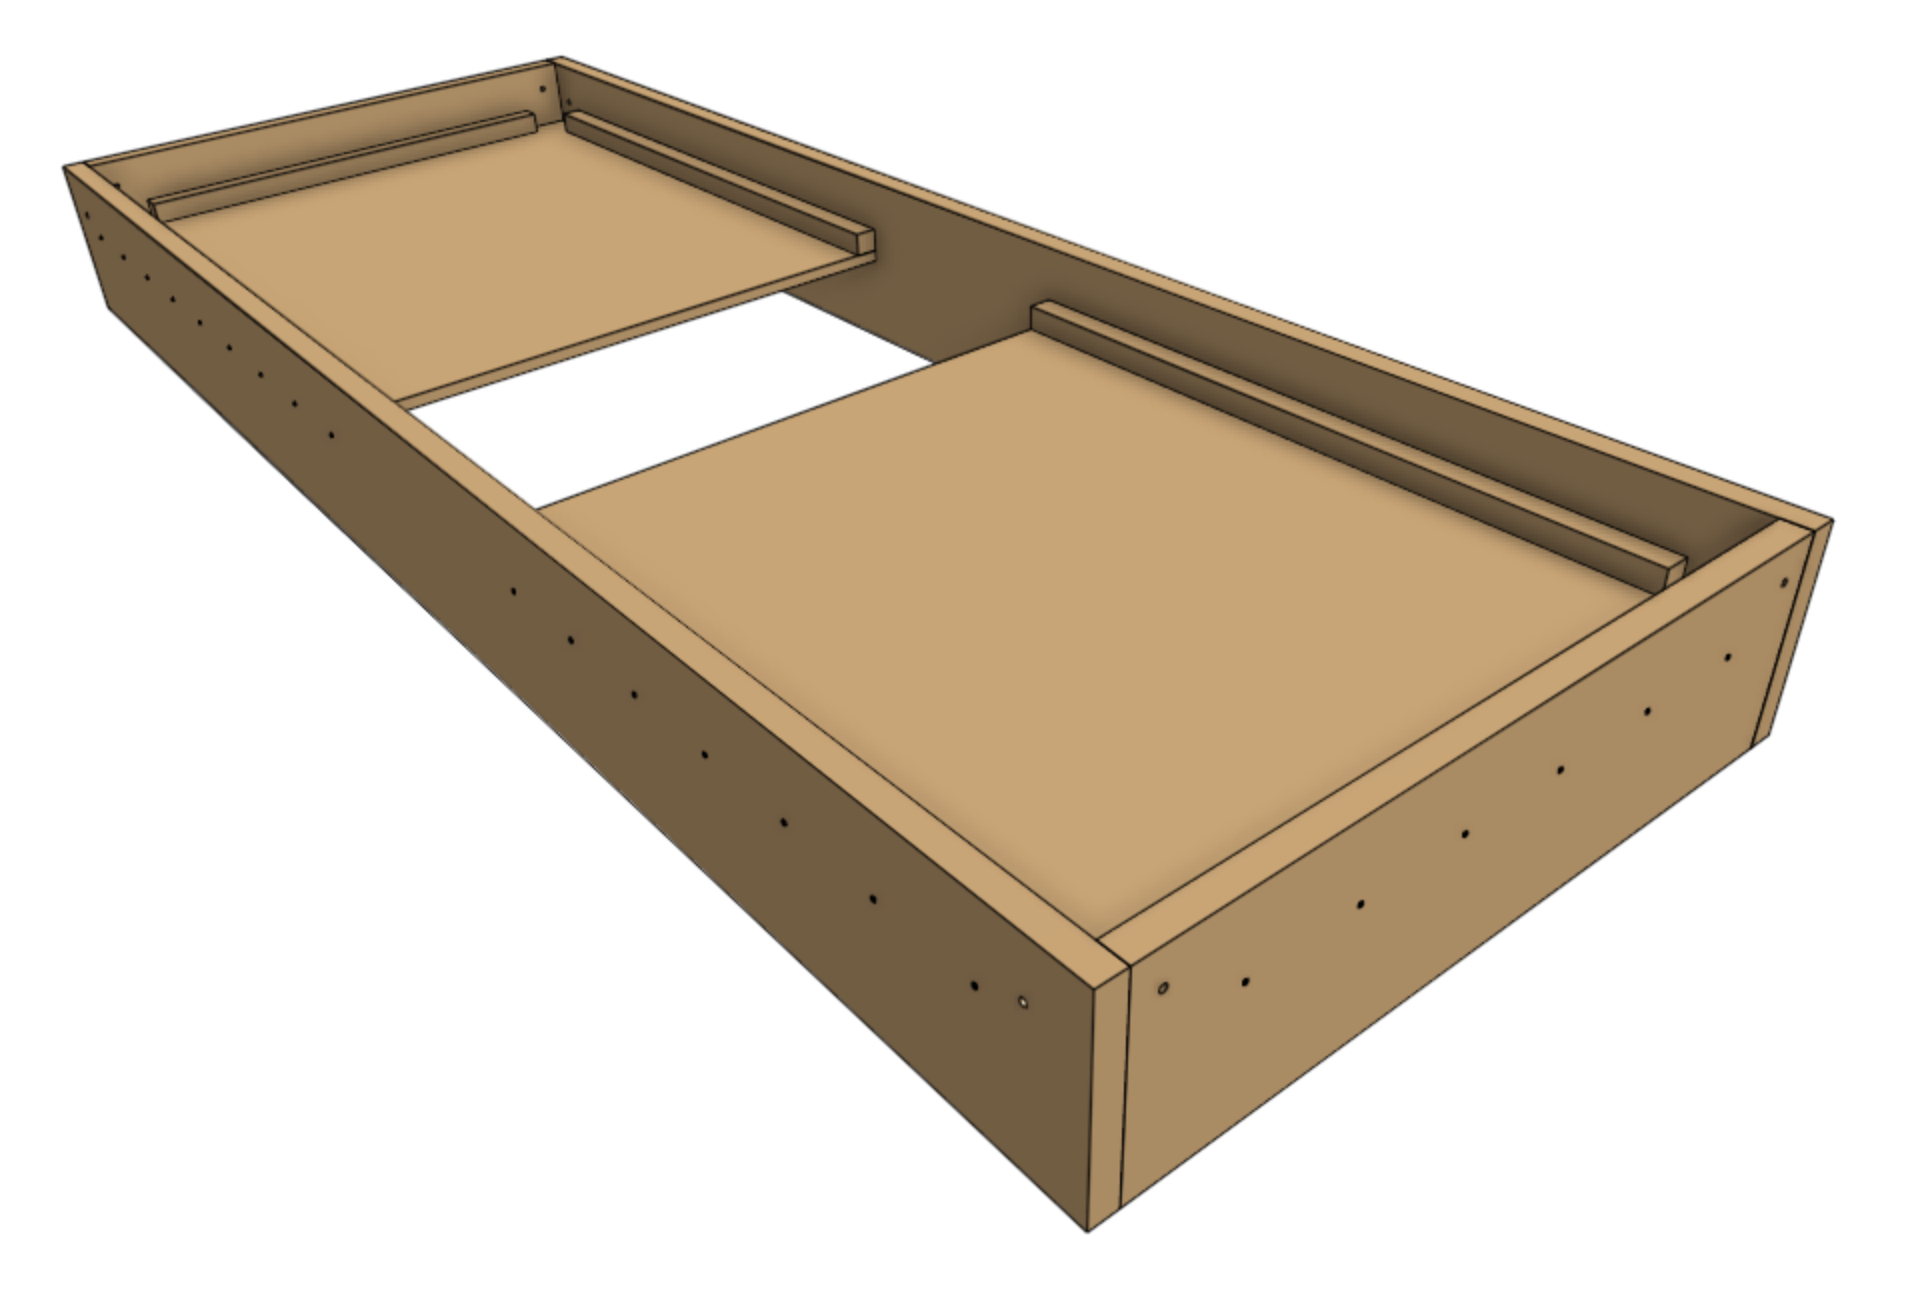
Position one of the legs in the corner of the bed.
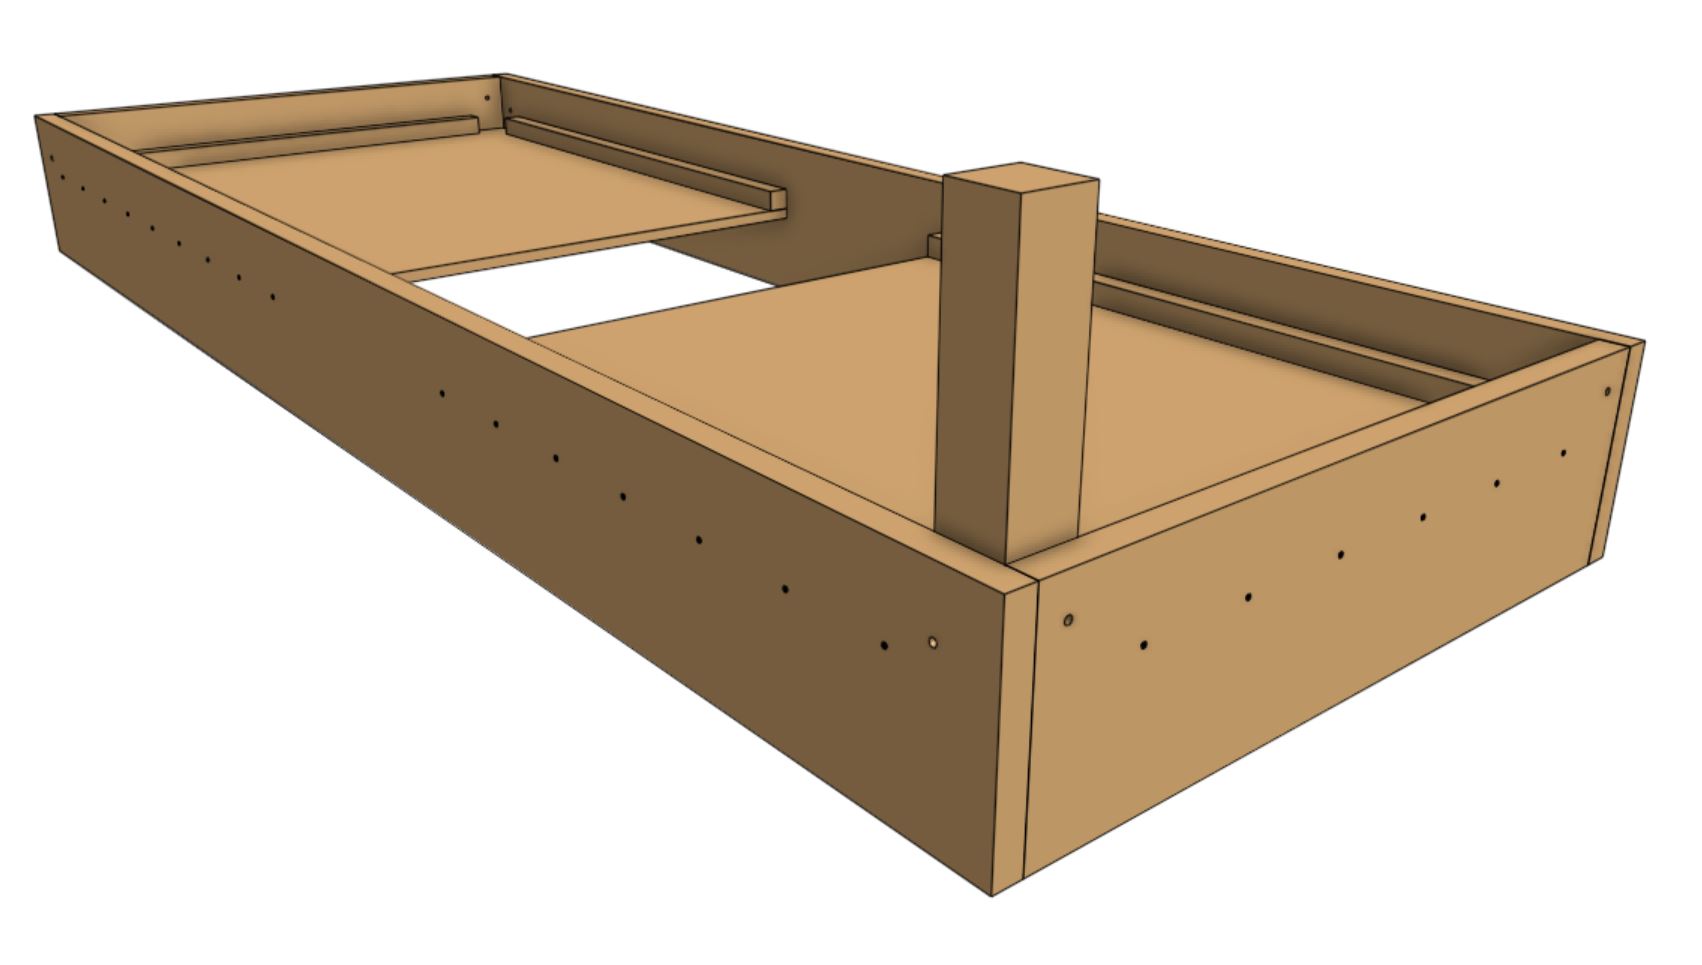
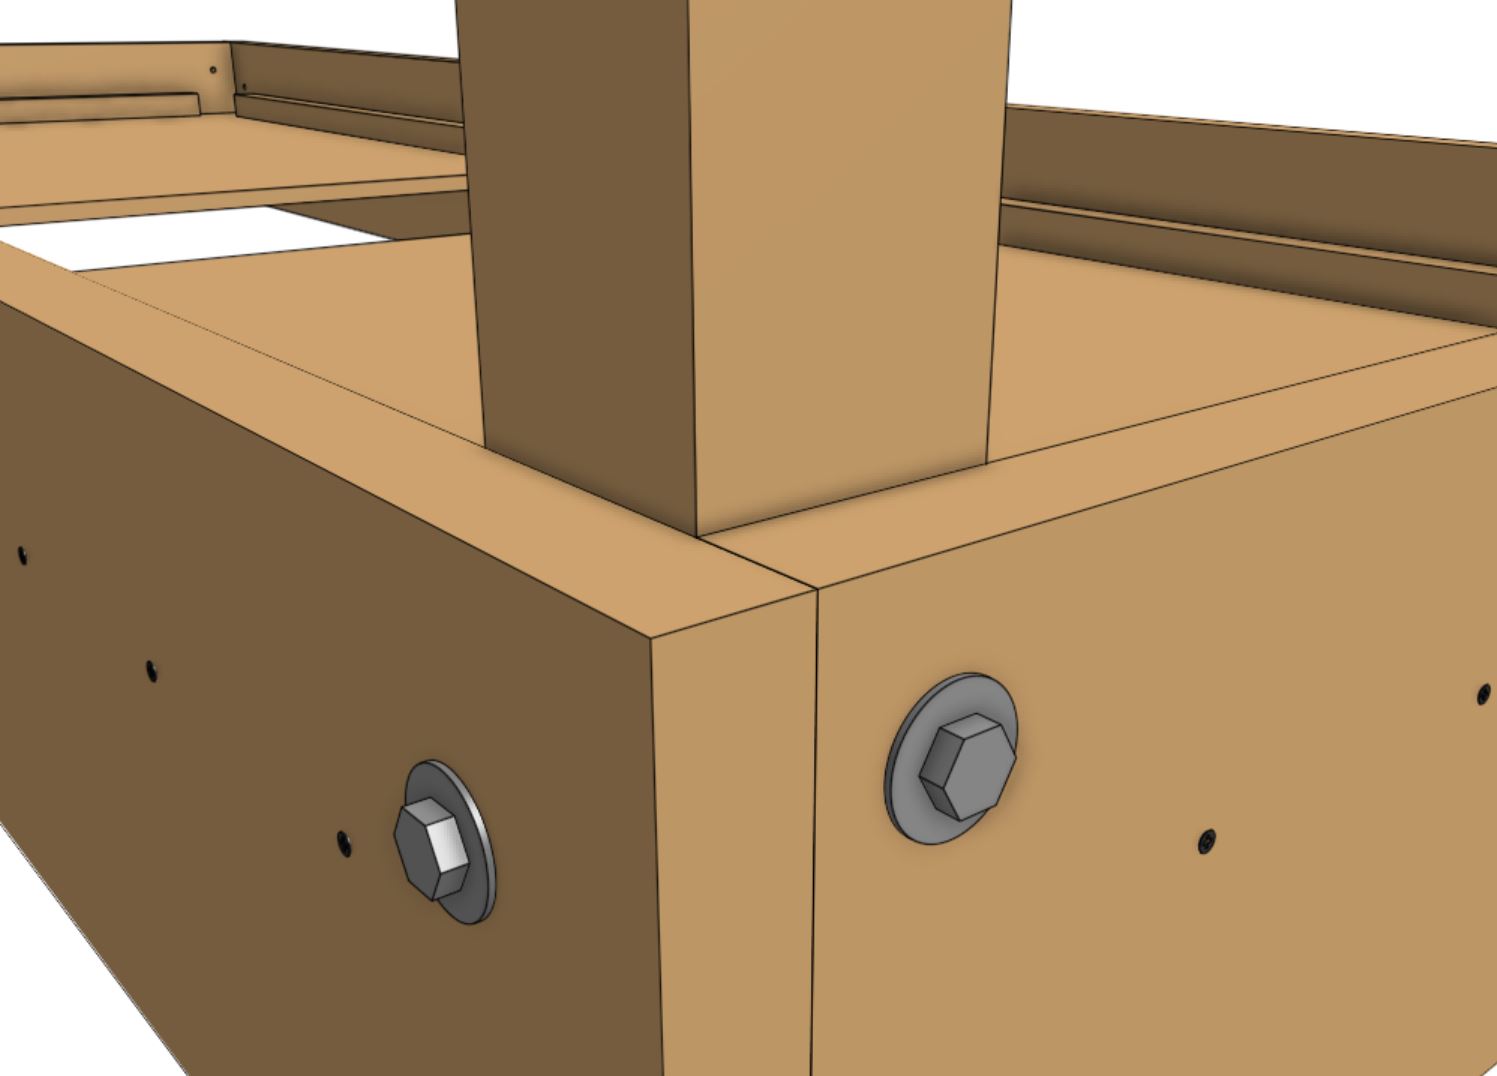
Mark and pre-drill one hole for an M10 bolt all the way through the long wall and leg. Then mark and pre-drill a second hole all the way through the short wall and leg. You may want to clamp the leg in place for pre-drilling.
Don't let the bolts hit each other
Make sure to stagger the holes slightly so that the bolt coming in from one side of the bed does not hit the bolt coming in from the other side.
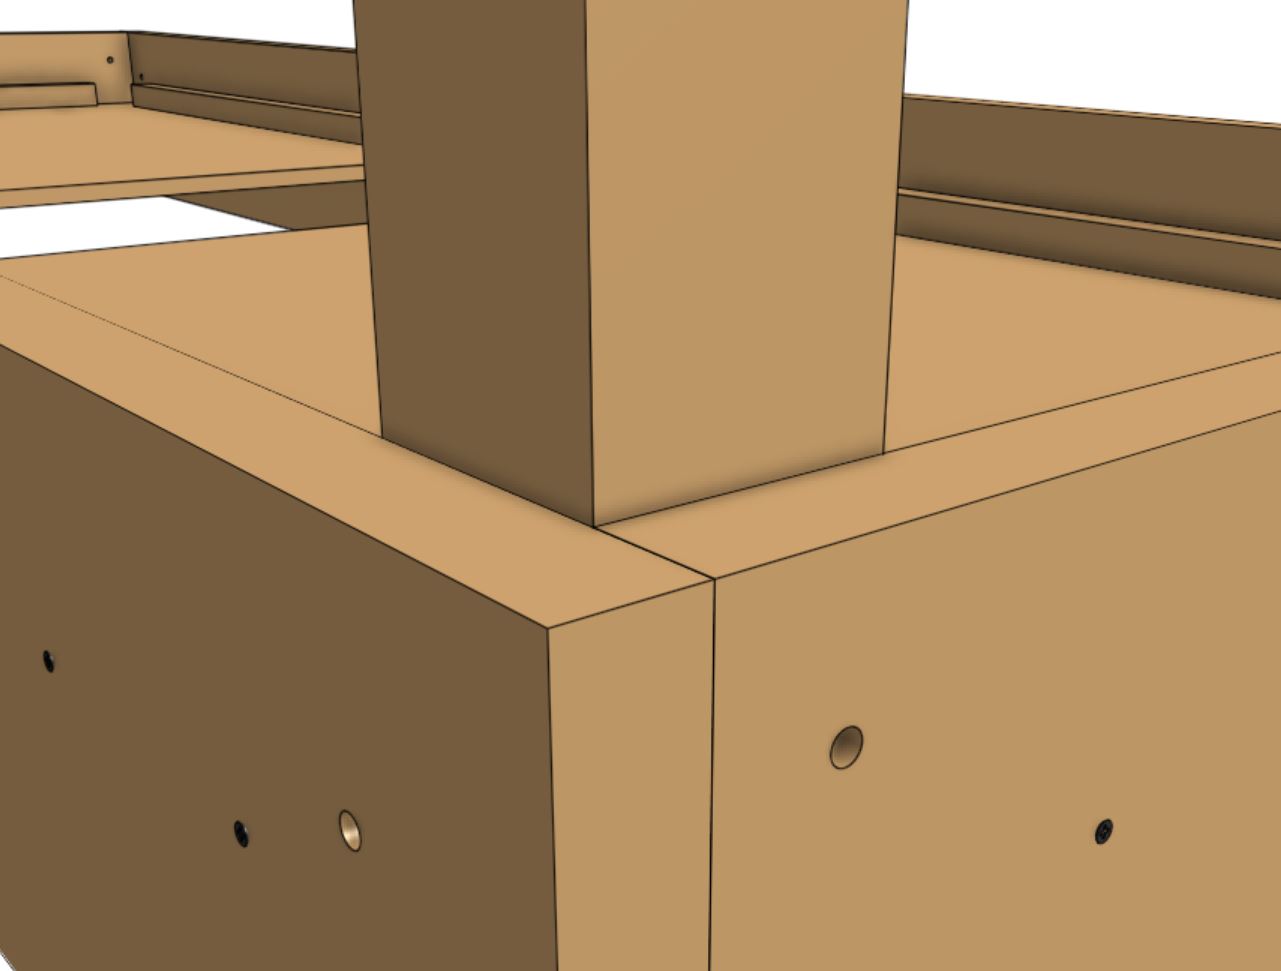
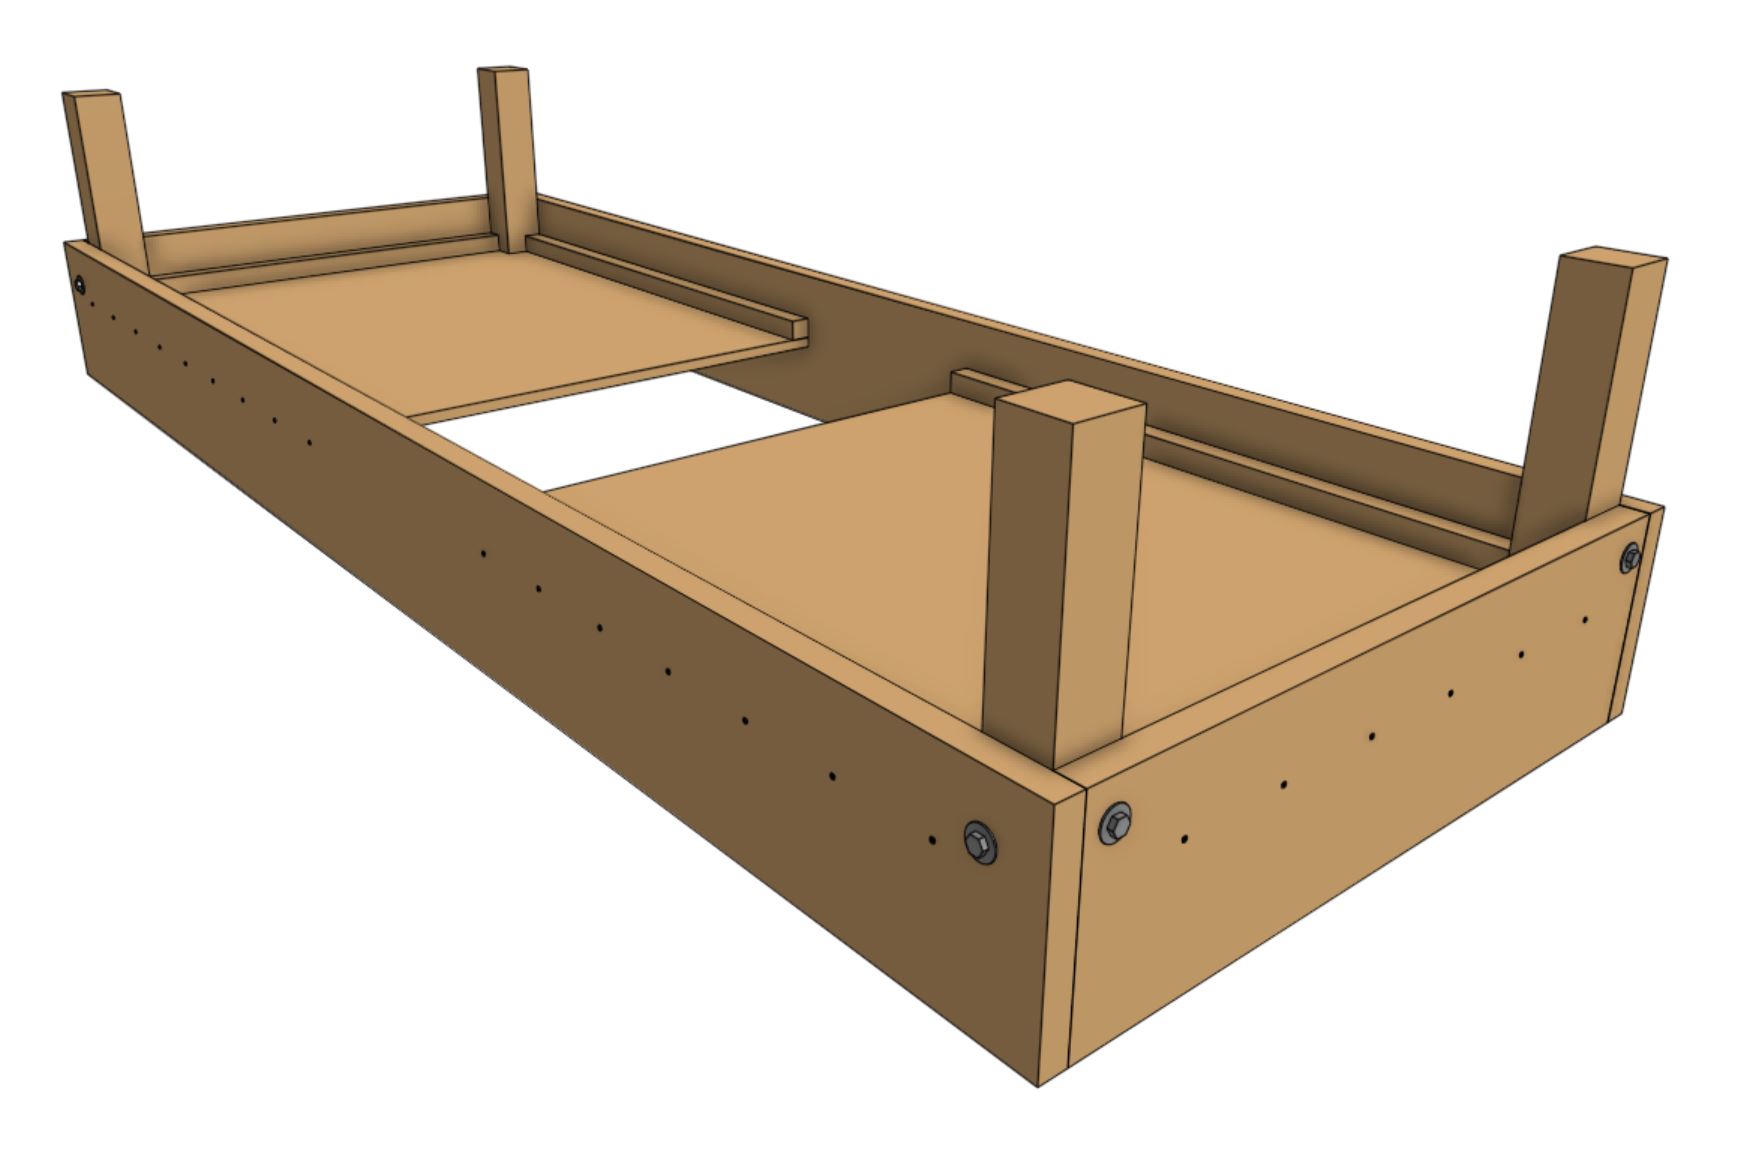
Attach the leg to the bed using two M10 x 150mm bolts, four large M10 washers, and two M10 nuts. One washer should be placed between each bolt head and the wood and between each nut and the wood.
Repeat for the remaining three legs.
Step 8: Attach the casters
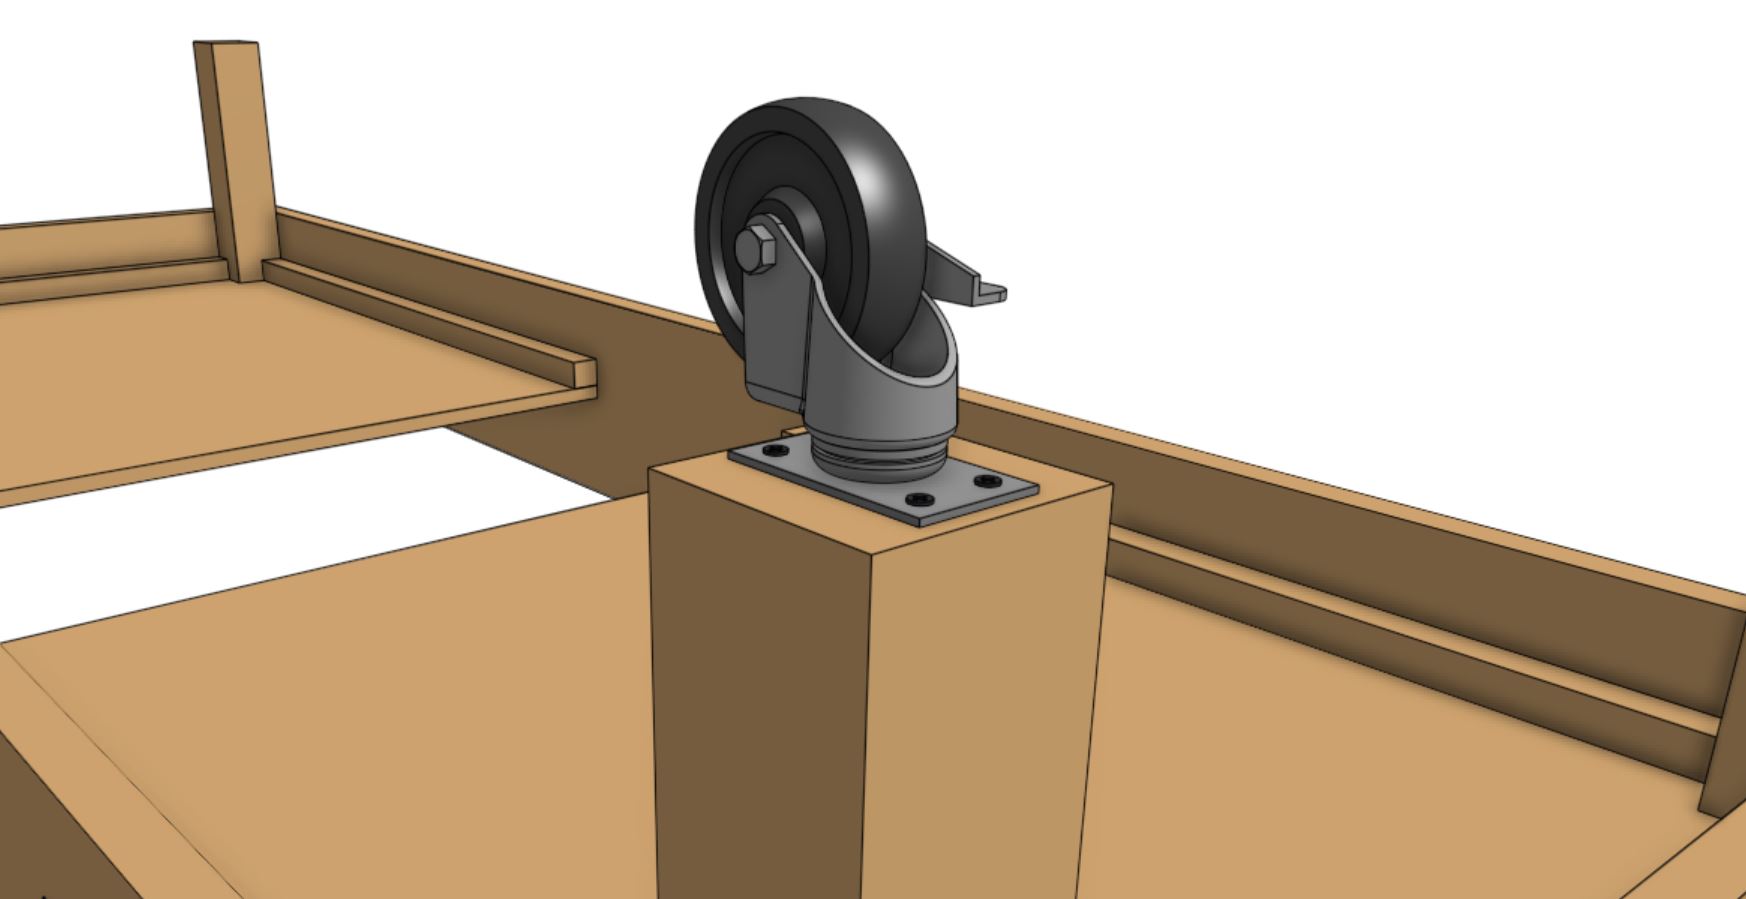
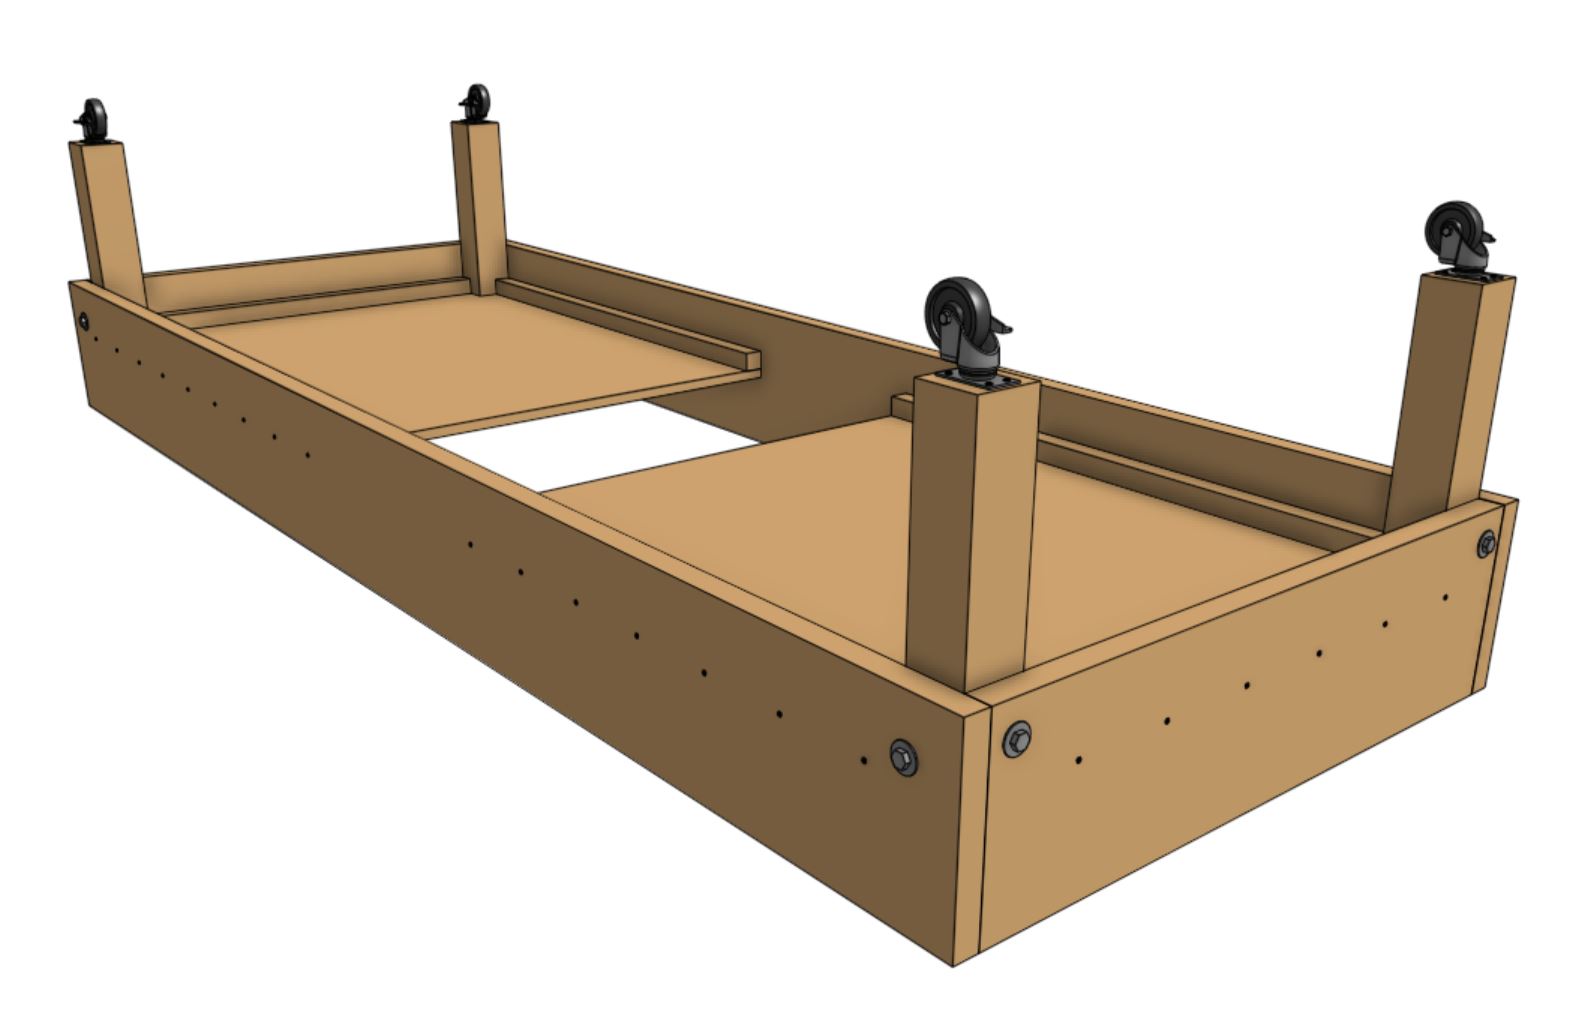
Using four 65mm screws, attach a caster to the bottom of a leg.
Repeat for the remaining three casters.
Step 9: Attach the middle floor panel
With the help of an extra person, flip the raised bed over onto its wheels. You may want to lock the casters before flipping the bed over, to prevent it from rolling.
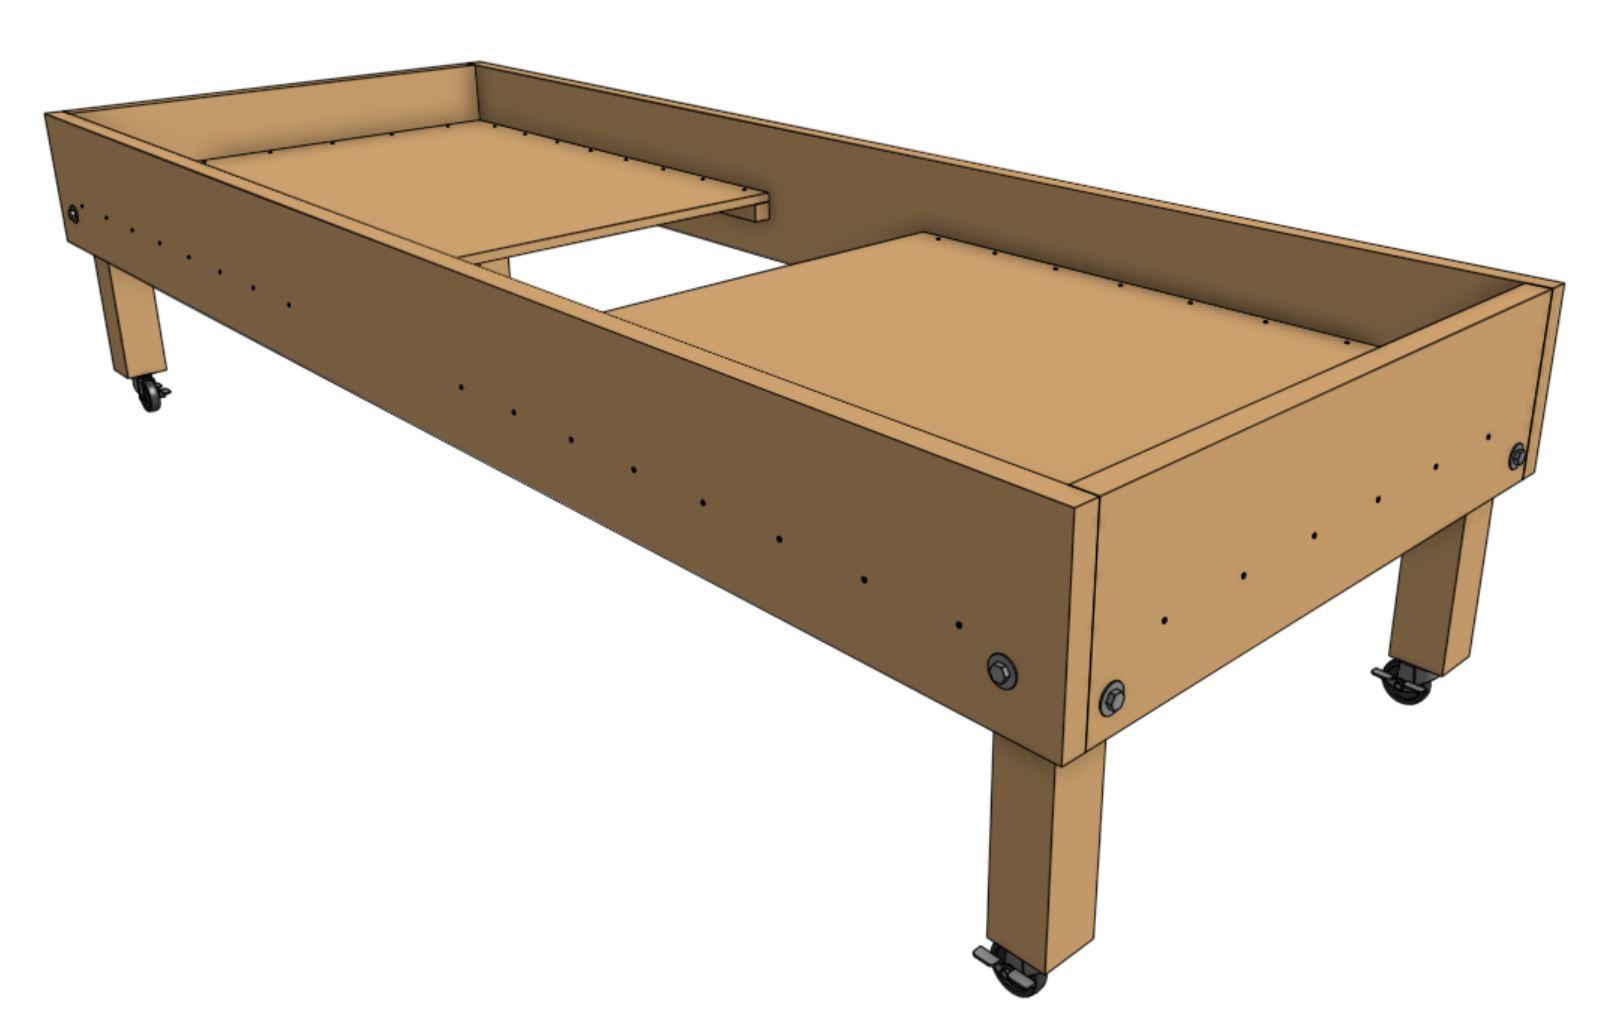
Position the middle floor panel over the gap in the middle of the bed, and attach it to the side floor panels using 30mm screws spaced roughly every 150mm.
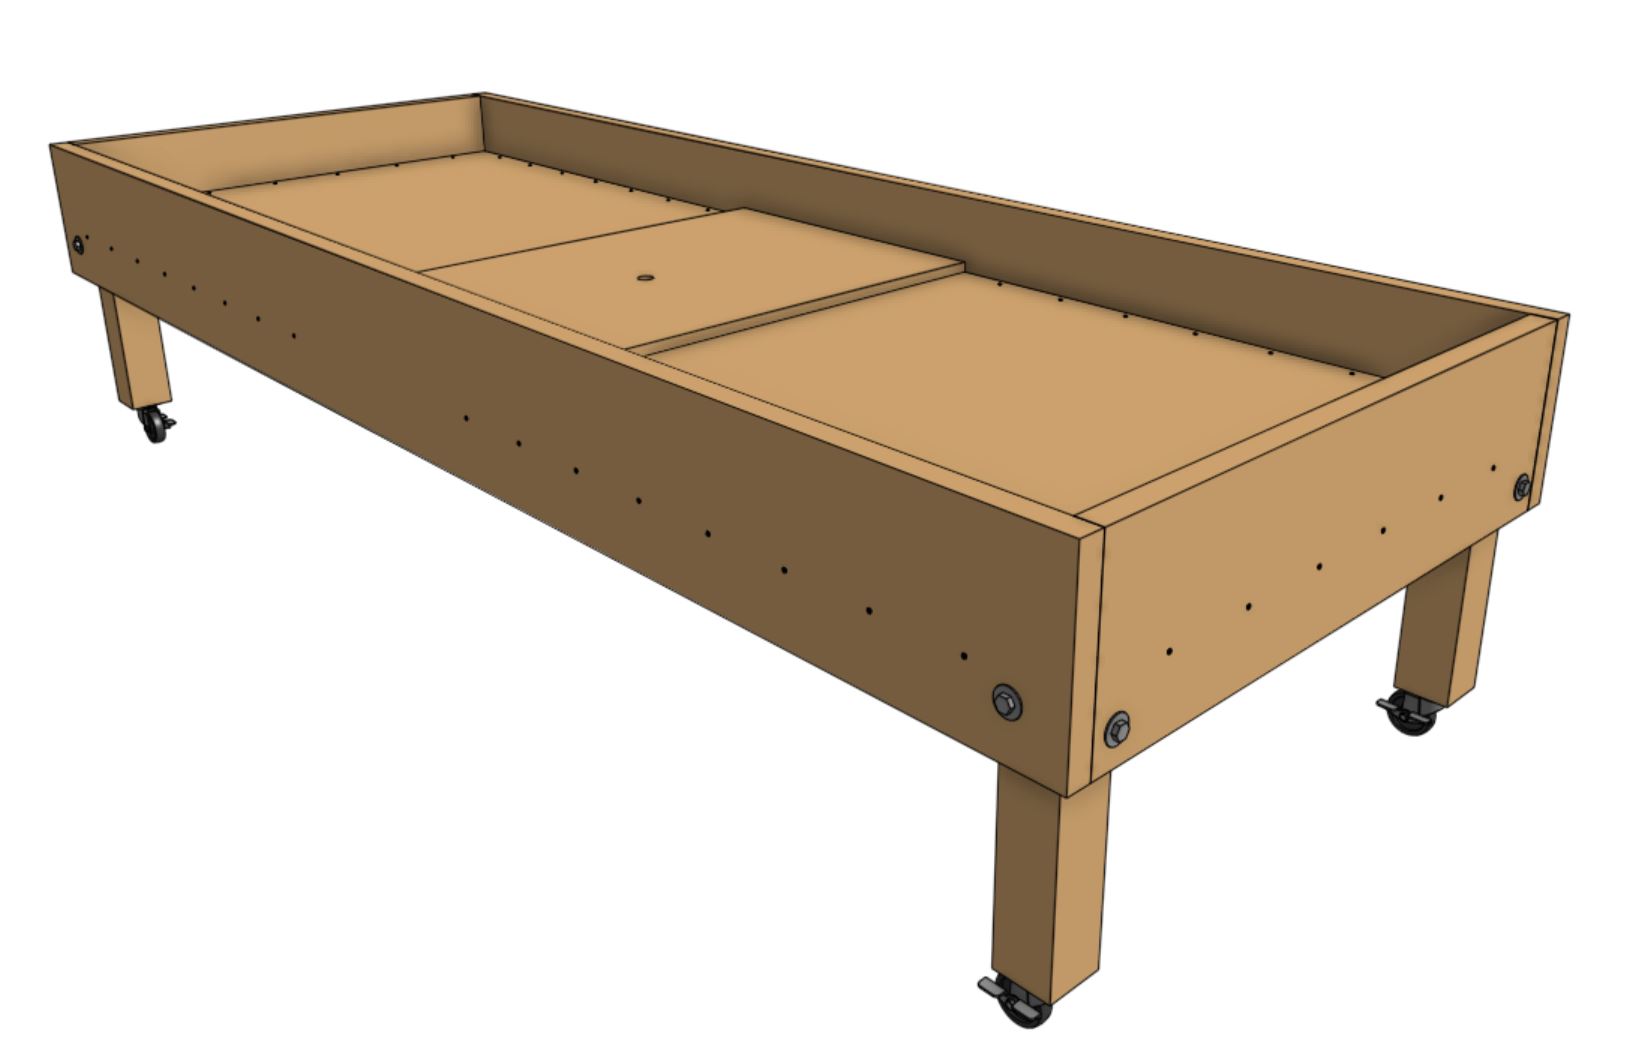
Step 10: Apply the sealer or stain
Consider using an orbital sander to smooth out any rough edges and corners, and remove any markings on the wood. Then follow the instructions on the the can of the stain or sealer you purchased to give your bed a finished look. While this step is optional, it can go a long way towards improving the aesthetics of your FarmBot installation.
Step 11: Add the bed liner
Unfold the tarp and lay it in the bed such that it wraps up the side walls. You can cut off the extra tarp material or simply fold it back into the bed. Some cuts may need to be made to facilitate tidy folding. Optionally, you may use a staple gun to secure the tarp in place, though the soil will also hold it in place just fine.
Step 12: Fill the bed
Fill the bed with a mix of soil and compost, and keep out large rocks and branches. We recommend purchasing potting soil from your local nursery.
Congrats!
Your mobile raised bed is now ready for your FarmBot installation.
