UTM Pre-Assembly
Pre-assembly and packing instructions for the UTM
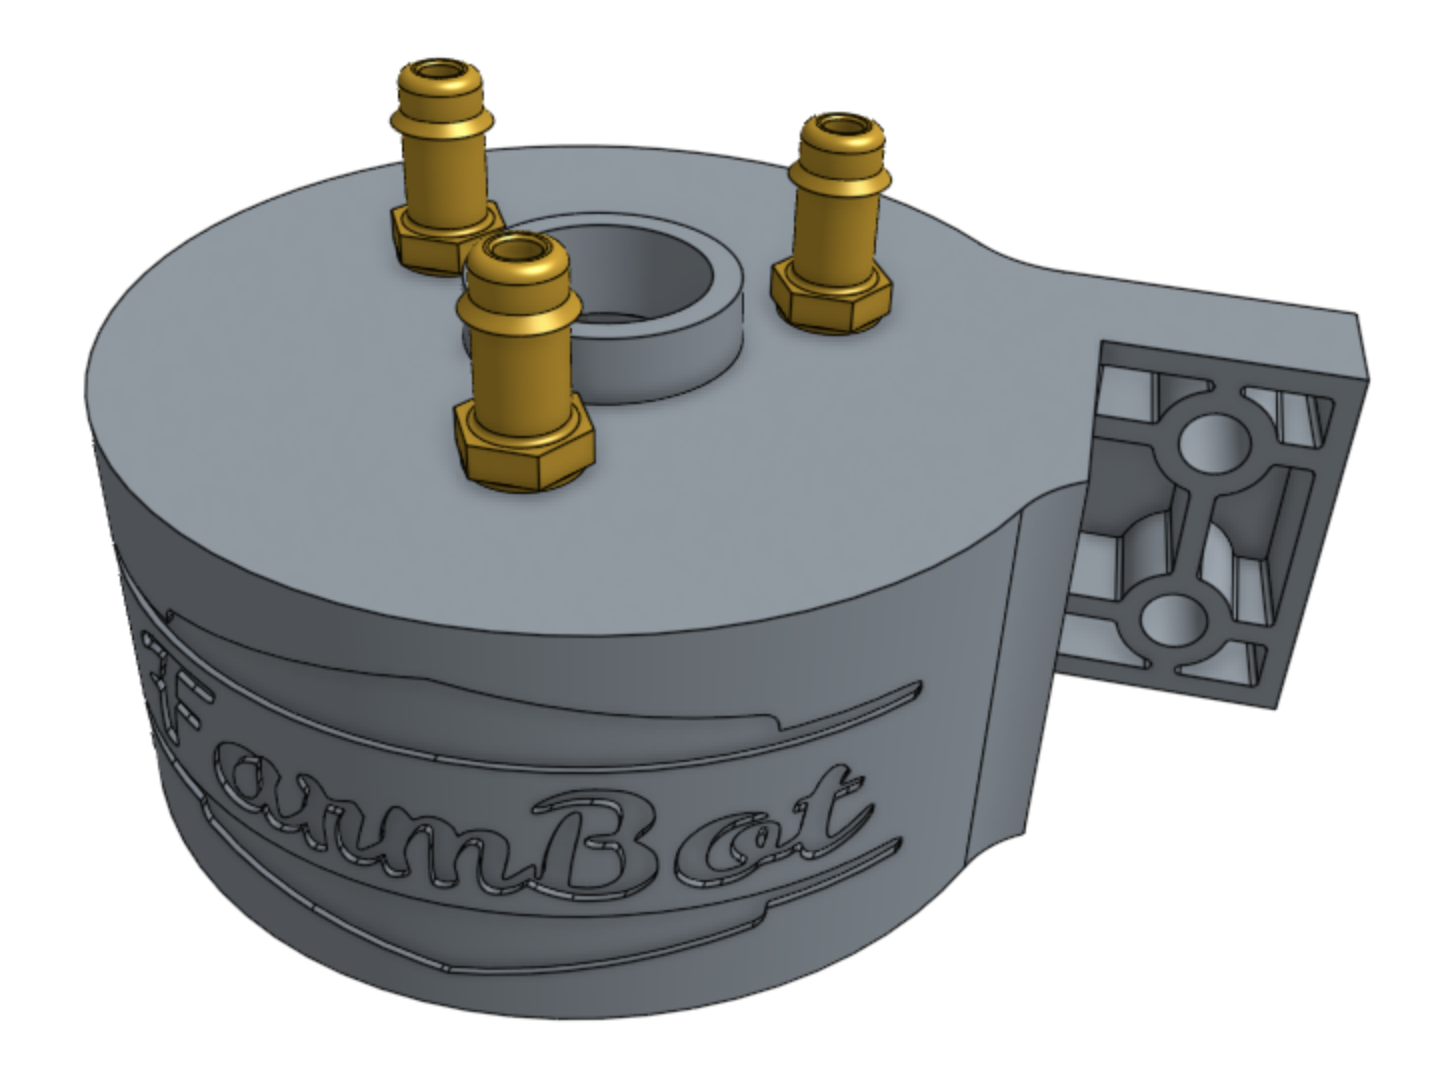
Component list
| Component | Qty |
|---|---|
| UTM | 1 |
| UTM PCB | 1 |
| Pogo Pin | 12 |
| Pogo Pin Jam Nut | 24 |
| Ring Magnet | 3 |
| M5 x 16mm Screw | 3 |
| Barb | 3 |
| X-Profile O-Ring | 3 |
| UTM Box | 1 |
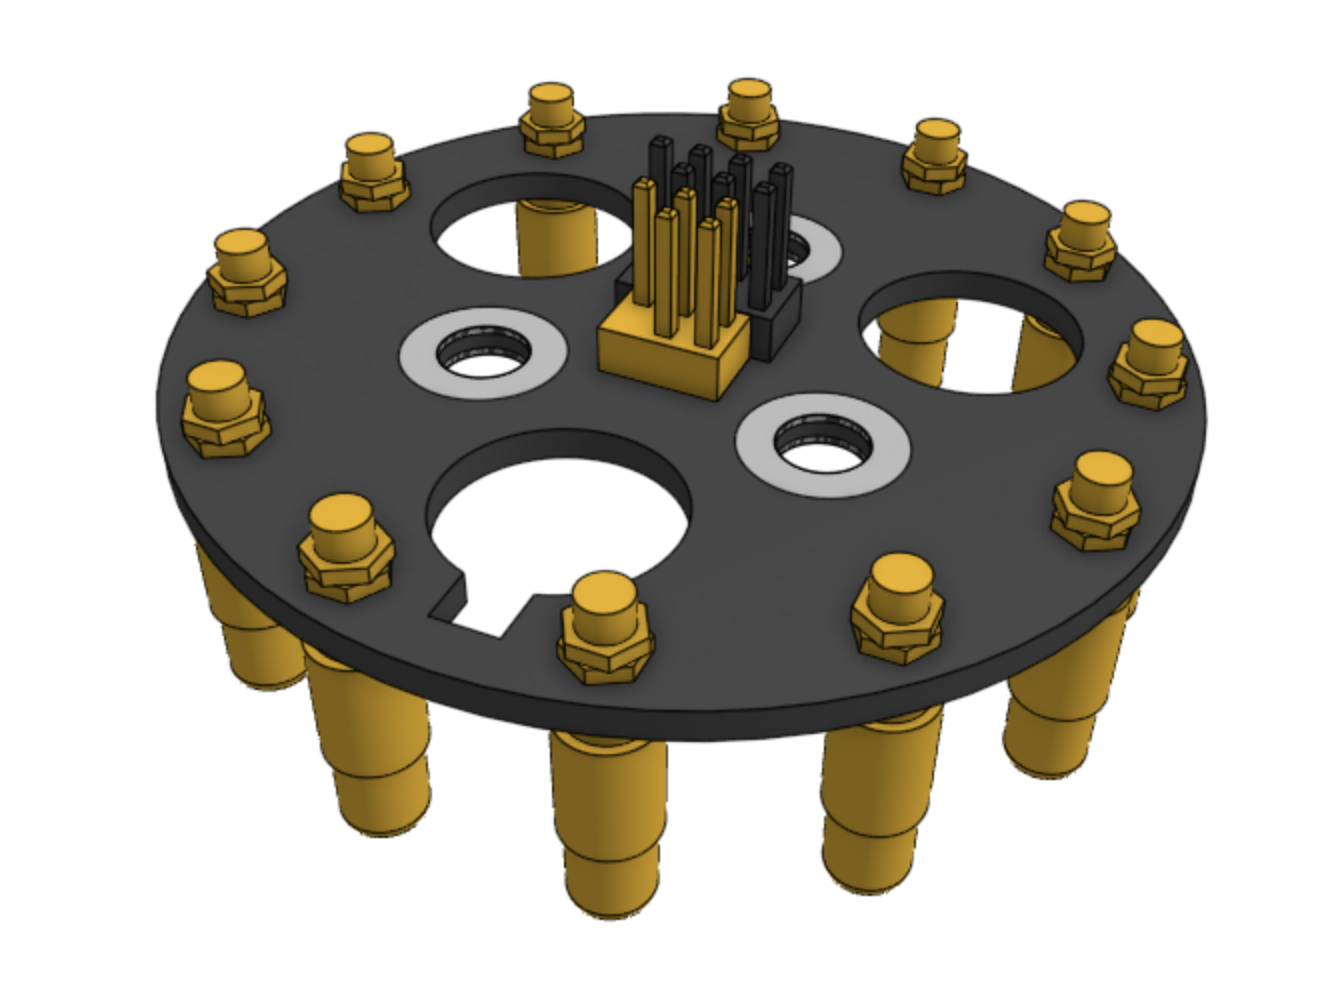
Step 1: Attach pogo pins to the PCB
Attach 12 pogo pins to the UTM PCB using 24 jam nuts (2 per pogo pin).
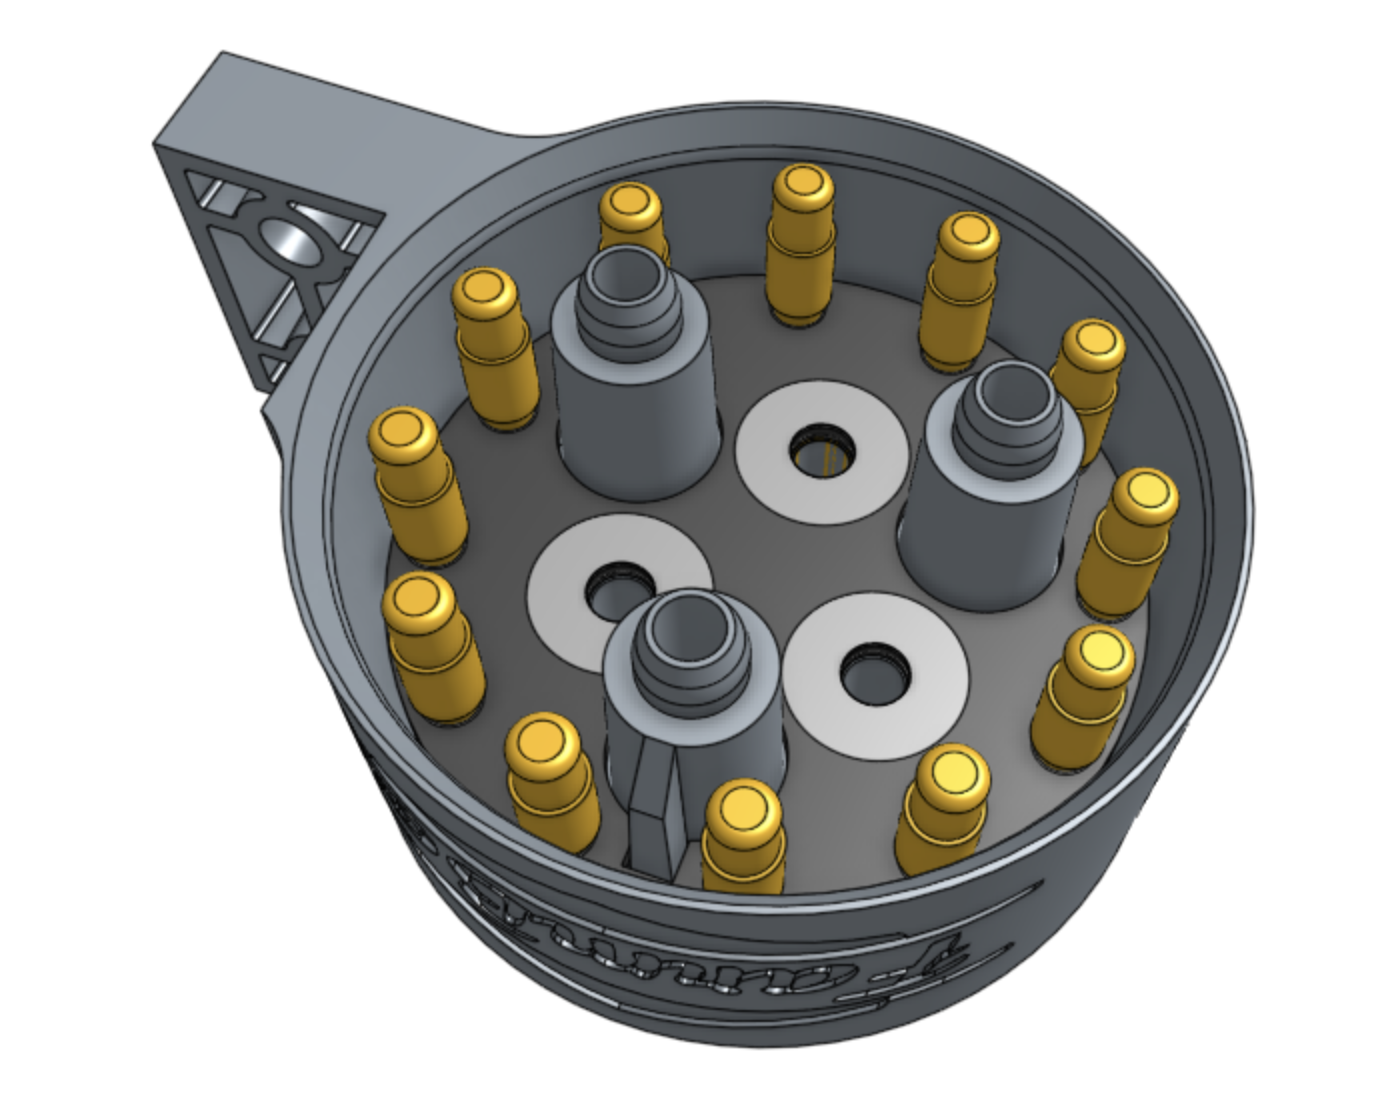
Step 2: Mount the PCB and magnets
Insert the UTM PCB into the UTM. It is keyed, and should only fit in one orientation.
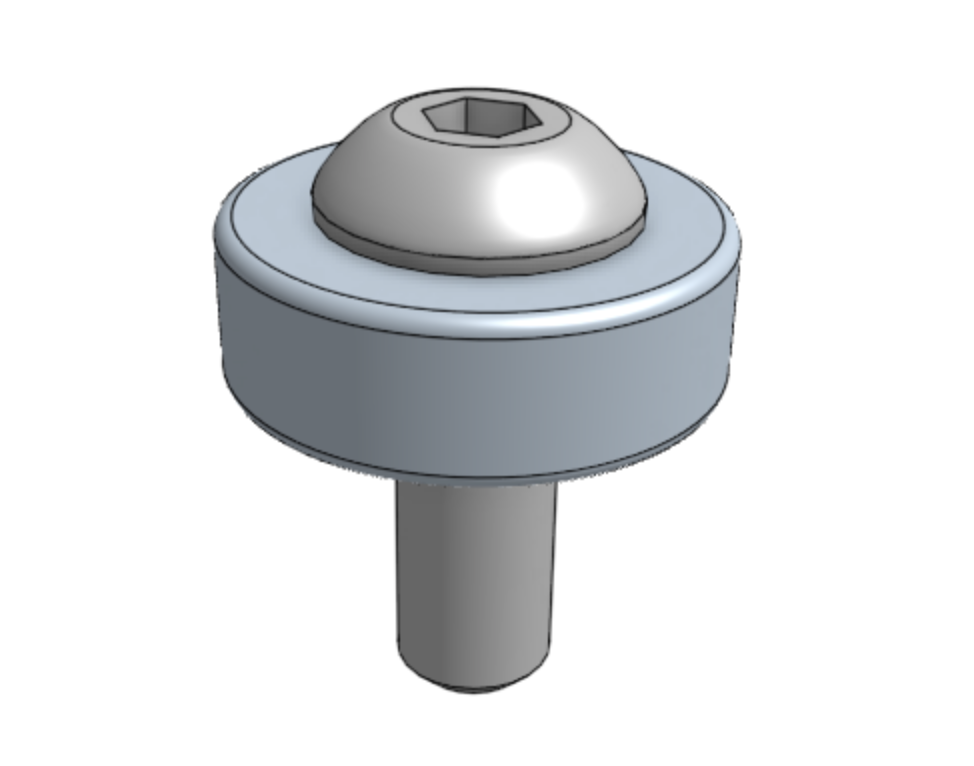
Slide a ring magnet onto an M5 x 16mm screw. The magnet’s South face should be butted against the screw head.
Fasten the PCB in the UTM with the ring magnet and screw. Repeat with two more magnets and screws.
Ensure all magnets face the same direction
All magnets must be mounted in the same magnetic orientation. The North faces should be butted up against the PCB while the South faces should butted against the screw heads.
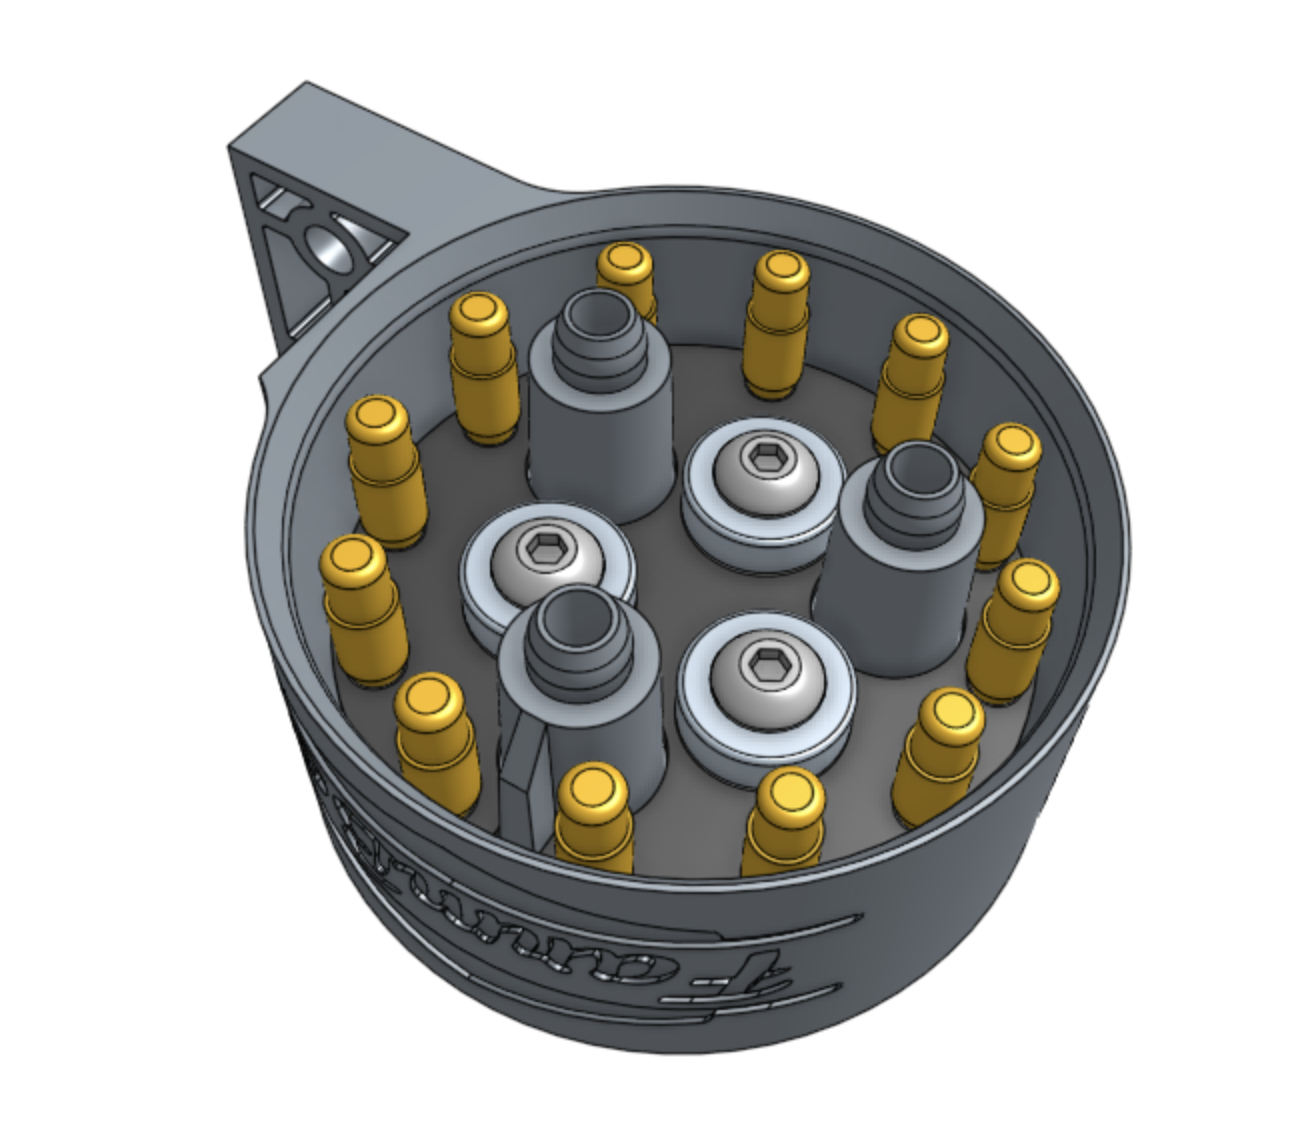
Step 3: Add o-rings
Slide three x-profile o-rings onto the UTM.
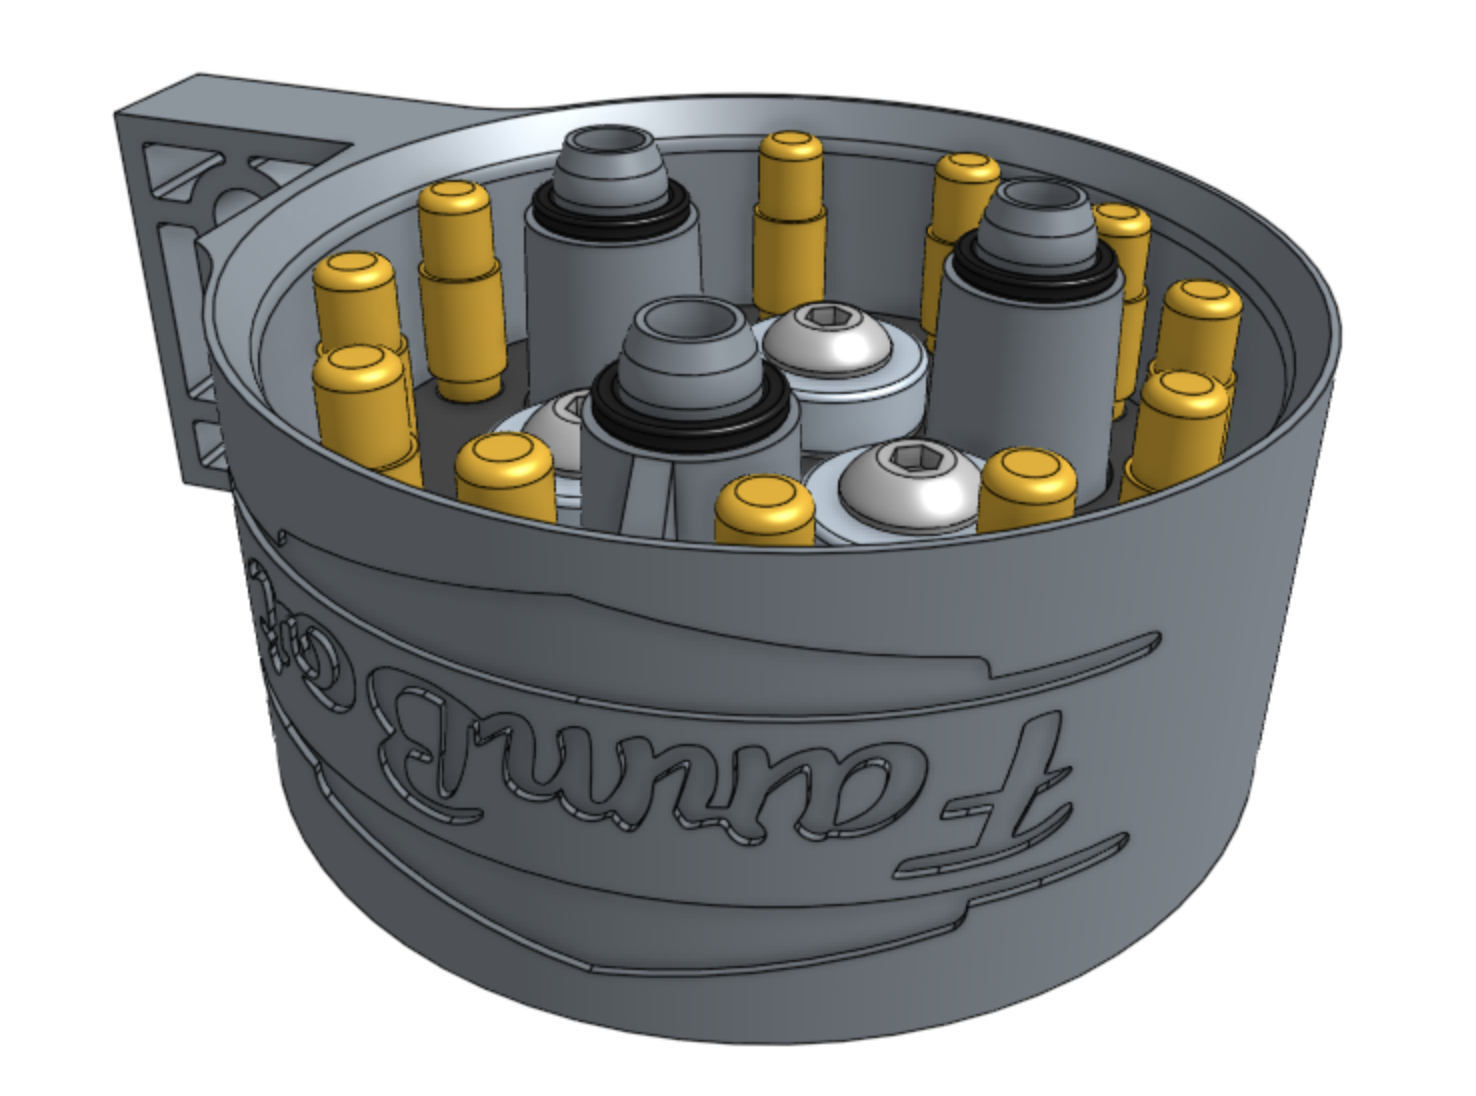
Step 4: Add barbs
Screw three barbs into the top of the UTM.

Step 5: Pack
Pack the pre-assembled UTM into the UTM box.
Box specifications
| Box style | Top flap (standard FarmBot box design) |
| Inner dimensions (L x W x H) | 75mm x 95mm x 52mm |
| Outer dimensions (L x W x H) | 80mm x 100mm x 57mm |
| Material | Cardboard |
| Color | Brown |
| Printing | UTM.pdf |
| Fill | None |